Content Source: 2020 600/800 HO/850 AXYS Conventional Tunnel Owner’s Manual (9929775 R02) > Maintenance Chapter

IMPORTANT

The Owner's Manual for this vehicle contains warnings, instructions and other information you must read and fully understand before safely riding or performing maintenance on this vehicle.Always follow the warnings and instructions in Owner's Manual.

Click the CONTENTS link above for the Table Of Contents, or download a full PDF of the Owner Manual in the Owner Support area of Polaris.com

Clutch System

Periodically inspect clutch sheaves for damage, wear or belt residue. To maintain optimum performance, clean with non-oil based cleaners such as isopropyl alcohol.
WARNING
If you become aware of higher than normal clutch engagement or an unusual vibration or shift pattern, see your dealer or qualified person immediately. Do not operate the snowmobile until repairs have been made.
All clutch maintenance and repairs can be performed by an authorized POLARIS dealer. Any unauthorized modifications to clutches, such as adding or removing weights, will void the warranty.
NOTICE
The bushings in the weights and rollers of POLARIS clutches are made of a material that may be damaged if lubricated. Do not lubricate clutch bushings.

Clutch Alignment Offset

Clutch alignment offset is important for maintaining optimum performance. Your dealer can perform service and adjustments. A special tool is required to check for proper alignment.

Drive Belt Condition

Periodically check the condition and tension of the drive belt. Inspect the belt for signs of excessive wear (frayed edges, missing cogs, cracks) and excessive looseness. Replace the belt if any of these conditions exist. See Drive Belt Troubleshooting.
Always carry a spare drive belt. When placing the belt in the holder, orientate the belt to match the profile of the hood.
For improved drive-away during extremely cold temperatures, remove the belt and warm it to room temperature. Reinstall it before starting the snowmobile.

Drive Belt Deflection

  • Measure belt deflection with both clutches at rest and in their full neutral position.
  • Place a straight edge on the belt and apply downward pressure while measuring at point. This measurement should be 1 1/4 inches (3.2 cm).

Image

Drive Belt Deflection Adjustment

To adjust the drive belt, do the following:
  1. Loosen the driven clutch set screw with 7/16 wrench
  2. Using an 1/8" allen wrench, adjust set screw until belt deflection meets specification
  3. Holding set screw with allen wrench, lightly tighten nut
  4. Using the L wrench, open driven clutch sheaves 0.5 in.
  5. Tighten deflection screw nut to specification
    TORQUE
    145 in-lbs
  6. Rotate belt clockwise while removing L wrench

Drive Belt Removal

NOTICE
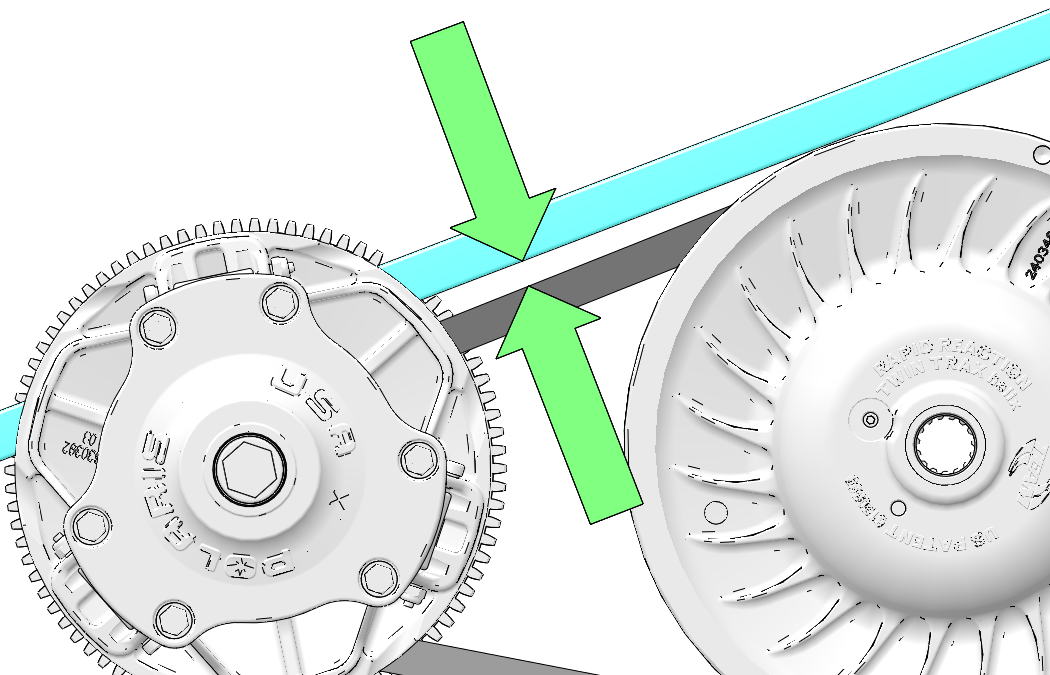
Do not attempt to remove the drive belt after operating in reverse. The snowmobile must be stopped after forward motion to prevent damage to components during belt removal. Rotate the driven clutch counter-clockwise 1/4 turn by hand to ensure forward engagement before attempting to remove the belt.
  1. Stop the engine after operating in a forward motion.
  2. Turn the ignition key off. Wait for the engine to come to a complete stop.
  3. Lock the parking brake.
  4. Remove the left side panel.
  5. Rotate the driven clutch counter-clockwise 1/4 turn by hand to ensure forward engagement.
  6. Locate the L-wrench in the tool kit. Install the wrench into the open threaded hole in the outer sheave of the clutch.
  7. Turn the wrench clockwise until the sheaves open far enough to remove the belt. If the wrench does not turn readily, rotate the driven clutch counter-clockwise an additional 1/4 turn by hand and try again.
  8. Remove the belt from the driven clutch.

Drive Belt Installation

  1. With the L-wrench inserted into the threaded hole and the sheaves in the open position, install the drive belt.
    TIP

    Install the belt so that the numbers can be read correctly on the left side of the vehicle, or in the direction in which the belt was originally installed.

  2. Rotate the belt clockwise to remove slack while removing the L-wrench.
  3. Reinstall the side panel.
  4. Break in the new belt. See Drive Belt Break-In.

© Copyright Polaris Industries Inc. All rights reserved.