Content Source: 2021 RANGER XP 1000 High Lifter / CREW XP 1000 High Lifter Owner’s Manual (9940010 R01) > Maintenance Chapter

IMPORTANT

The Owner's Manual for this vehicle contains warnings, instructions and other information you must read and fully understand before safely riding or performing maintenance on this vehicle.Always follow the warnings and instructions in Owner's Manual.

Click the CONTENTS link above for the Table Of Contents, or download a full PDF of the Owner Manual in the Owner Support area of Polaris.com

Lights

Poor lighting can result in reduced visibility when driving. Headlight and taillight lenses become dirty during normal operation. Clean lights frequently and replace burned out lamps promptly. Do not operate this vehicle at night or in low light conditions until the headlight is replaced. Always make sure lights are adjusted properly for best visibility.
When servicing a halogen lamp, don't touch the lamp with bare fingers. Oil from your skin leaves a residue, causing a hot spot that will shorten the life of the lamp.

Headlight Bulb Replacement

  1. Remove the hood from the front cab.
  2. Locate the bulb on the back side of the headlight housing.
  3. Disconnect the harness from the bulb. Be sure to pull on the connector , not on the wiring.

    Image

    Image
  4. Turn the bulb counterclockwise and remove it from the headlight housing, as shown above.
  5. Install the new bulb into the housing and rotate it clockwise 90° to lock it in place.
    NOTICE

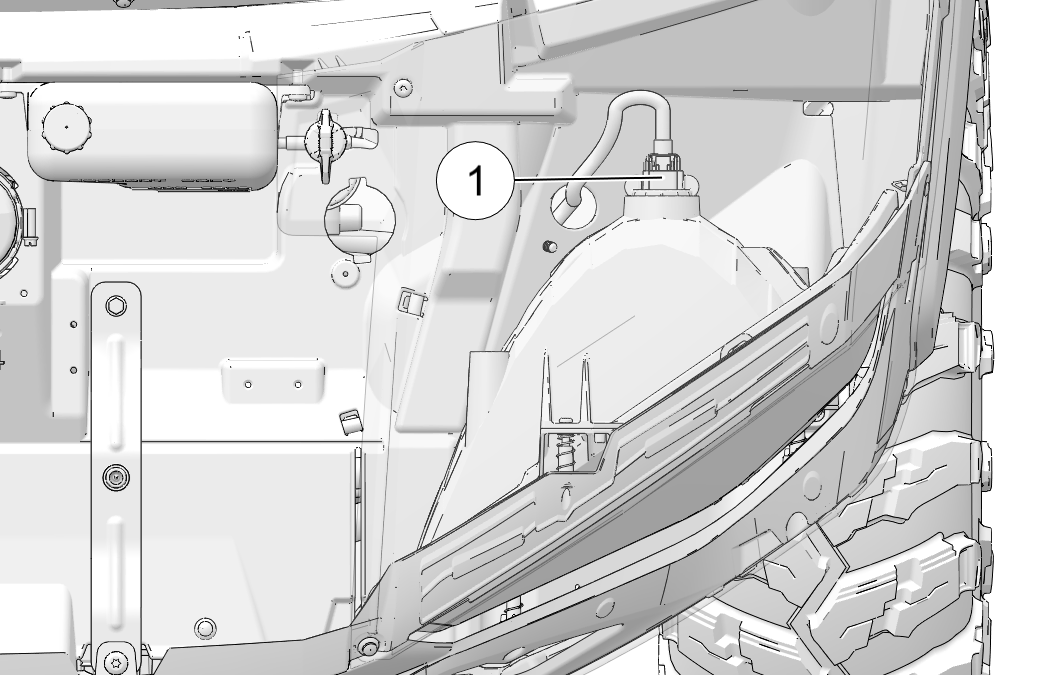
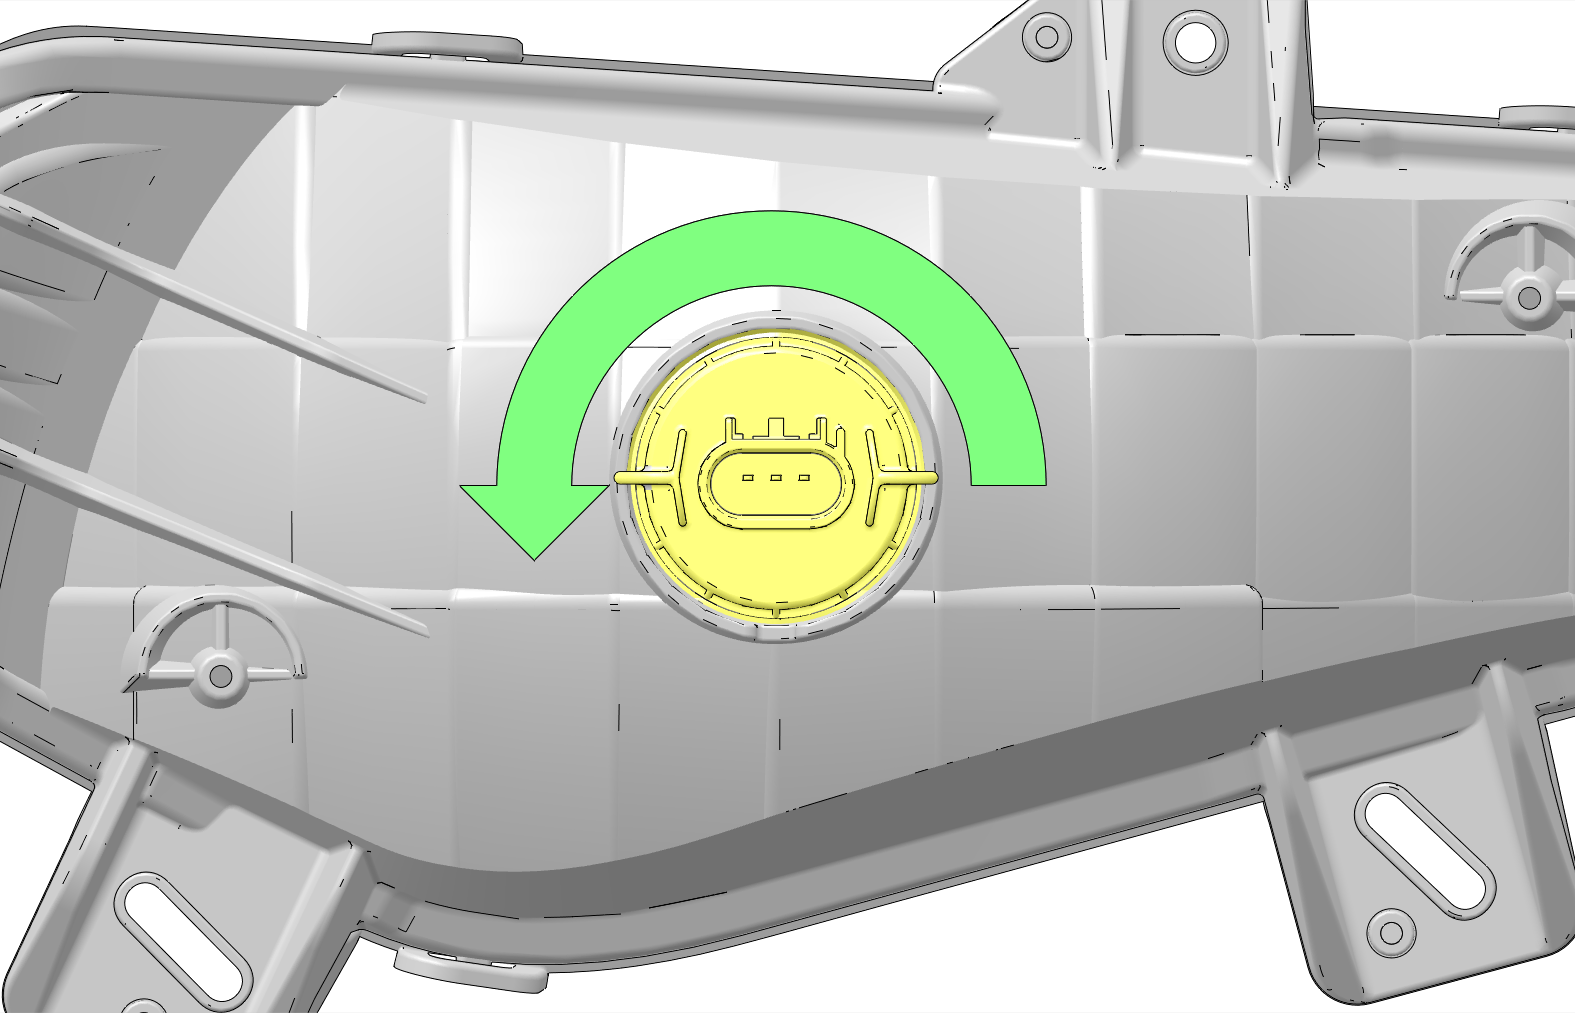
    Make sure the tab on the bulb locates properly in the housing.

  6. Install the harness onto the new headlight bulb and install the hood.

Headlight Adjustment

The headlight beams are adjustable.
Image
  1. Place the vehicle on a level surface with the headlight approximately 25 ft. (7.6 m) from a wall.
    ITEM DESCRIPTION
    Measure Distance = 7.5 in (19.0 cm)
    Measure Distance = 25 ft (7.6 m)
    Headlight Center of Bulb
  2. Measure the distance from the floor to the center of the headlight and make a mark on the wall at the same height.
  3. With the machine in PARK, start the engine and turn the headlight switch to the LOW position.
  4. The most intense part of the LOW beam headlight beam should be aimed 7.5 in (19.0 cm) below the mark placed on the wall.
    NOTE
    Rider weight must be included in the seat while performing this procedure.
  5. Adjust the beam to the desired position by loosening or tightening the adjustment screws and moving the lamp to the appropriate height.
  6. Adjust the beam to desired position. Repeat the procedure to adjust the other headlight.
    WARNING
    Due to the nature of light utility vehicles and where they are operated, headlight lenses become dirty. Frequently washing is necessary to maintain lighting quality. Riding with poor lighting can result in severe injury or death.

Brake Lights

When the brake pedal is depressed, the brake light comes on. Check the brake light before each ride.
To check the brake lights, do the following:
  1. Turn the key to the ON position.
  2. Depress the brake pedal. The brake light should come on after about 0.4 in (10 mm) of pedal travel. If the light doesn't come on, check the bulb.

© Copyright Polaris Inc. All rights reserved.