
Content Source: 2021 GEM e2/e4/e6/eXLD Owner’s Manual (9939951-EN R01) > Features and Controls Chapter
| IMPORTANT |
|
The Owner's Manual for this vehicle contains warnings, instructions and other information you must read and fully understand before safely riding or performing maintenance on this vehicle.Always follow the warnings and instructions in Owner's Manual. Click the CONTENTS link above for the Table Of Contents, or download a full PDF of the Owner Manual in the Owner Support area of Polaris.com |
| NOTICE |
| The key must be in the ON position to activate the turn signals. |
Check turn signal lamps before each ride. When driving, activate a turn signal before turning to alert others of your intentions.
Move the lever upward ![]() to signal a right turn. Move the lever downward
to signal a right turn. Move the lever downward ![]() to signal a left turn. The corresponding turn signal lamps on the front and rear of the vehicle will flash. The corresponding
turn indicator in the LCD display will also flash.
to signal a left turn. The corresponding turn signal lamps on the front and rear of the vehicle will flash. The corresponding
turn indicator in the LCD display will also flash.

Press the tip of the left control lever ![]() inward to sound the horn.
inward to sound the horn.
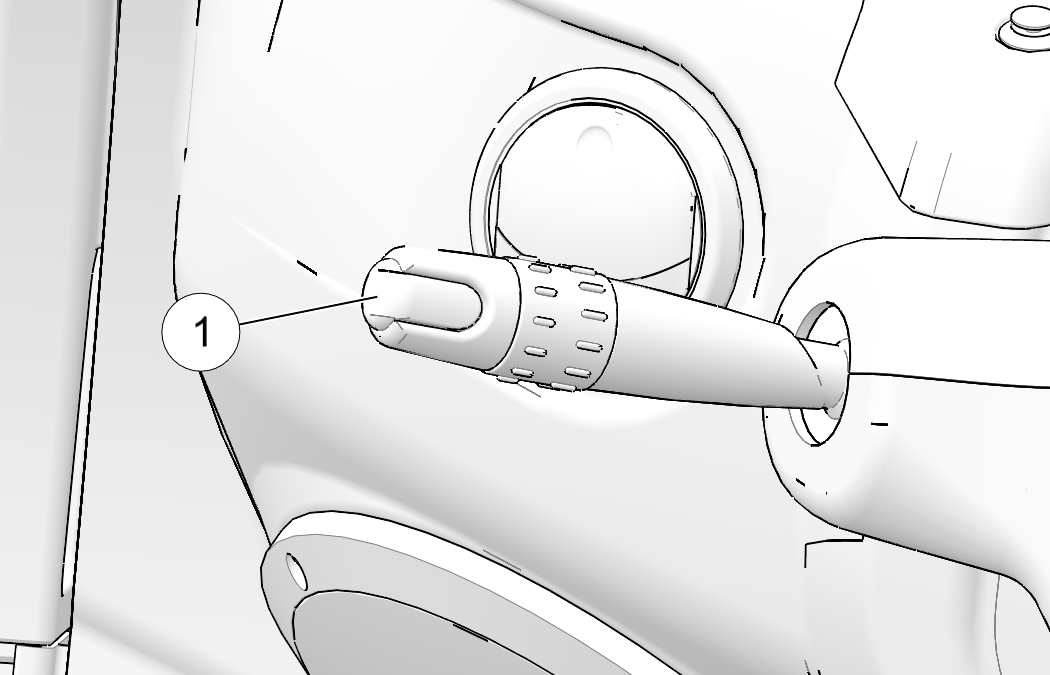
Press the tip of the lever inward ![]() to cause all turn signal lamps to flash simultaneously. Use this feature to alert others of an emergency or other situation
requiring caution, especially if your vehicle becomes disabled on or near a road. Press the switch again to cancel the hazard
signals.
to cause all turn signal lamps to flash simultaneously. Use this feature to alert others of an emergency or other situation
requiring caution, especially if your vehicle becomes disabled on or near a road. Press the switch again to cancel the hazard
signals.
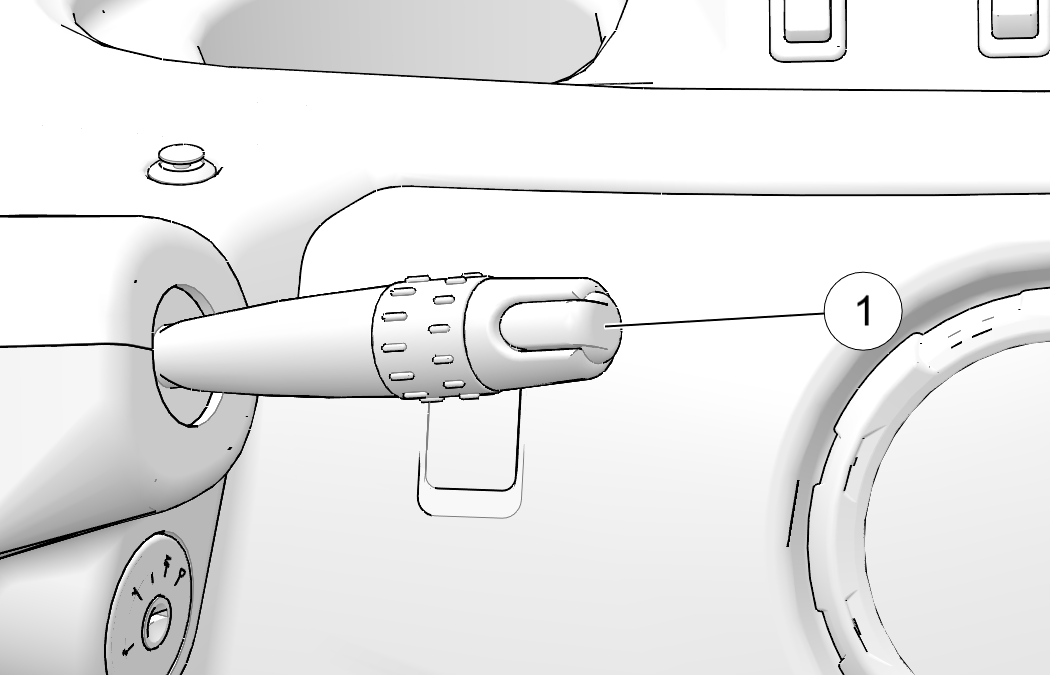
Rotate the knurled barrel ![]() forward to turn the windshield wipers on. Pull the control lever toward the driver’s seat to activate the washer (if equipped).
forward to turn the windshield wipers on. Pull the control lever toward the driver’s seat to activate the washer (if equipped).
If the wiper fails to work, check for a blown fuse at the fuse block. See Fuses and Relays.

| A worn or damaged wiper blade could impair operator vision and result in an accident. A worn wiper blade could also damage windshield glass. Always replace worn or damaged wiper blades promptly. |
| NOTICE |
| The steering column automatically locks when the ignition key is removed.
The key can be removed from the switch when it is in the OFF position. |
| Never turn the key to the OFF position while the vehicle is in motion. This could lead to loss of speed control and loss of vehicle control, which could result in serious injury or death. |
| NOTICE |
| The malfunction light will illuminate after reversing direction if you press the accelerator pedal before coming to a complete stop. |
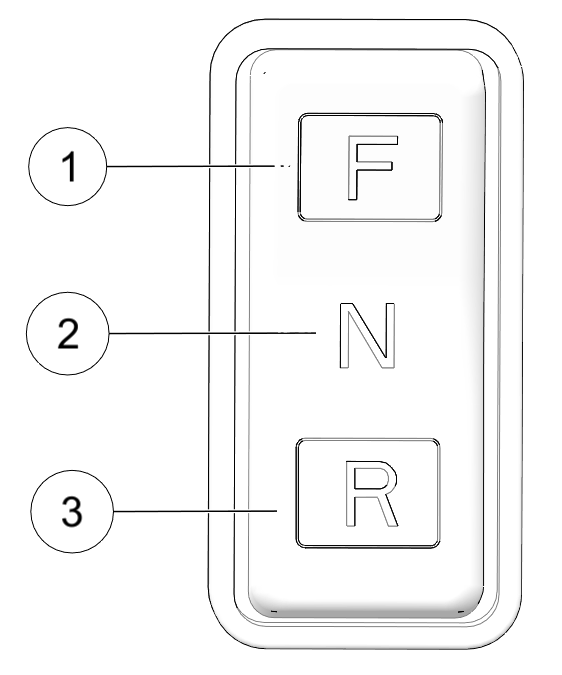
Always come to a complete stop before reversing direction. To choose the forward option, push the top of the switch ![]() . Push the bottom of the switch to choose reverse operation
. Push the bottom of the switch to choose reverse operation ![]() . When the drive mode switch is in the center position
. When the drive mode switch is in the center position ![]() , the vehicle is in neutral. The vehicle will not move if the accelerator is depressed.
, the vehicle is in neutral. The vehicle will not move if the accelerator is depressed.
High water pressure may damage components. Wash the vehicle by hand or with a garden hose using mild soap. Certain products, including insect repellents and chemicals, will damage the speedometer lens and other plastic surfaces. Do not use alcohol to clean the instrument cluster. Do not allow insect sprays to contact the lens.
|
Lamp |
Indicates |
Condition |
|---|---|---|
|
|
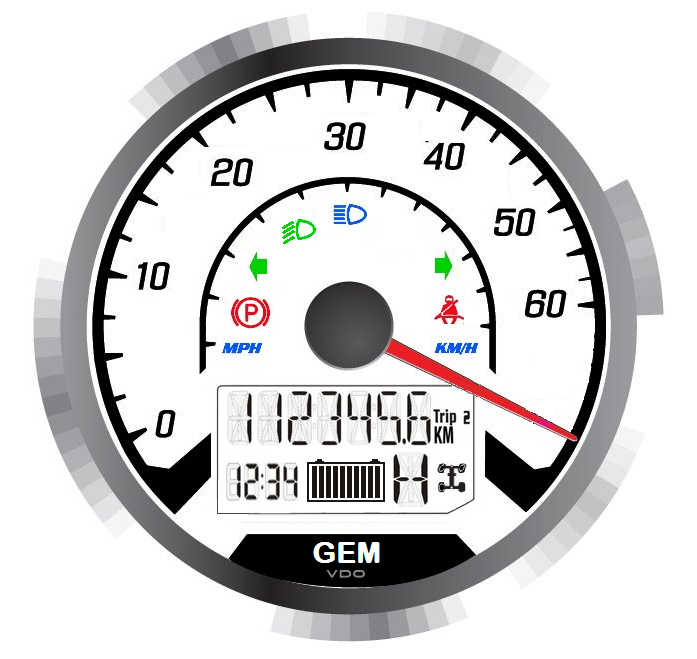
Vehicle Speed |
When standard mode is selected, speed displays in miles per hour. |
|
|
When metric mode is selected, speed displays in kilometers per hour. |
|
|
|
Brake Indicator |
The brake indicator illuminates when the park brake is engaged or when a brake system failure has occurred. If the brake warning illuminates, check the following items before operating the vehicle |
|
|
Direction Indicators |
A direction indicator flashes when a turn signal is active. |
|
|
Low Beam |
This lamp illuminates when the headlamp switch is set to low beam. |
|
|
High Beam |
This lamp illuminates when the headlamp switch is set to high beam. |
|
|
Seat Belt |
When the key is turned on, the seat belt indicator lamp will illuminate if the driver’s seat belt is not fastened. The lamp is a reminder to the operator to ensure all riders are wearing seat belts before operating. |
|
Brake System Item |
Solution |
|---|---|
|
Park brake |
Release the park brake. |
|
Brake system |
Check hoses for cracks, scuffs and worn spots. If you discover signs of wear or damage, do not operate the vehicle. Your authorized GEM dealer can provide service. |
| Worn or damaged brake hoses can cause brake failure. Always have worn or damaged brake hoses replaced promptly. |
|
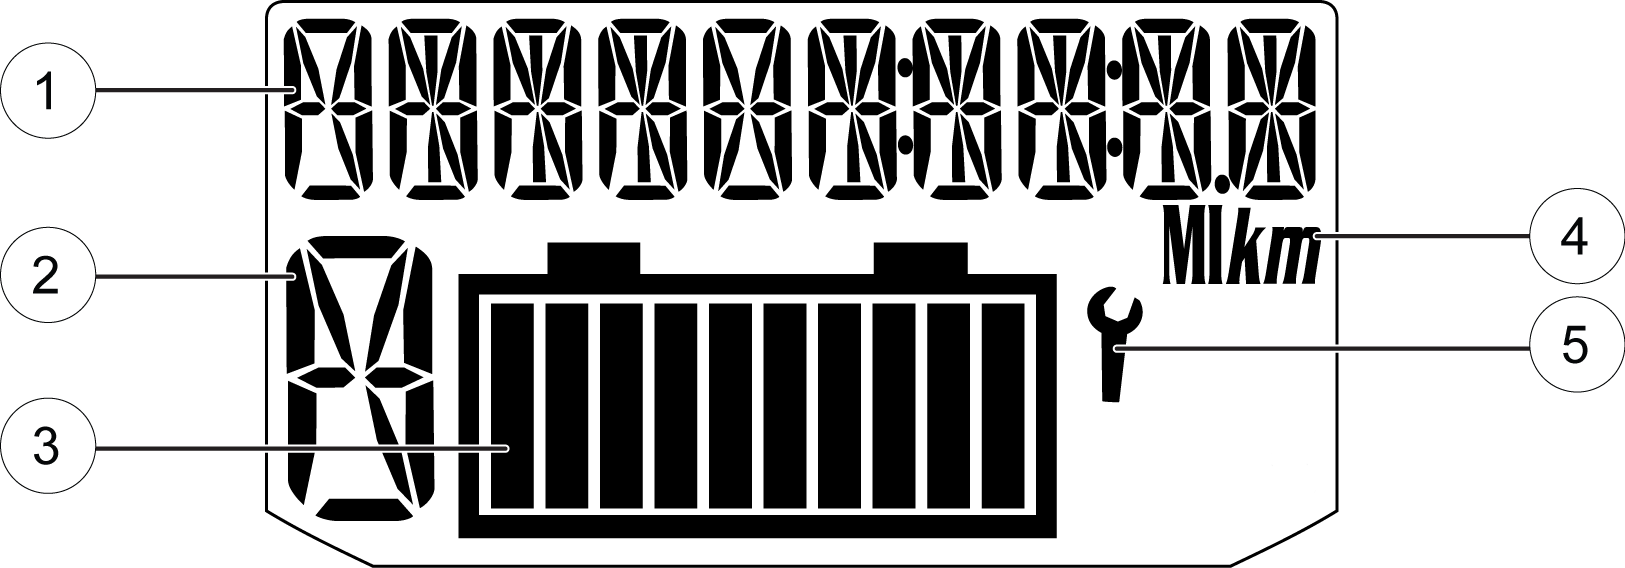
State of Charge Indicator |
|
|---|---|
|
Bars |
% Of Charge |
|
1 |
Less Than 10 |
|
2 |
10-20 |
|
3 |
20-30 |
|
4 |
30-40 |
|
5 |
40-50 |
|
6 |
50-60 |
|
7 |
60-70 |
|
8 |
70-80 |
|
9 |
80-90 |
|
10 |
90-100 |
|
Standard Display |
Metric Display |
|
|
Distance |
Miles |
Kilometers |
|
Temperature |
Fahrenheit |
Celsius |
|
Time |
12-Hour Clock |
24-Hour Clock |
| NOTICE |
| To exit the set-up mode, turn the key off. Wait 5 seconds, then turn the key on. The gauge displays the mode that was displayed prior to setting the units. |
| NOTICE |
| The clock must be reset any time the batteries have been disconnected or fully discharged. |
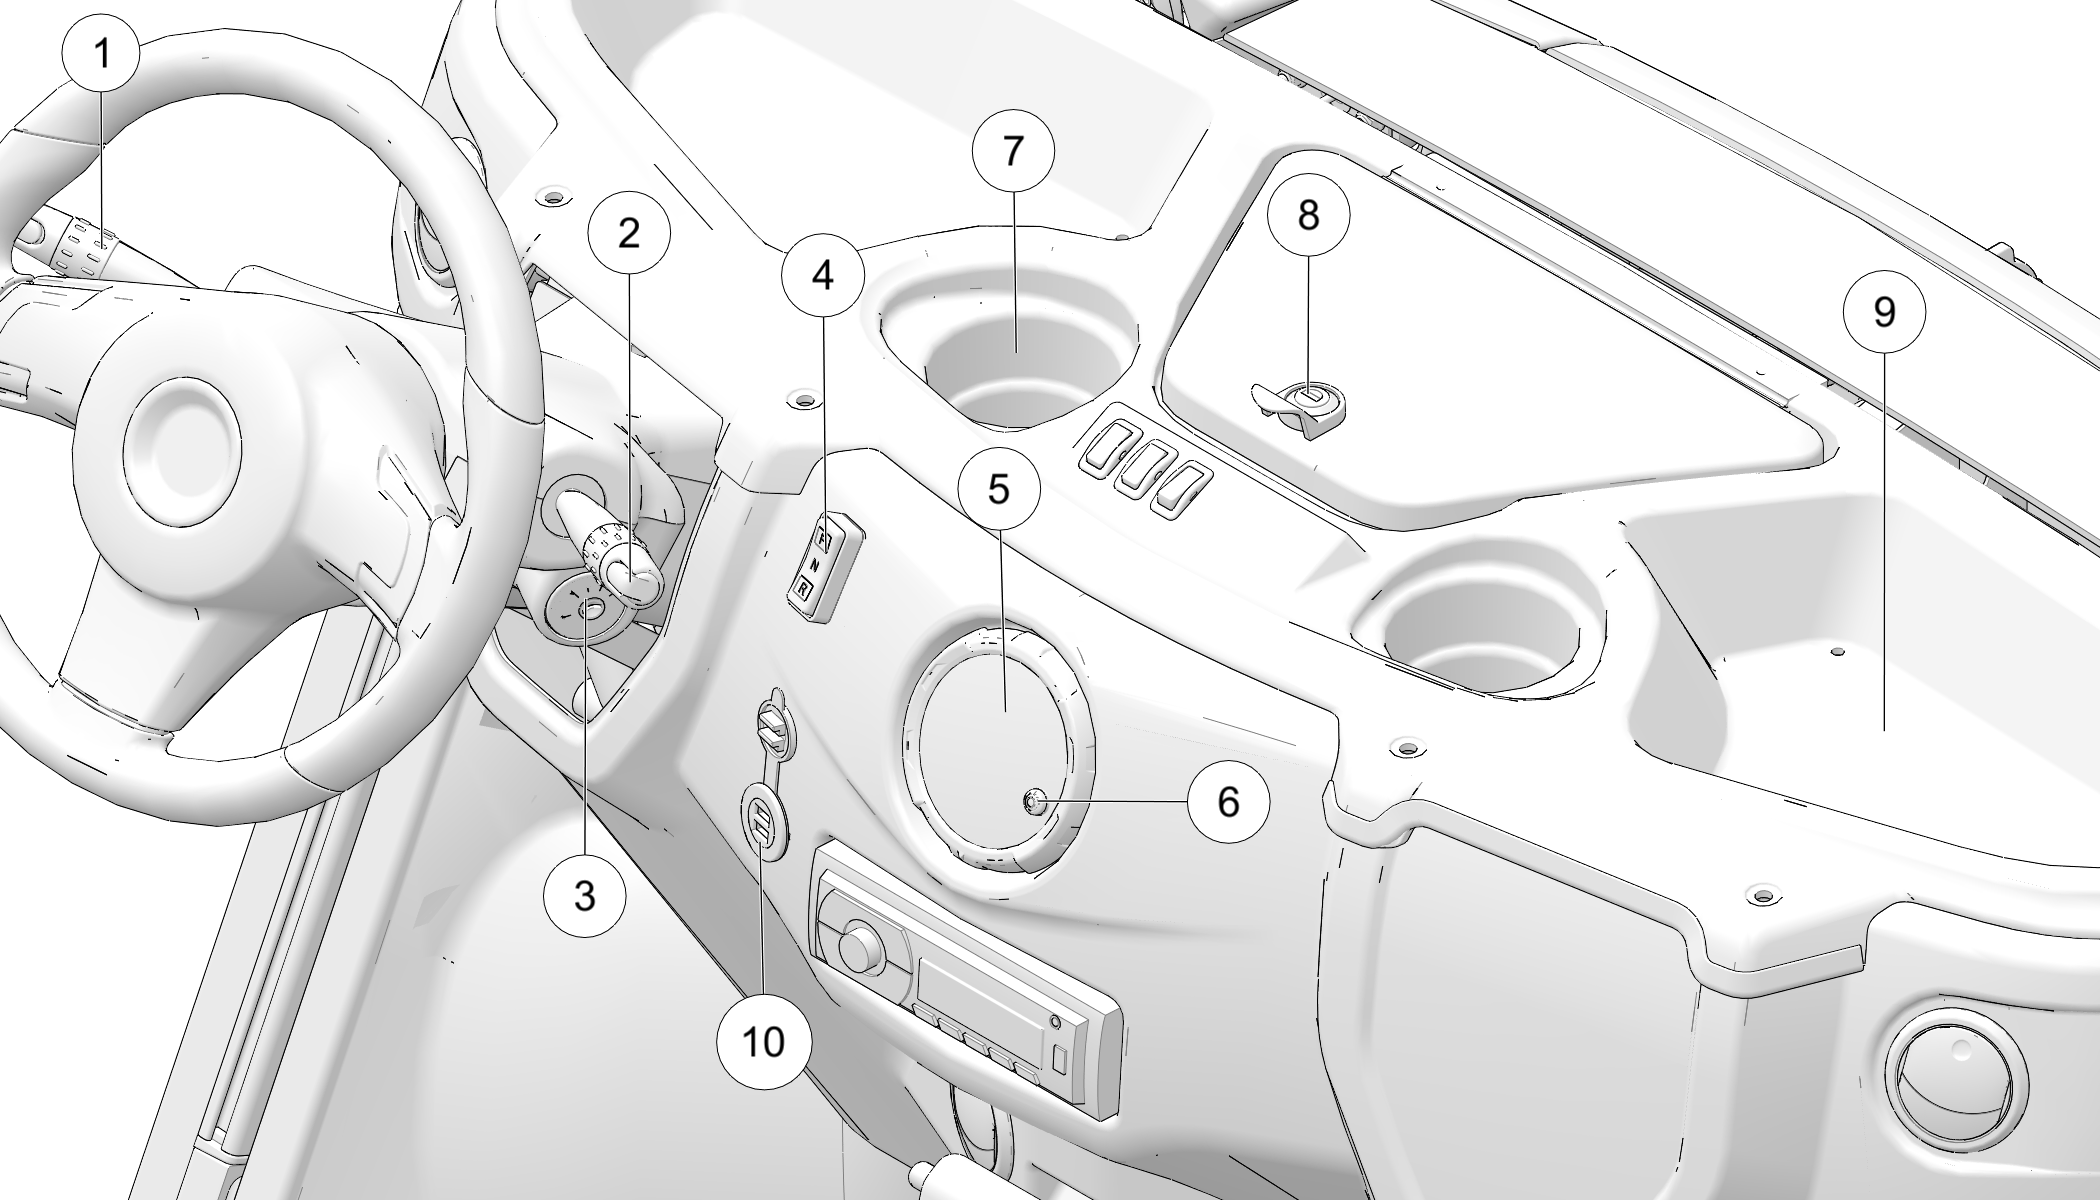
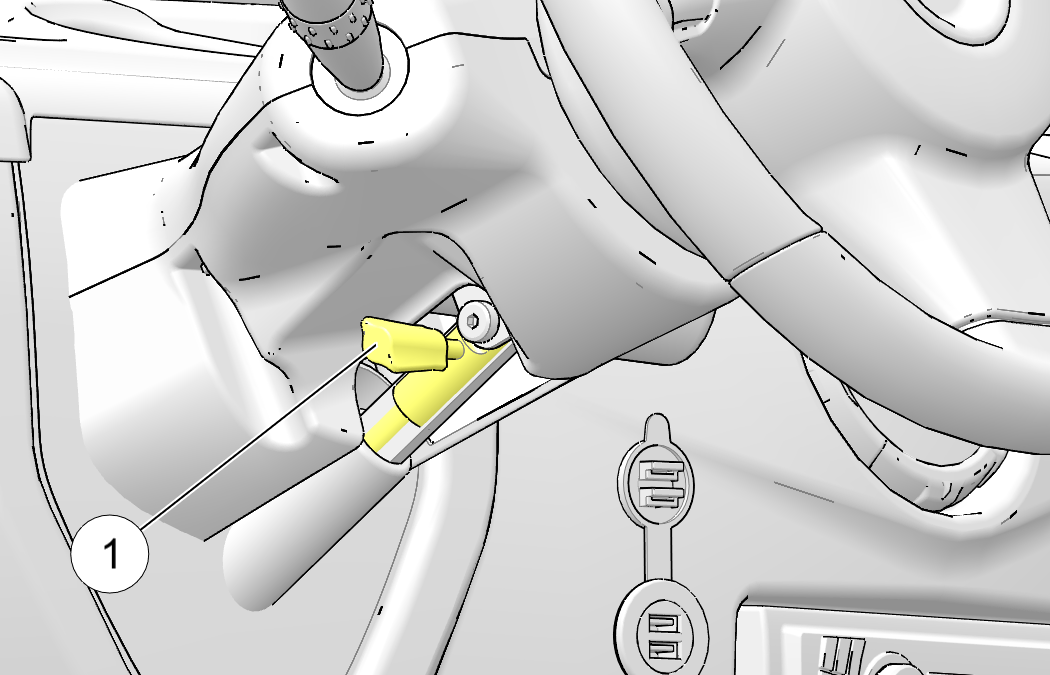
If equipped, the steering wheel can be tilted upward or downward for rider preference.
Pull and hold the adjustment lever ![]() upward while moving the steering wheel upward or downward. Release the lever when the steering wheel is at the desired position.
upward while moving the steering wheel upward or downward. Release the lever when the steering wheel is at the desired position.
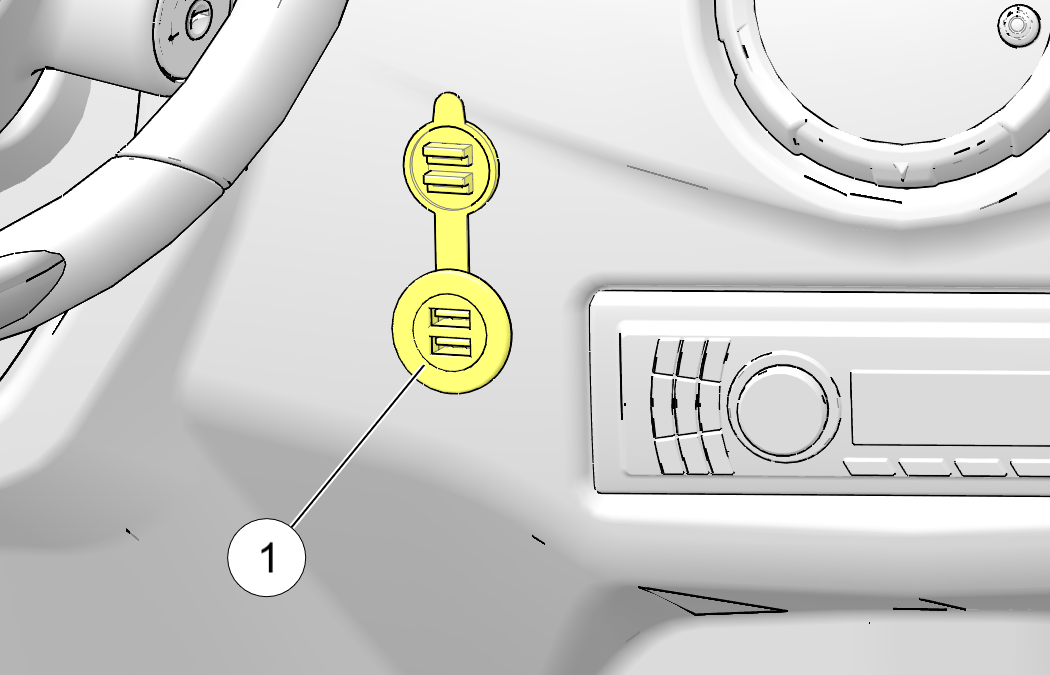
The fuse for the USB port ![]() is located under the hood in the fuse block. Always use fuses with the same type and rating.
is located under the hood in the fuse block. Always use fuses with the same type and rating.
| NOTICE |
| Do not plug in devices requiring power exceeding 25 watts. Damage to the vehicle electrical system may occur or an accessory fuse may blow. |
© Copyright Polaris Inc. All rights reserved.