
Content Source: 2021 Slingshot Owner’s Manual (9939930 R02) > Features and Controls Chapter
| IMPORTANT |
|
The Owner's Manual for this vehicle contains warnings, instructions and other information you must read and fully understand before safely riding or performing maintenance on this vehicle.Always follow the warnings and instructions in Owner's Manual. Click the CONTENTS link above for the Table Of Contents, or download a full PDF of the Owner Manual in the Owner Support area of Polaris.com |
| NOTICE |
| The vehicle must be in ignition state to activate the turn signals. |
| NOTICE |
| For lane changes, bump the signal lever momentarily. The corresponding signal lamps will flash three times. |
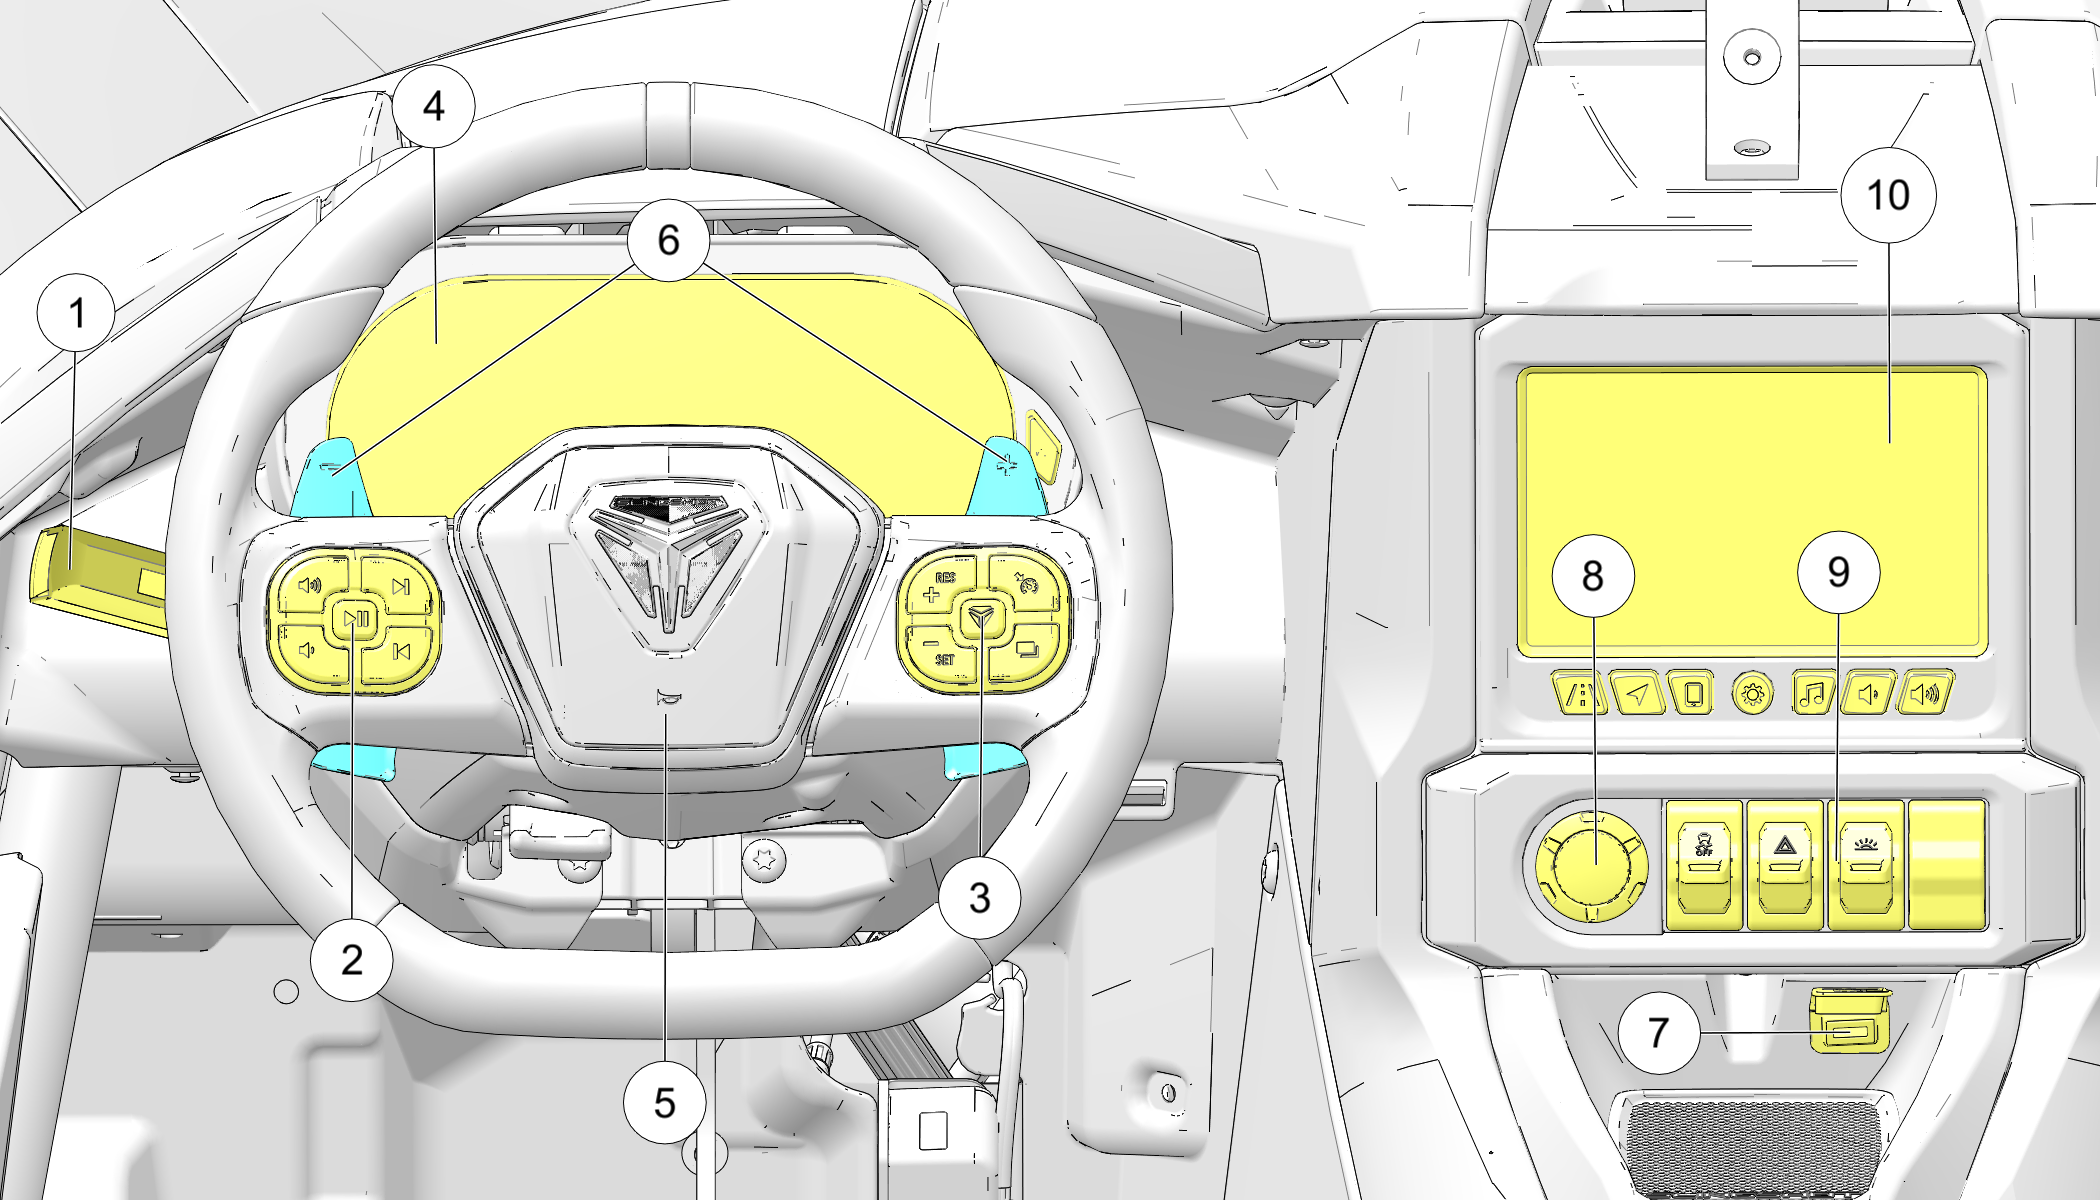
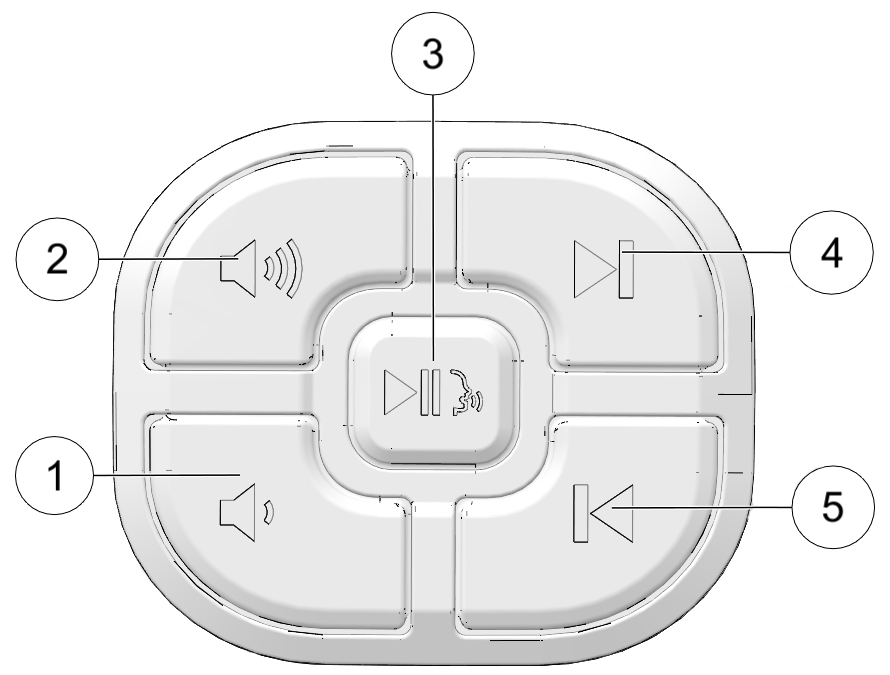
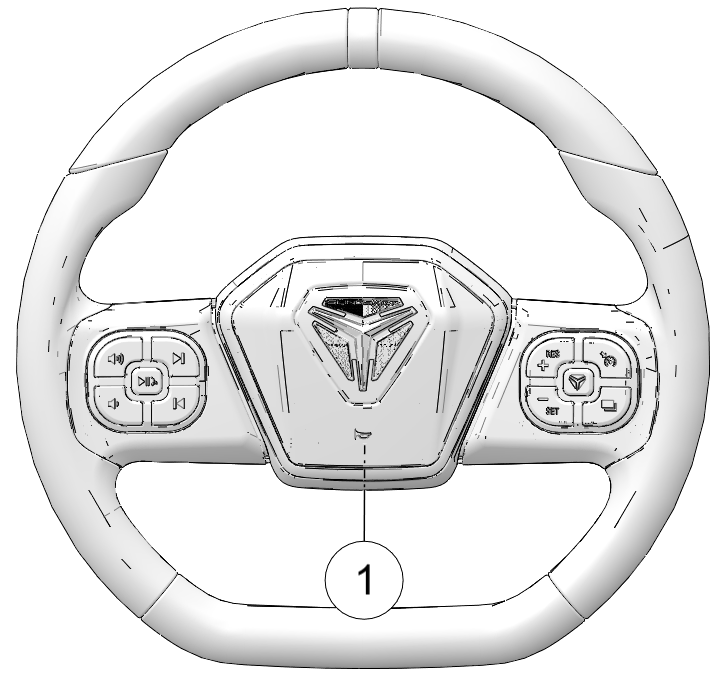
To adjust the audio volume, press the Volume Decrease button ![]() or the Volume Increase button
or the Volume Increase button ![]() .
.
To pause or resume audio, press the Play/Pause button ![]() .
.
Track navigation can be performed by pressing the Advance Track button ![]() or the Previous Track button
or the Previous Track button ![]() .
.
The cruise control buttons are located on the right-hand side of the steering wheel. Before using the cruise control, read the procedures in the Operation chapter.
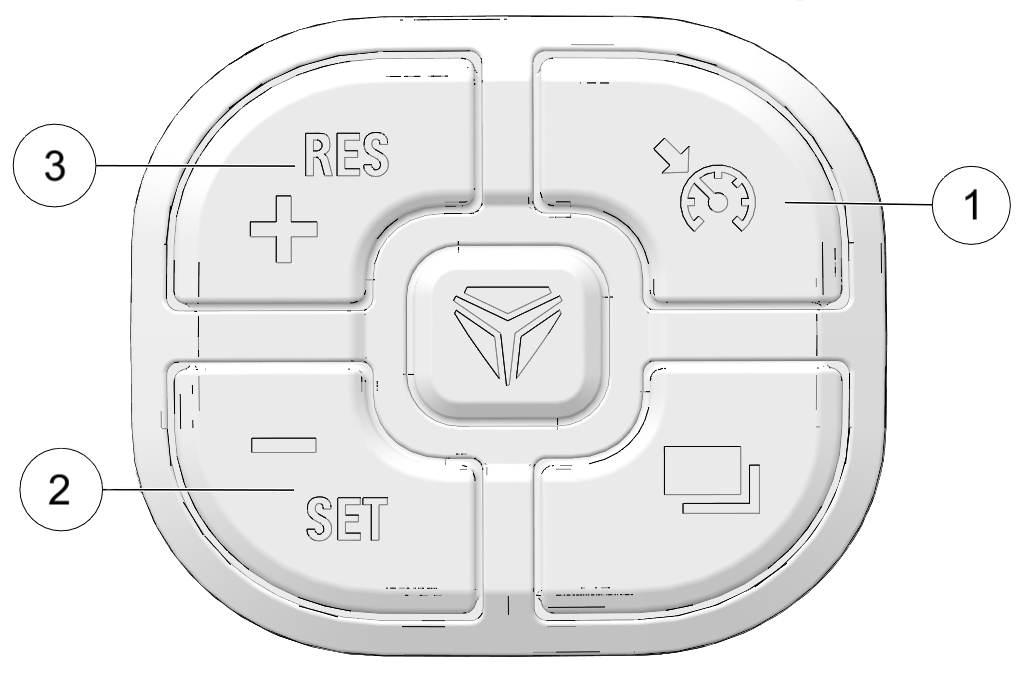
| Button | Function |
|---|---|
| Enable Cruise Control | |
| Set Cruise Control / Reduce Speed | |
| Resume Cruise Control / Increase Speed |
You can choose between two ride modes – Slingshot or Comfort. The throttle map for each ride mode was designed with a specific
application in mind, resulting in different riding experiences.
Ride Mode options can be viewed by pressing the Slingshot badge![]() on the right-hand side of the steering wheel or from the display.
on the right-hand side of the steering wheel or from the display.
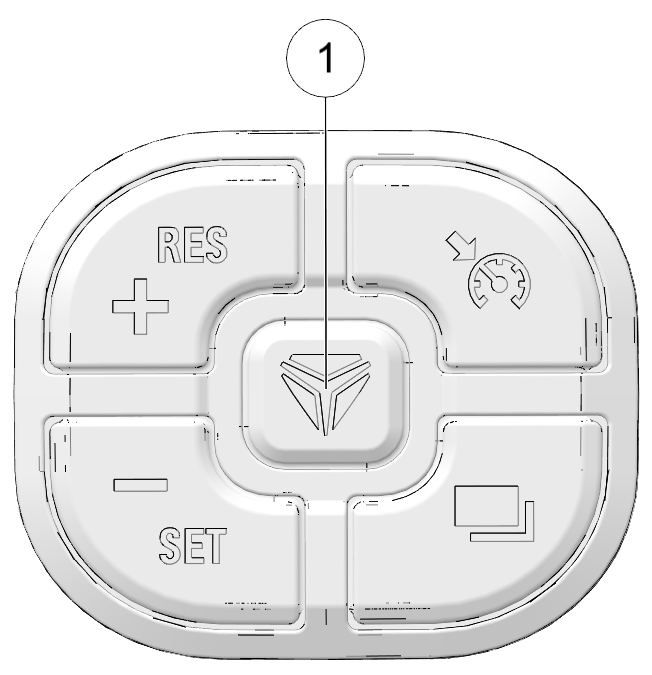
| NOTICE |
| For the ride mode to change the throttle must be fully disengaged. If you change the ride mode while the throttle is engaged, a spinning icon will appear indicating that the ride mode has not yet changed. Once the throttle has been disengaged the icon will disappear and the ride mode will change. |
Press the horn button ![]() to sound the horn. The vehicle must be in ignition state.
to sound the horn. The vehicle must be in ignition state.
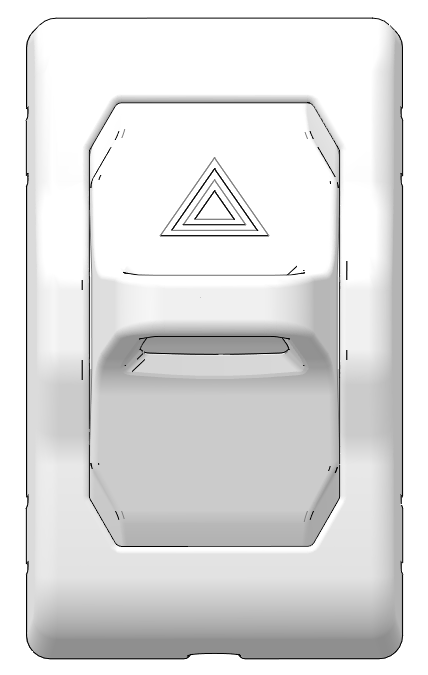
All turn signals flash when the emergency flashers are activated. Toggle the switch to activate the flashers. The vehicle does not have to be in ignition state to activate the flashers.
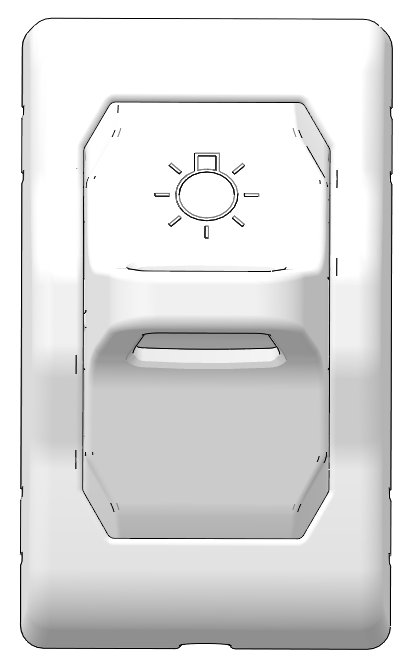
The master lighting switch must be in the ON position to allow operation of the high beam headlights.
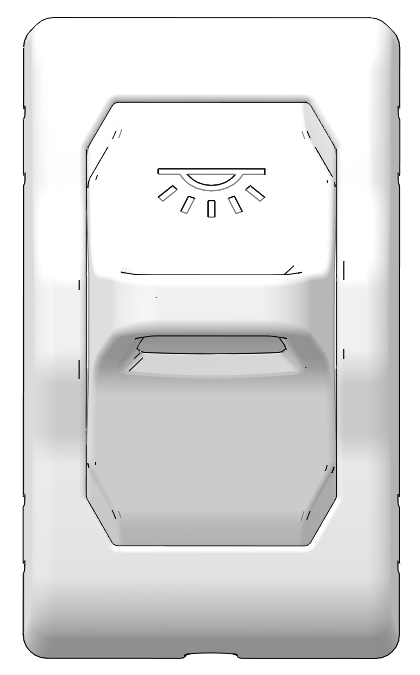
If equipped, toggle the interior light switch to activate the vehicle’s interior lights.
| No stability control, traction control or anti-lock braking system can fully protect you from every situation. Always be mindful of road conditions. Always drive safely and within the limits of the driver, vehicle, and road conditions. |
| Stability control, traction control and anti-lock braking systems rely on grip between the tires and the road to function properly. In a hydroplane situation, tires lose contact with the road and the effectiveness of these features may be diminished. |
| IMPORTANT |
| When operating the vehicle in wet or reduced traction conditions, always leave the traction control and stability control enabled. |
| Operating the vehicle under normal riding conditions with the ESP disabled could result in an increased risk of loss of vehicle control, rollover, personal injury, and death. |
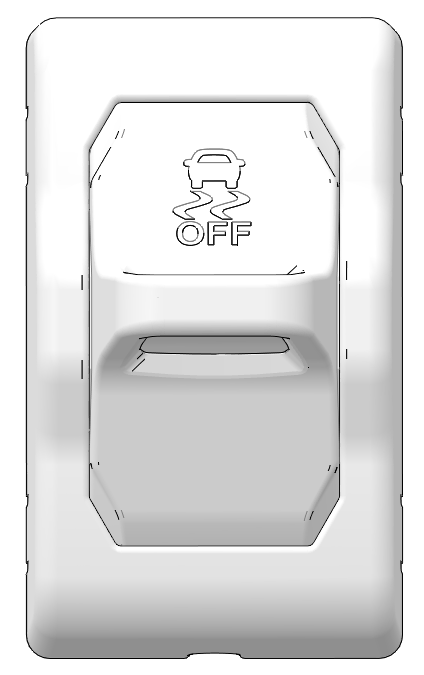
| Objective | Action | Comments |
|---|---|---|
| Disable Traction Control | Press and release switch | Traction Control indicator illuminates in tachometer |
| Disable ESP (Traction Control and Stability Control) | Press and hold switch for 5 seconds | Traction Control indicator and ESP OFF indicator illuminate in tachometer |
| Enable ESP (if disabled) | Press and release switch | Traction Control indicator and ESP OFF indicator extinguish |
| NOTICE |
| If the key fob is lost while operating the vehicle, a passcode will be needed once engine restart is needed. |
| IMPORTANT |
|
The vehicle’s key fob will become inactive if a period of 7 days has elapsed since last startup.
For AutoDrive Transmission vehicles: Pressing the start button and/or the brake pedal will reestablish connection between the Vehicle Control Module (VCM) and
the key fob.
For Manual Transmission vehicles: Pressing the start button and/or the clutch pedal will reestablish connection between the Vehicle Control Module (VCM) and
the key fob.
While the connection is inactive, functions that involve the key fob, such as arming the alarm system, will not be available
until after vehicle startup.
|
© Copyright Polaris Inc. All rights reserved.