
Content Source: 2021 Indian Scout Bobber Owner’s Manual (9931589 R02) > Maintenance Chapter
| IMPORTANT |
|
The Owner's Manual for this vehicle contains warnings, instructions and other information you must read and fully understand before safely riding or performing maintenance on this vehicle.Always follow the warnings and instructions in Owner's Manual. Click the CONTENTS link above for the Table Of Contents, or download a full PDF of the Owner Manual in the Owner Support area of Polaris.com |
| Failure to properly lift and stabilize motorcycle may allow it to tip or fall, resulting in serious injury or death. |
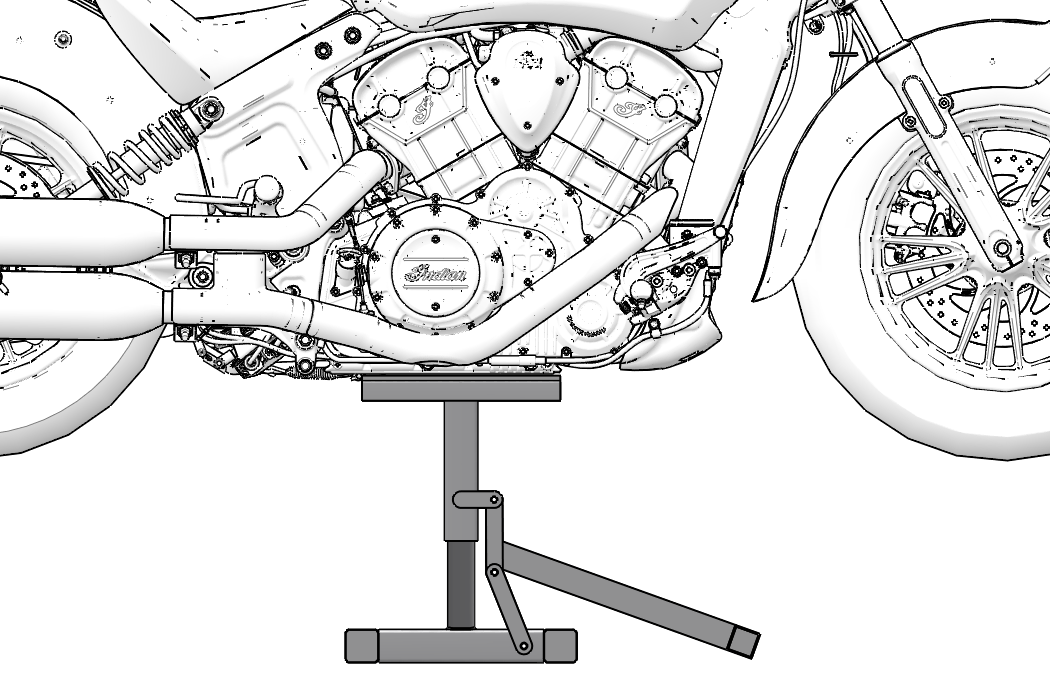
| IMPORTANT |
| Automotive floor jack does not provide adequate stability and is NOT RECOMMENDED! |
| IMPORTANT |
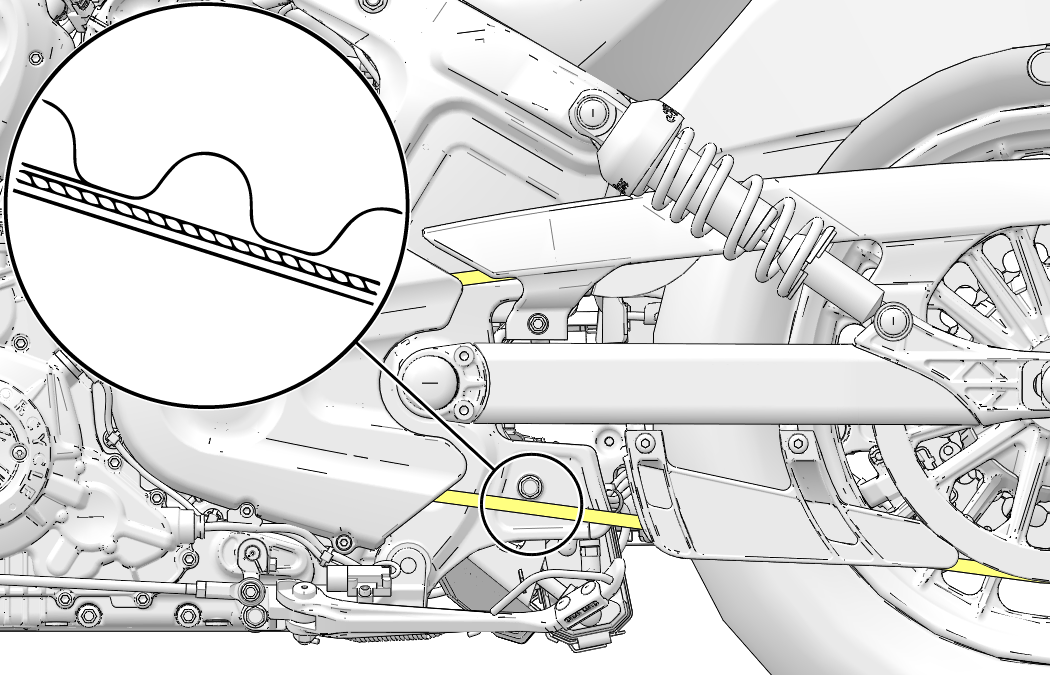
| Perform this procedure to achieve proper belt tension and alignment. Belt tension should be set before performing alignment procedure. |
| A drive belt that is not properly tensioned can cause drive line noise and damage the drive belt, causing possible belt failure and loss of control of the motorcycle. |
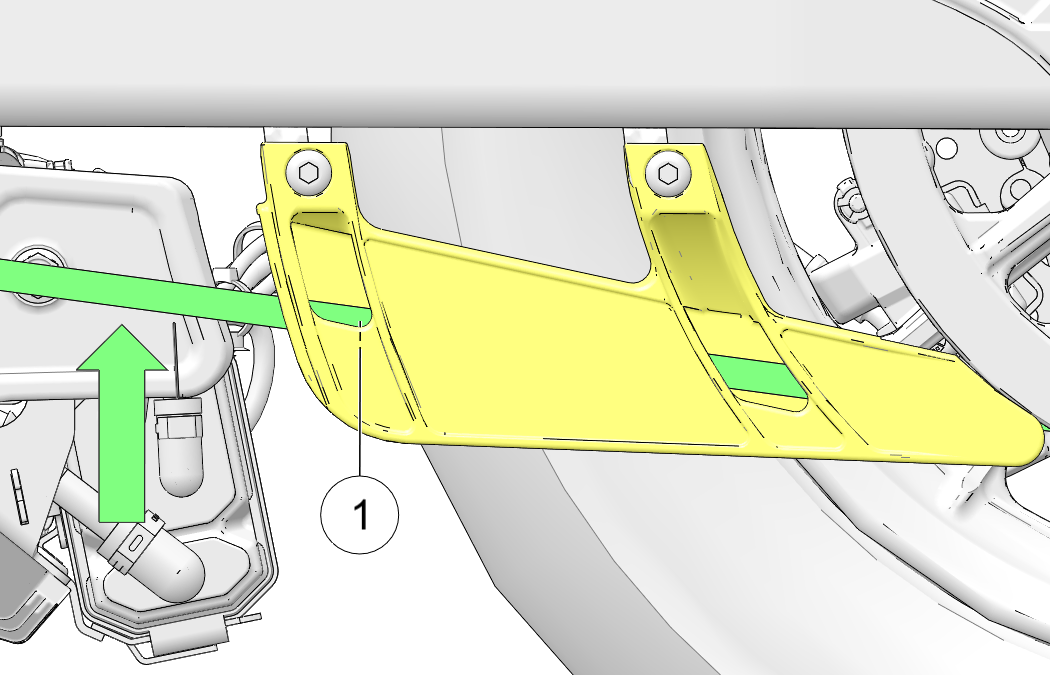
| MEASUREMENT | |
|
Drive Belt Deflection @ 10 lbs force: 15/32 in (12 mm) |
| IMPORTANT |
| Perform this procedure to achieve proper belt tension and alignment. Belt tension should be set before performing alignment procedure. |
| A rear axle not in alignment can cause drive line noise and damage the drive belt, causing possible belt failure and loss of control of motorcycle. |
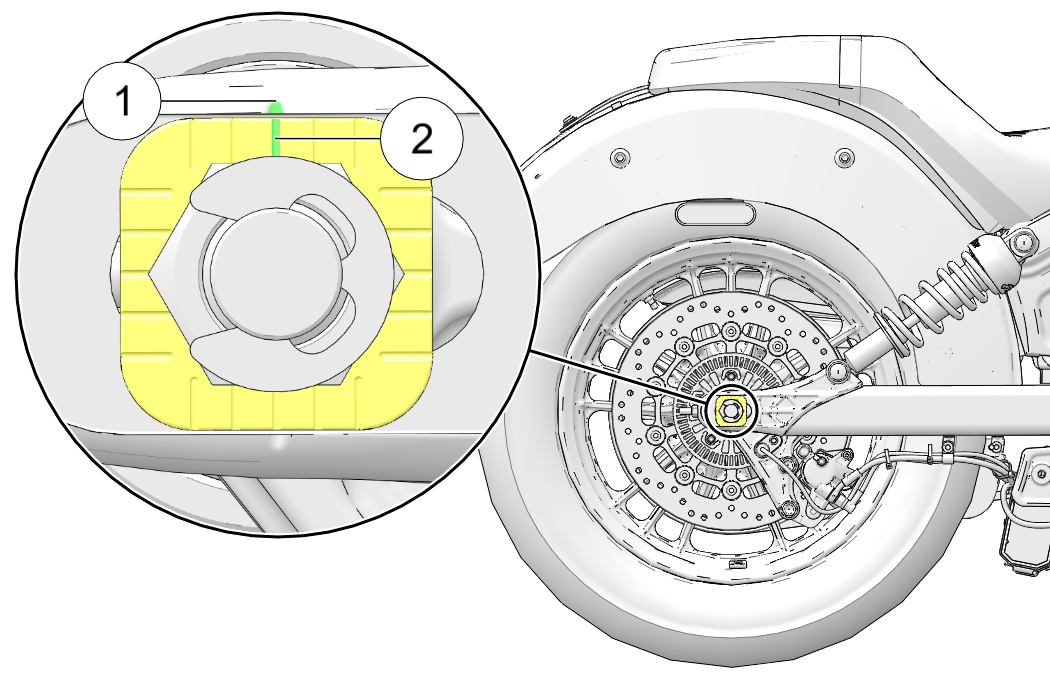
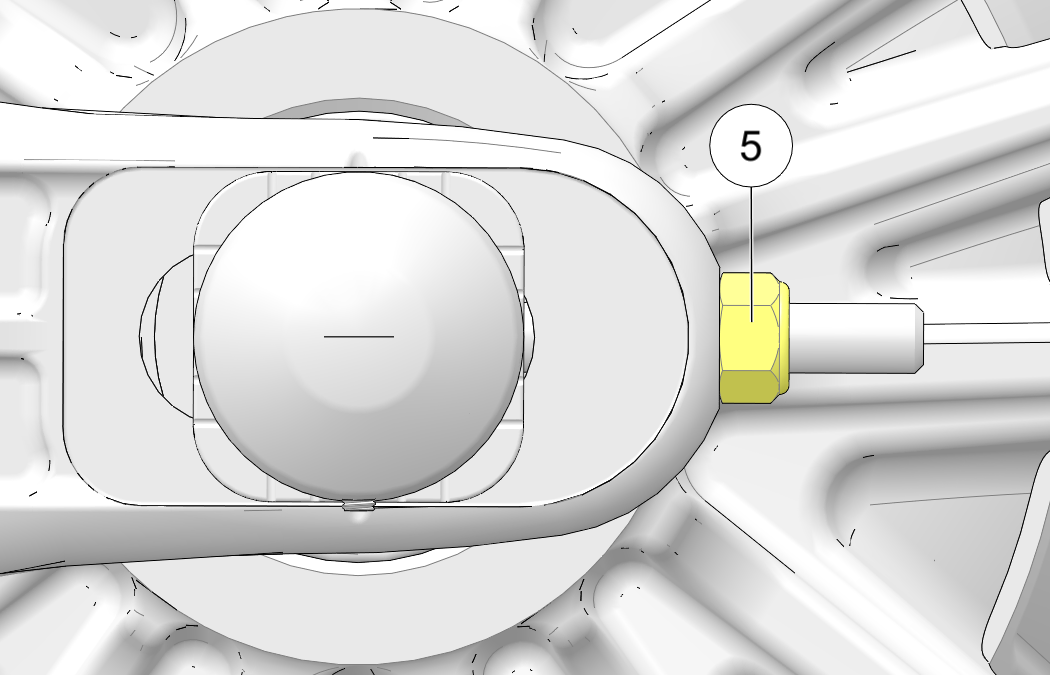
| TORQUE | |
| Adjustment Specification: 15 ft-lbs (20 N·m) |
| Drive belt misalignment can cause drive line noise and damage drive belt, causing possible belt failure and loss of control of motorcycle. |
| NOTICE |
| To minimize change in belt tension, use RIGHT SIDE adjuster only to make final adjustments to belt alignment. Be sure to keep axle seated forward against axle adjusters during this procedure. |
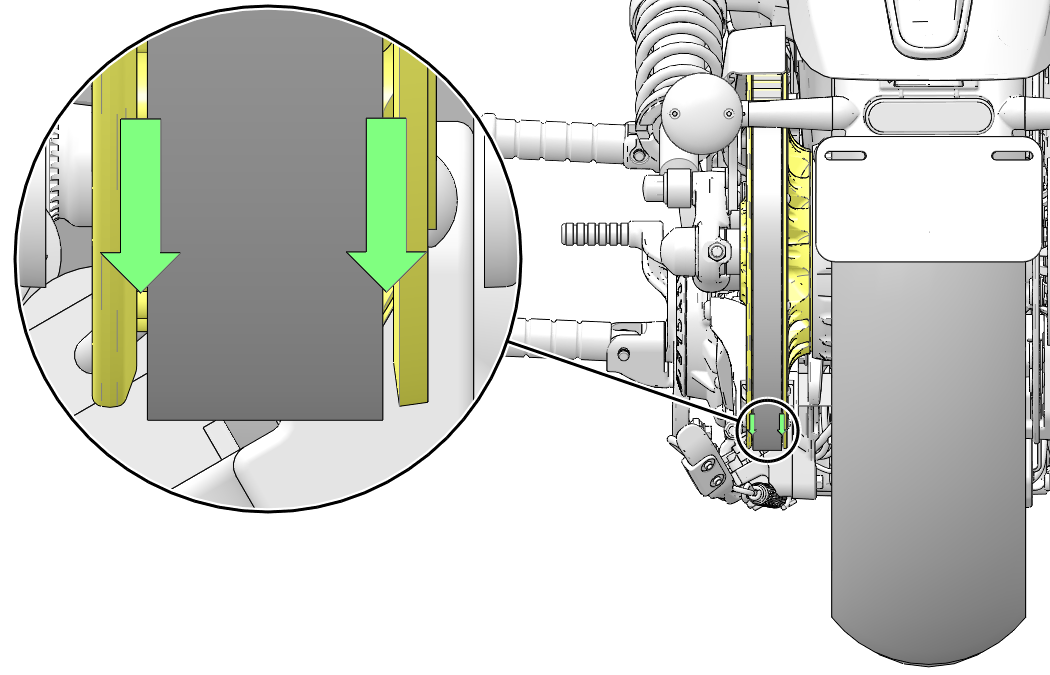
| IMPORTANT |
| Belt should track to center of sprocket tooth surface when properly aligned. Sprocket teeth should be visible on both sides of drive belt. |
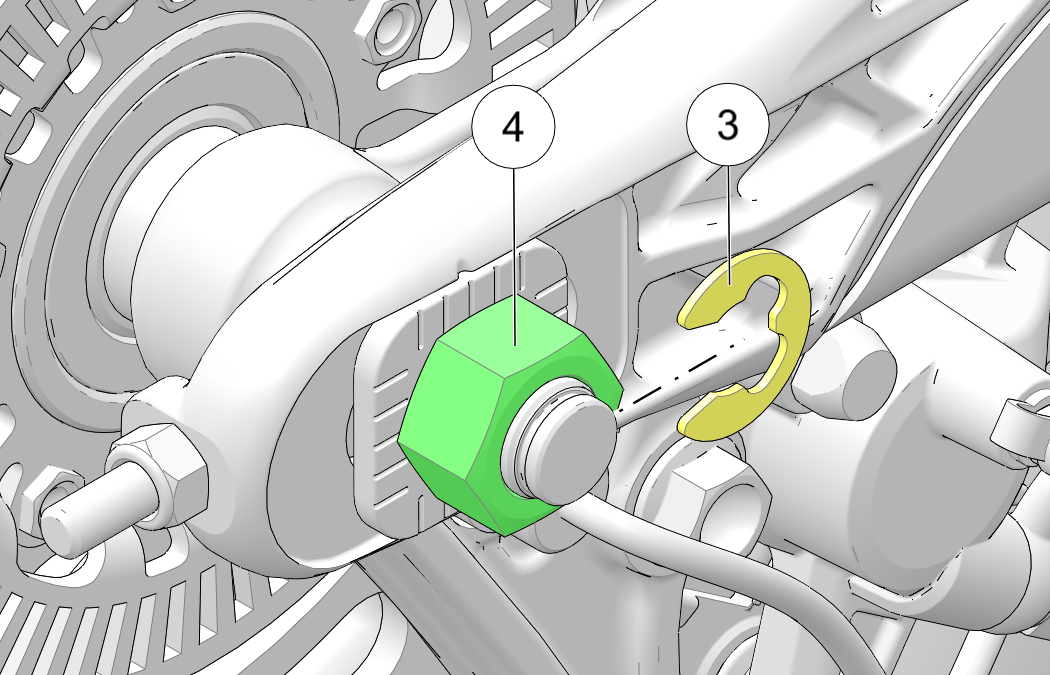
| NOTICE |
| It may be necessary to loosen axle nut and tap left end of axle to ensure it moves forward when adjuster is loosened. Axle nut must be retightened to Adjustment Specification (15 ft-lbs (20 N·m)) before proceeding. |
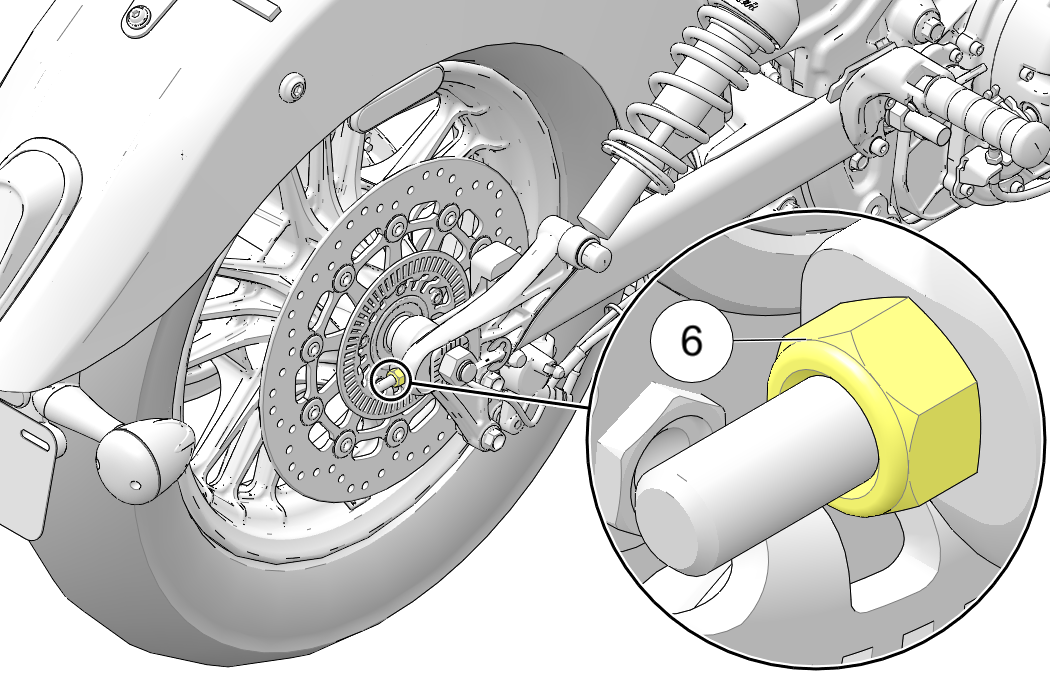
| TORQUE | |
| Final Specification: 65 ft-lbs (88 N·m) |
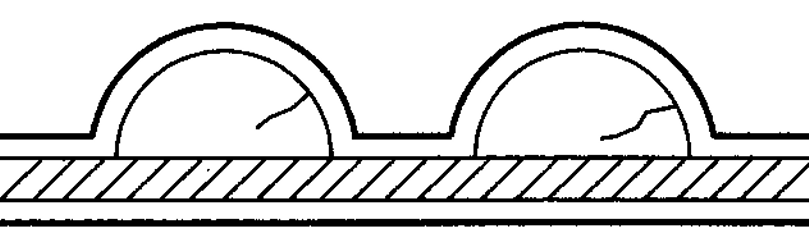
| Wear Analysis | Belt Condition |
|---|---|
|
Internal
tooth cracks (hairline): |
 |
|
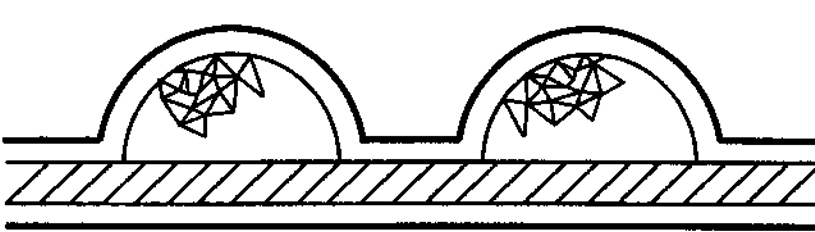
External
tooth cracks: |
 |
|
Missing
teeth: |
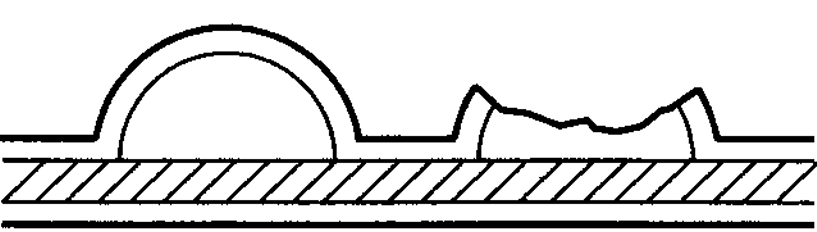 |
|
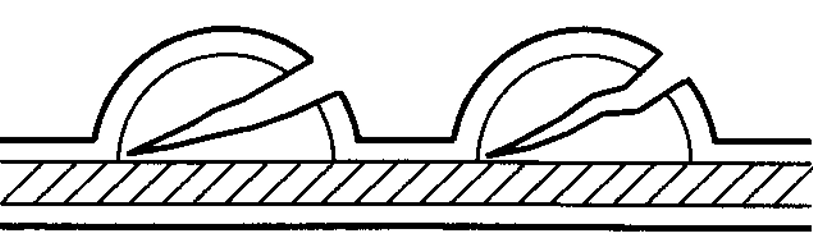
Chipping
(not serious): |
 |
|
Fuzzy
edge cord: |
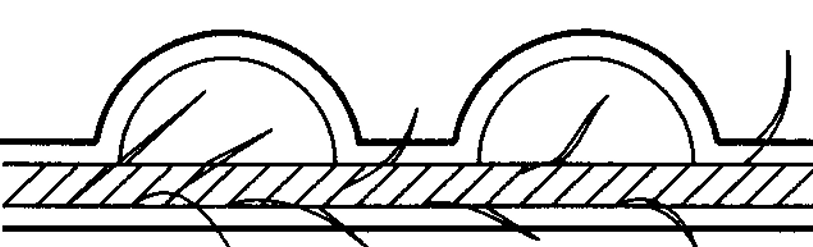 |
|
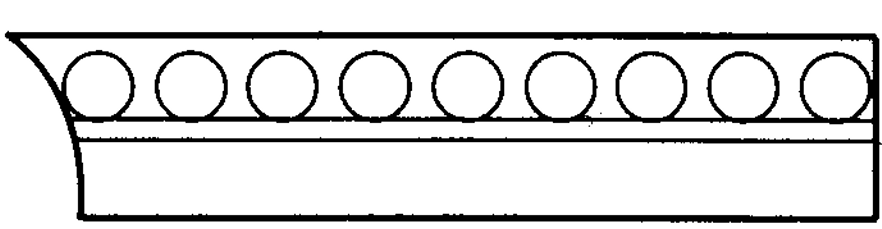
Hook
wear: |
 |
|
Stone
damage: |
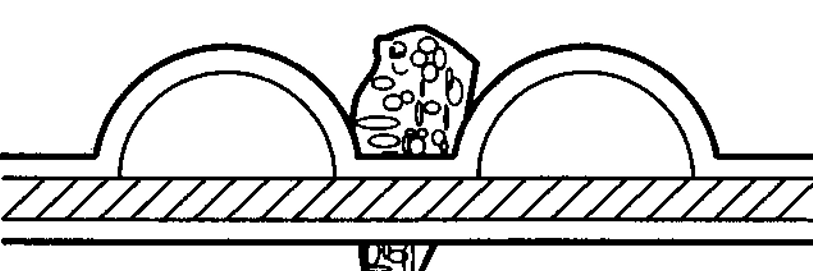 |
|
Bevel
wear (outboard edge only): |
 |
© Copyright Polaris Inc. All rights reserved.