
Content Source: 2021 Indian Heavyweight Owner’s Manual (9931551 R01) > Instruments, Features and Controls Chapter
| IMPORTANT |
|
The Owner's Manual for this vehicle contains warnings, instructions and other information you must read and fully understand before safely riding or performing maintenance on this vehicle.Always follow the warnings and instructions in Owner's Manual. Click the CONTENTS link above for the Table Of Contents, or download a full PDF of the Owner Manual in the Owner Support area of Polaris.com |
| TIP |
| The clock must be reset any time the battery has been disconnected or discharged. |
| NOTICE |
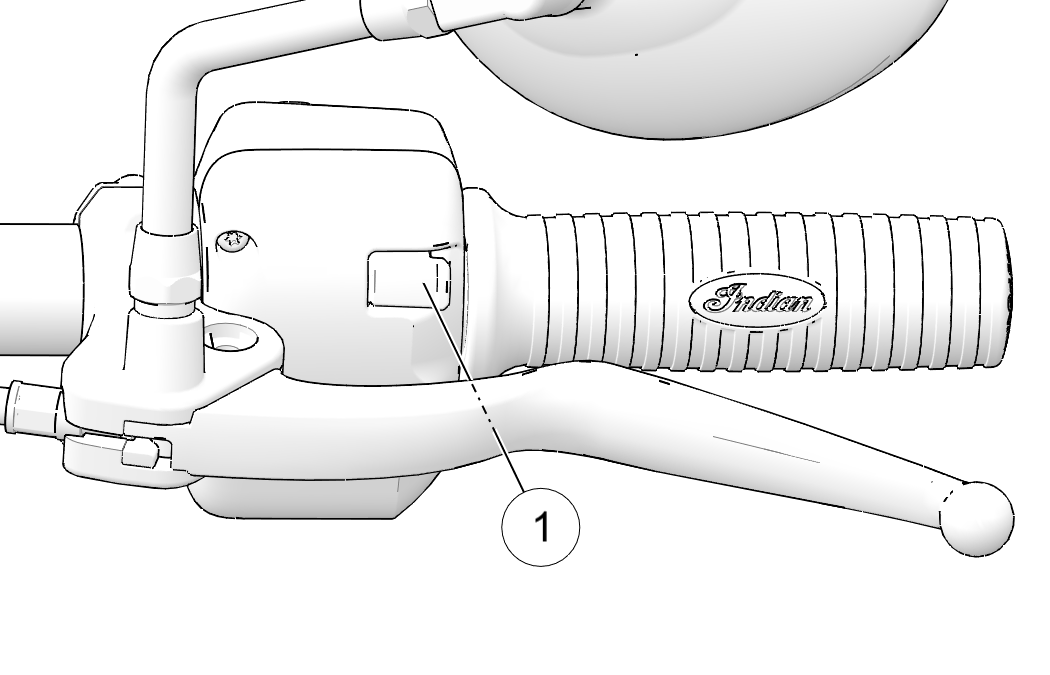
| For models equipped with Ride Command, ride modes can be selected on the display. The following procedure is for models not equipped with Ride Command. |
| NOTICE |
|
Flashing ride mode means ride mode has been requested, but parameters to change the ride mode have not been met (throttle
not in range, etc.)
|
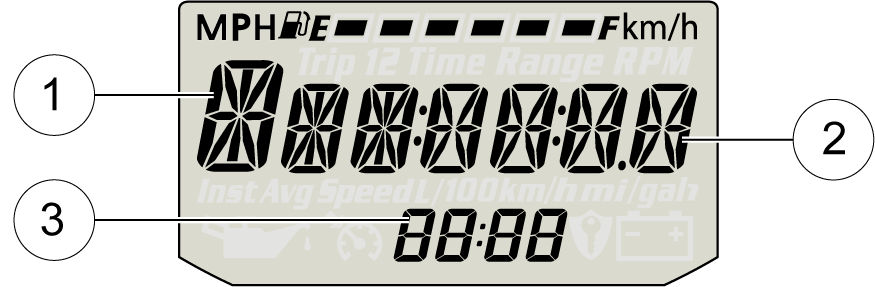
| Standard Display | Metric Display | ||
|---|---|---|---|
| Distance | Miles | Kilometers | |
| Fuel | U.S. Gallons | I = Imperial Gallons | Liter = Liters |
| Temperature | Fahrenheit | Celsius | |
| Time | 12-Hour Clock | 24-Hour Clock | |
| Message | Location | Indicates |
|---|---|---|
| ERROR | All | Checksum error (gauge malfunction) |
| LO (CHIEF/SPRINGFIELD) | DC Voltage Screen | Voltage remains below 11.0 volts for more than 10 seconds |
| OV (CHIEF/SPRINGFIELD) | DC Voltage Screen | Voltage remains above 15.0 volts for more than 10 seconds |
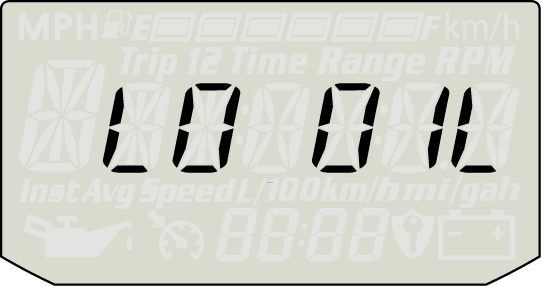
“LO OIL” displays under the following conditions.
| Condition | Indicates | Action Required |
|---|---|---|
| Engine oil pressure has dropped while the engine is running. | Oil pressure is below a safe operating pressure. | Stop the engine as soon as safely possible and check the oil level. If the oil level is sufficient, but “LO OIL” continues to display after restarting the engine, stop the engine immediately. |
© Copyright Polaris Inc. All rights reserved.