
Content Source: 2021 RZR XP / XP4 1000 Owner’s Manual (9931524 R02) > Features and Controls Chapter
| IMPORTANT |
|
The Owner's Manual for this vehicle contains warnings, instructions and other information you must read and fully understand before safely riding or performing maintenance on this vehicle.Always follow the warnings and instructions in Owner's Manual. Click the CONTENTS link above for the Table Of Contents, or download a full PDF of the Owner Manual in the Owner Support area of Polaris.com |
| NOTICE |
| Trails change often, and the trail data file is only considered valid for 90 days after the release date. Please keep your trail data up to date. Download the latest trails at http://ridecommand.polaris.com. |
| NOTICE |
| Using the display for an extended period of time while the vehicle’s engine is off can drain the battery. |
| NOTICE |
| Some cell phones or operating systems will not work as shown in this manual. |
|
This equipment complies with part 15 of the Federal Communications
Commission (FCC) rules.
These requirements are intended to provide reasonable
protection against harmful interference in a residential installation.
This equipment generates,
uses and can radiate radio frequency energy and, if not installed
and used in accordance with the
instructions, may cause
harmful interference to radio communications. However, there is no
guarantee that interference will
not occur in a particular
installation.
If this equipment does cause harmful interference to
radio or television reception, which can be determined by turning
the
equipment off and on,
the user is encouraged to try to correct the interference by one or
more of the following measures:
Changes or modifications to this equipment not expressly
approved by the party responsible for compliance could void the user’s
authority to operate
the equipment.
|
| Component | Component ID | Manufacturer |
|---|---|---|
| 9200 Series Display | RC7 | Polaris Industries Inc. |
| Button | Description | Function |
|---|---|---|
 |
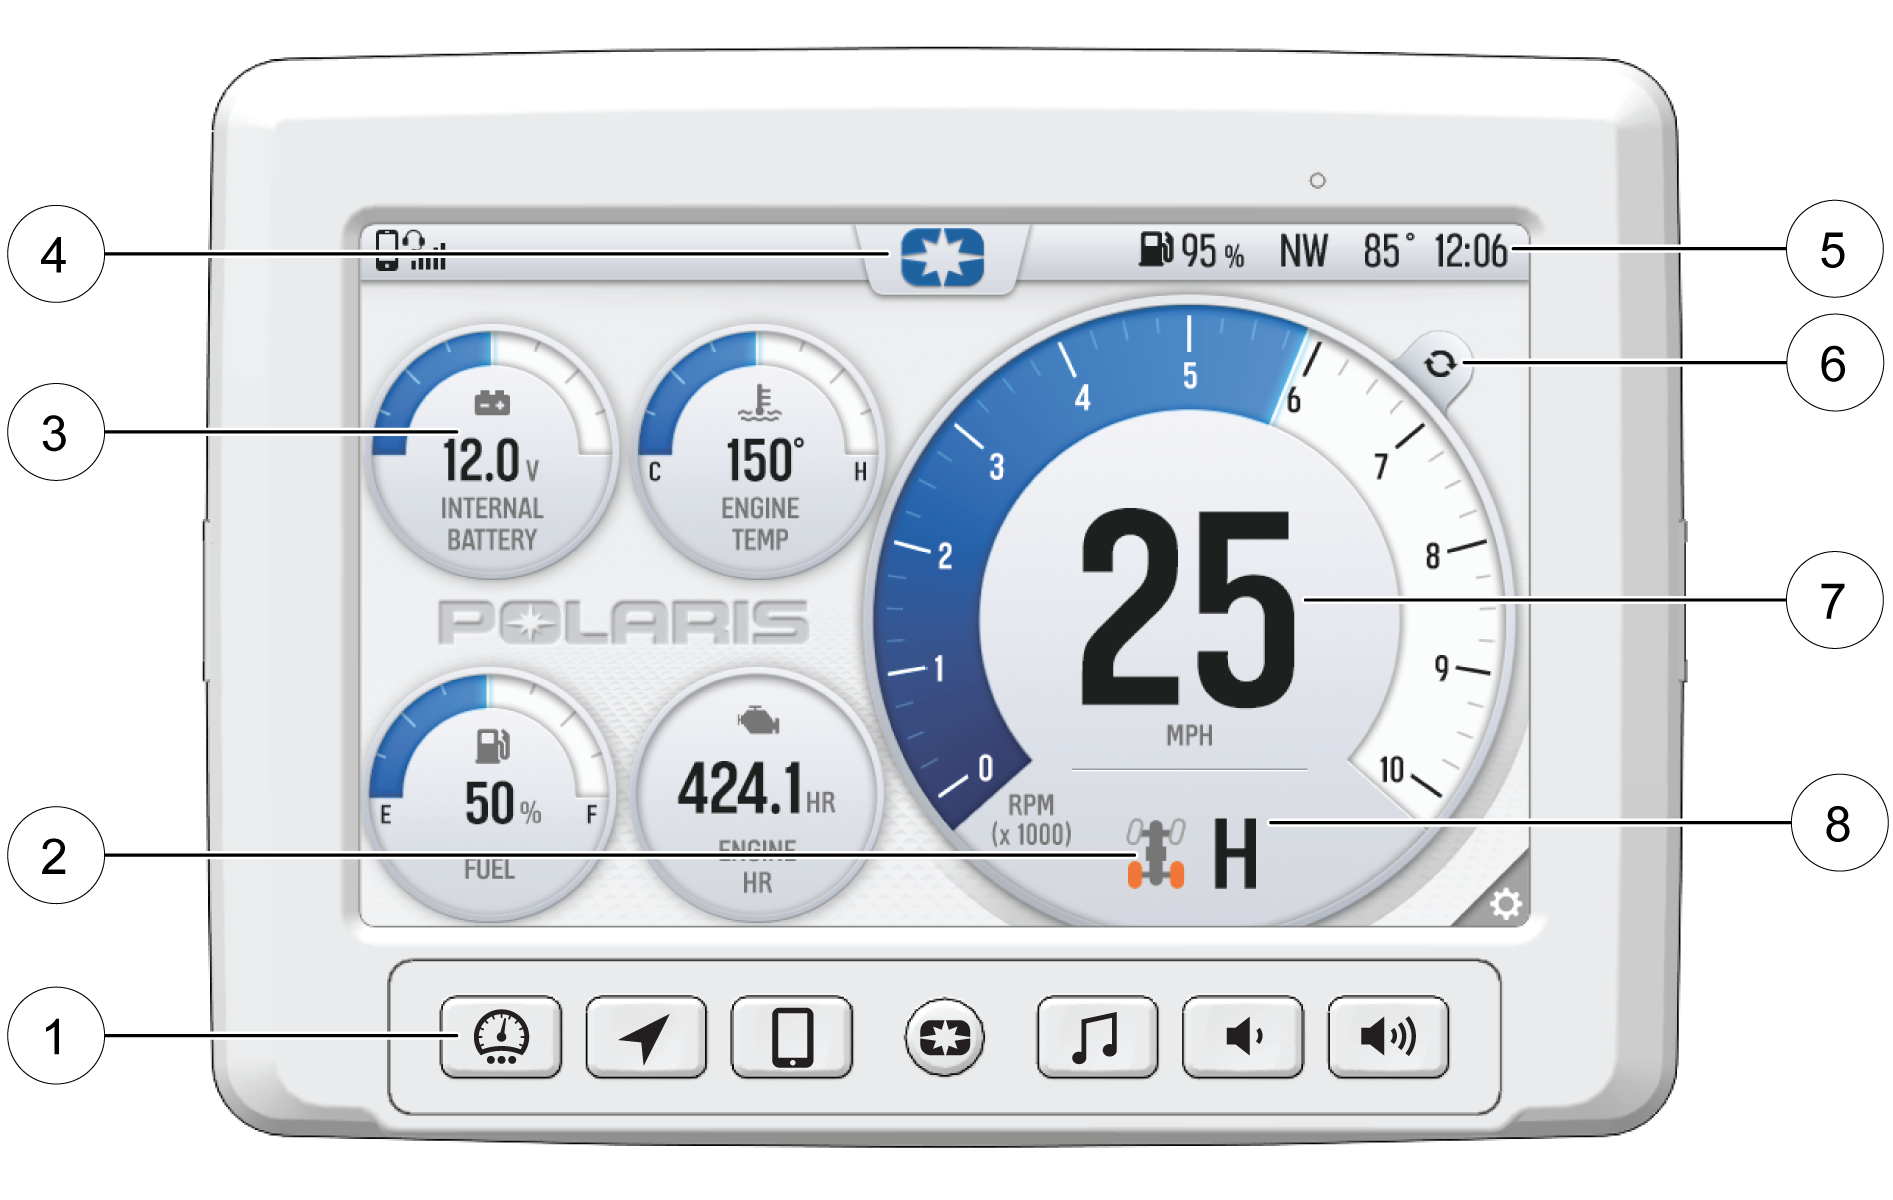
Menu/Power Button | Press the Menu/Power button to access the settings. To reboot the display, press and hold for 5 seconds. |
 |
Gauge Screen Button | Press the Gauge Screen button to select from available screens. |
 |
Map Button | Press the Map button to access the map, manage your rides and waypoints, and to see your friends on the map with Group Ride. |
 |
Phone Button | Press the Phone button to access your Bluetooth® connected phone, including recent calls, contacts, dialer, and messages. |
 |
Audio Button | Press the Audio button to access the Radio, Weather, USB, and connected Bluetooth® music interface |
 |
Volume Decrease Button | Press the Volume Decrease button to decrease the volume. Press and hold to mute volume. |
 |
Volume Increase Button | Press the Volume Increase button to increase the volume. |
| Indicator | Description | Function |
|---|---|---|
 |
2WD | When the switch is on 2X4, the vehicle is in two-wheel drive at all times. |
 |
AWD | When in All-Wheel Drive, the demand drive unit will automatically engage any time the rear wheels lose traction. When the rear wheels regain traction, the demand drive unit will automatically disengage. There is no limit to the length of time the vehicle may remain in 4X4. The vehicle automatically engages 4X4 when operating in reverse if the switch is set to 4X4 position. |
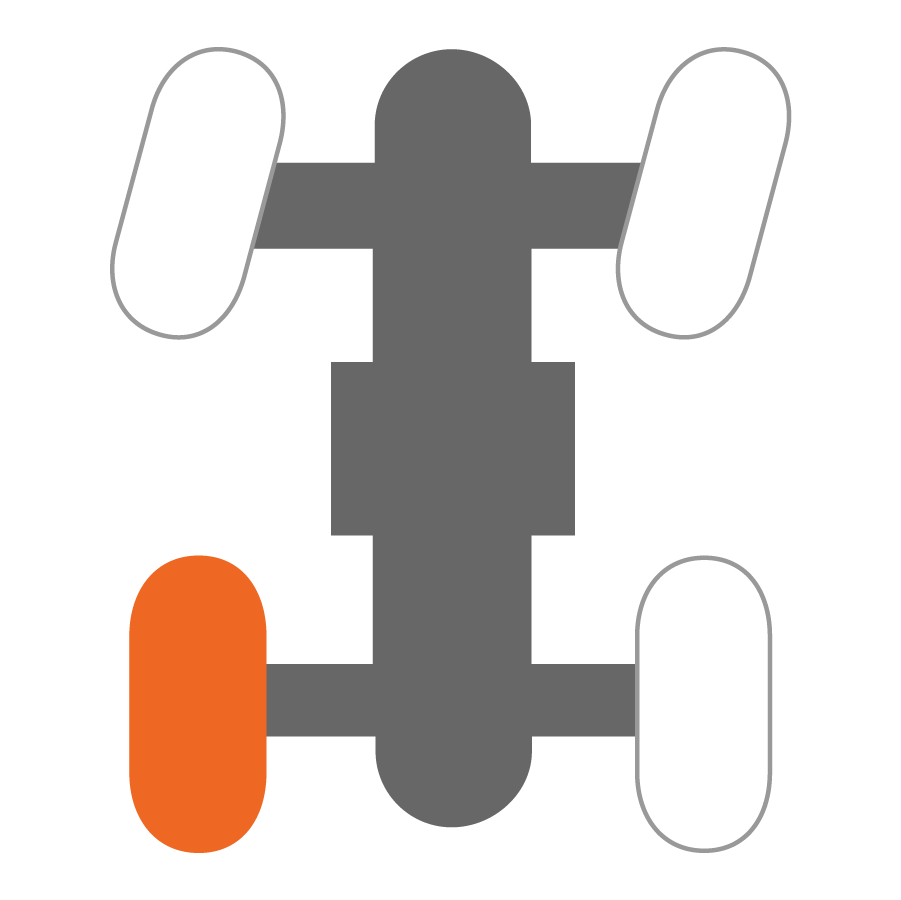 |
Turf Mode (if equipped) | When operating in TURF mode, the inside rear wheel will rotate independently from the outside wheel during turns. Operate in TURF mode only as needed to protect smooth, level surfaces from tire damage. DO NOT operate in TURF mode when climbing or descending hills, when sidehilling, or when operating on uneven, loose, or slippery terrain such as sand, gravel, ice, snow, obstacles, and water crossings. Always operate in AWD on these types of terrain. |
Each gauge screen is customizable and can be set up in the following configurations:
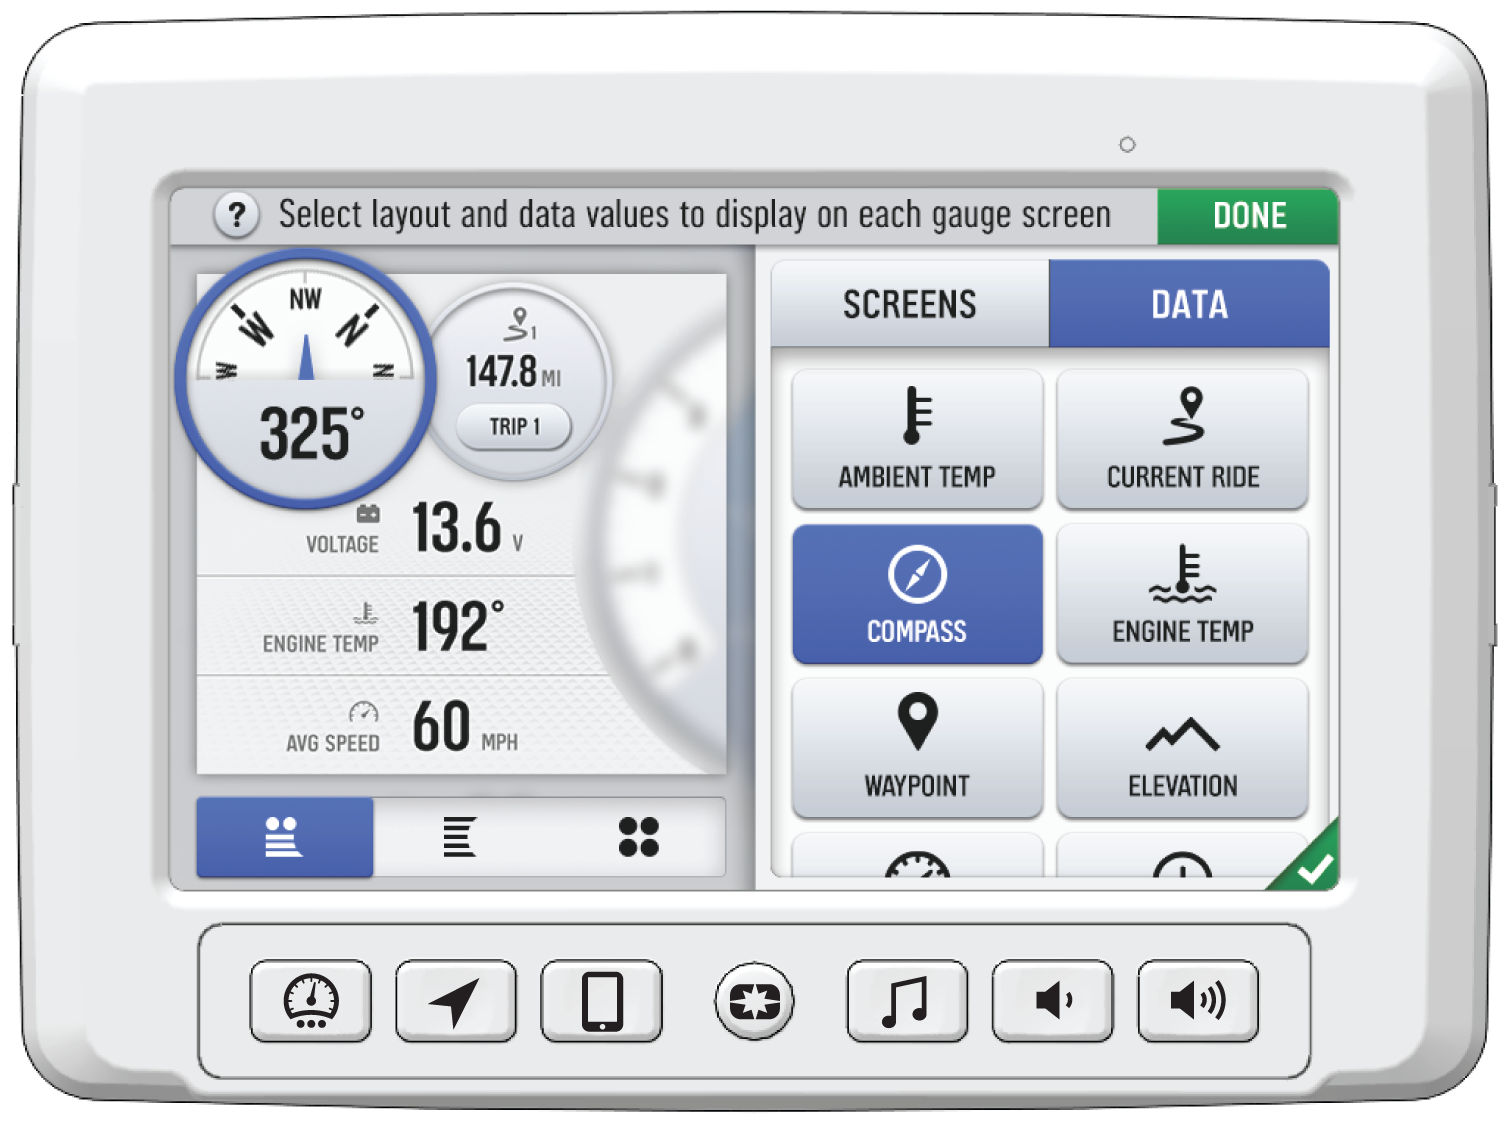
To access the Setting
menu, press the Menu/Power button ![]() .
.
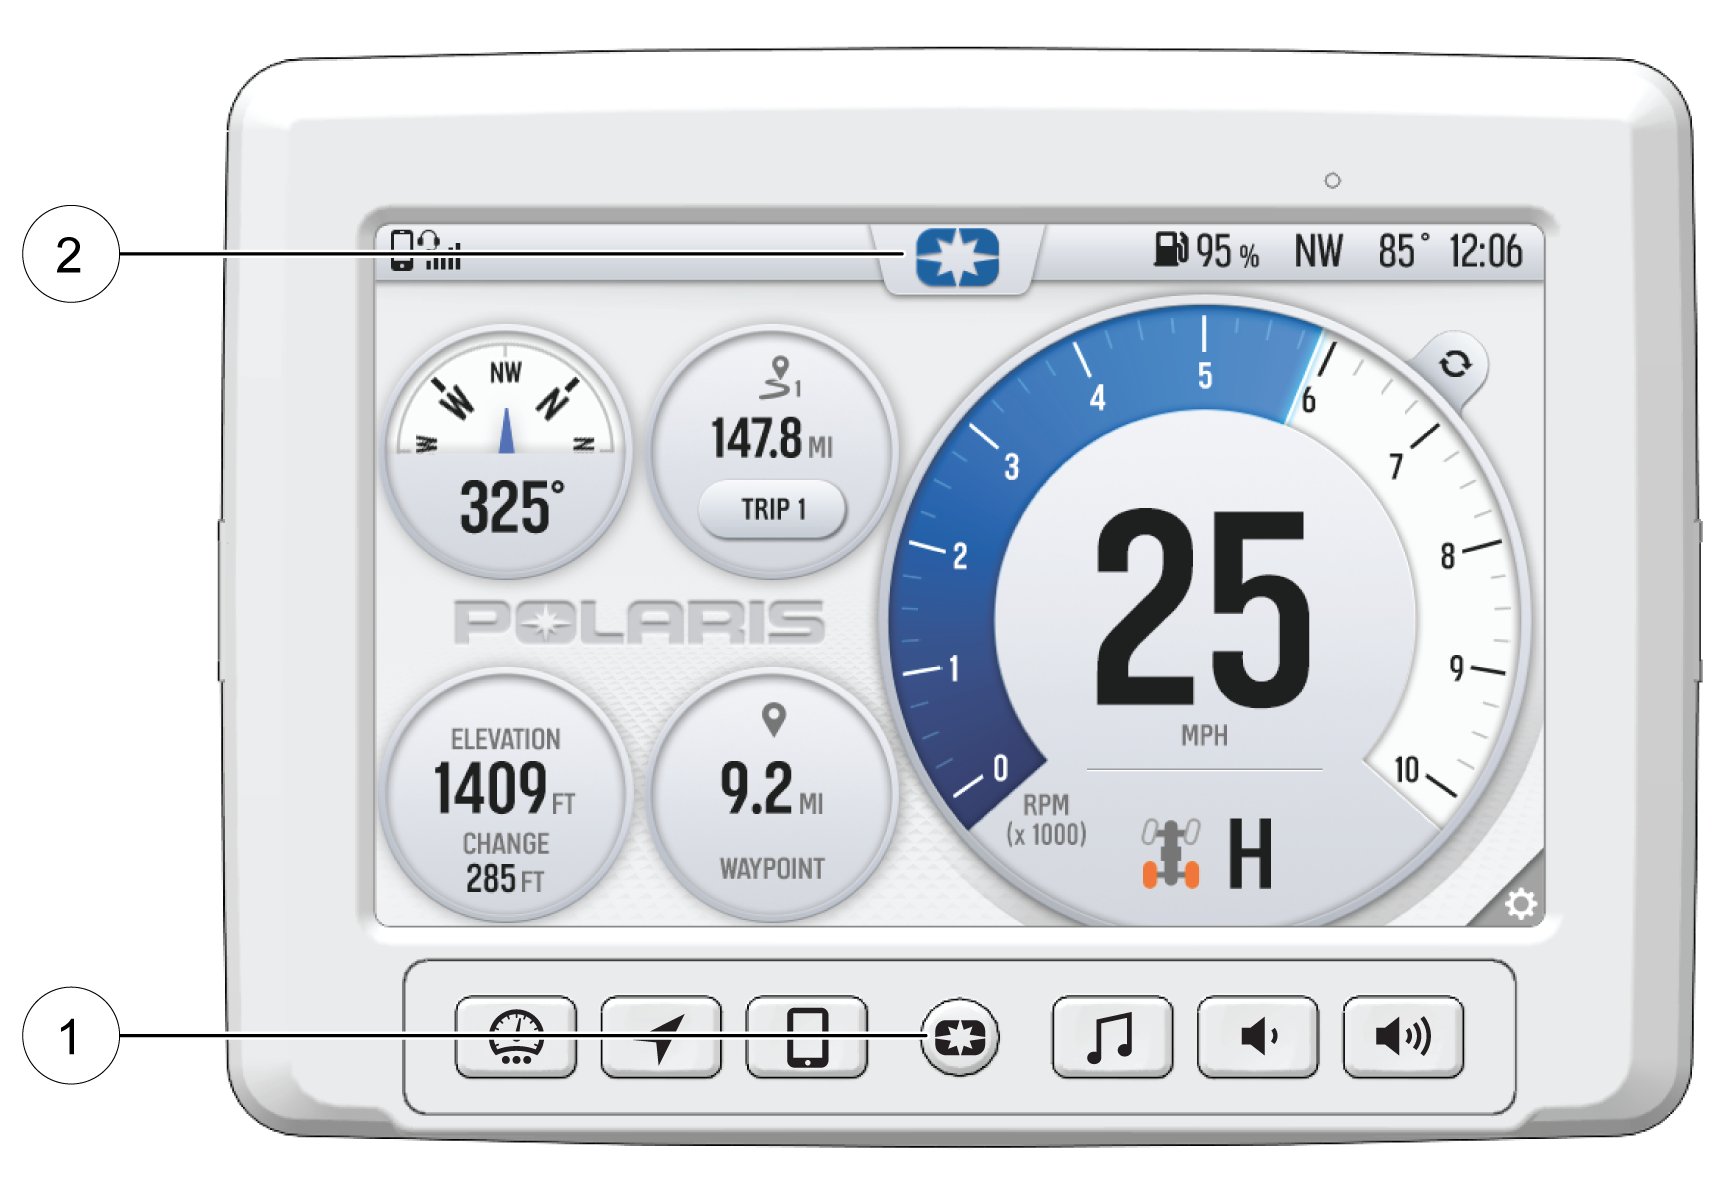
You can also navigate to the settings menu by pressing
the POLARIS logo at the top of the display screen ![]() . This will open the Control Panel. From the Control
Panel, select the settings tab, then press the All Settings button located in the lower right
corner of the display screen.
. This will open the Control Panel. From the Control
Panel, select the settings tab, then press the All Settings button located in the lower right
corner of the display screen.
Press ![]() to toggle between the two available gauge view modes, Analog and Digital.
to toggle between the two available gauge view modes, Analog and Digital.
While
in the digital gauge view mode, press ![]() to invert the MPH
and RPM units.
to invert the MPH
and RPM units.

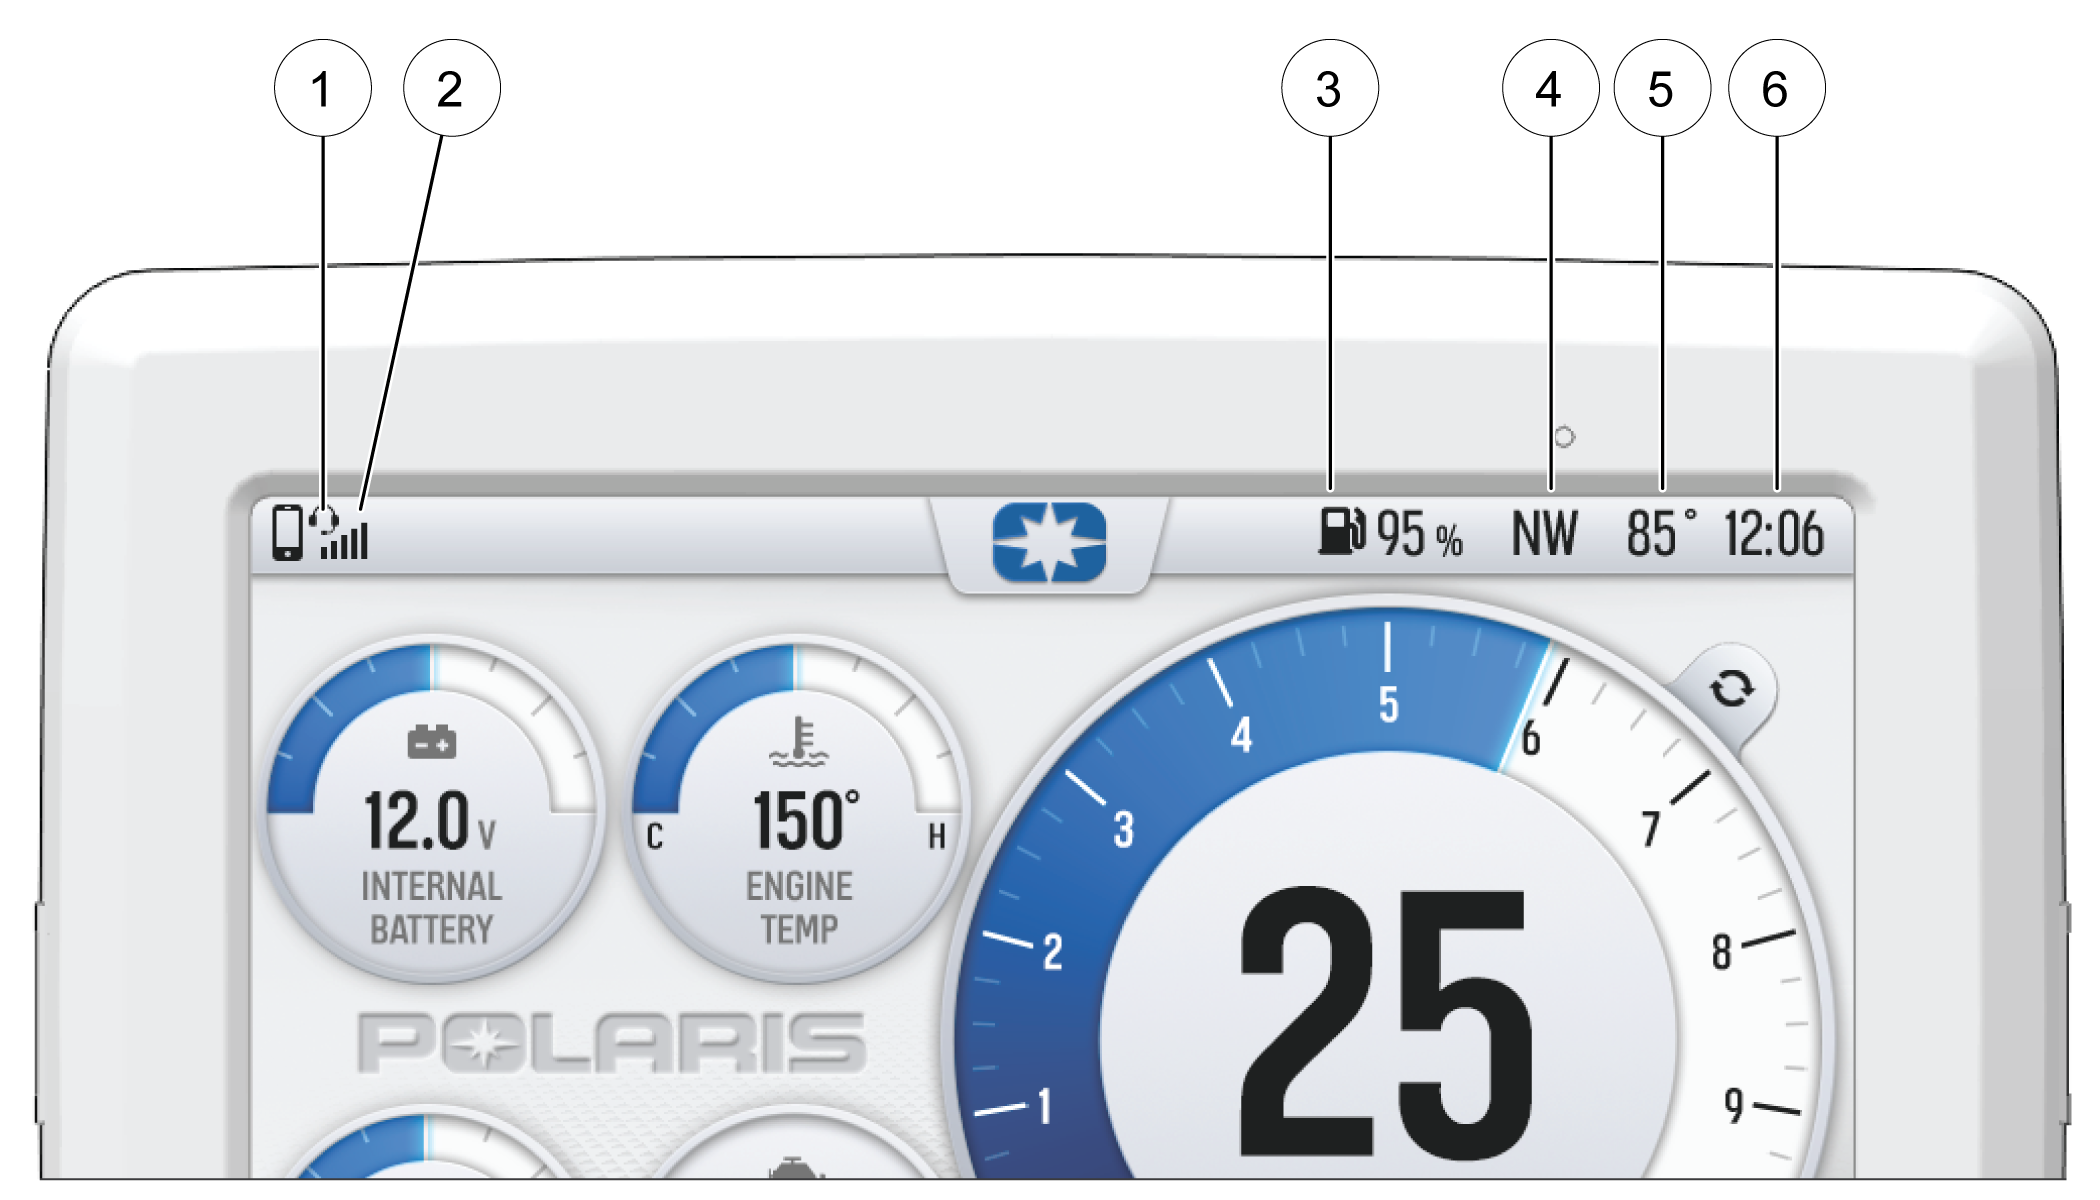
| Icon | Description | Function |
|---|---|---|
| Headset | Displays icon if headset is connected | |
| Signal Strength | Displays current cell signal strength | |
| Fuel Level | Displays current fuel capacity percentage | |
| Vehicle Direction | Displays vehicle direction | |
| Ambient Temperature | Displays ambient temperature | |
| Clock | Displays current time |
| NOTICE |
| Before updating the Display, always export your existing rides and waypoints to a USB drive to avoid losing them. |
© Copyright Polaris Inc. All rights reserved.