
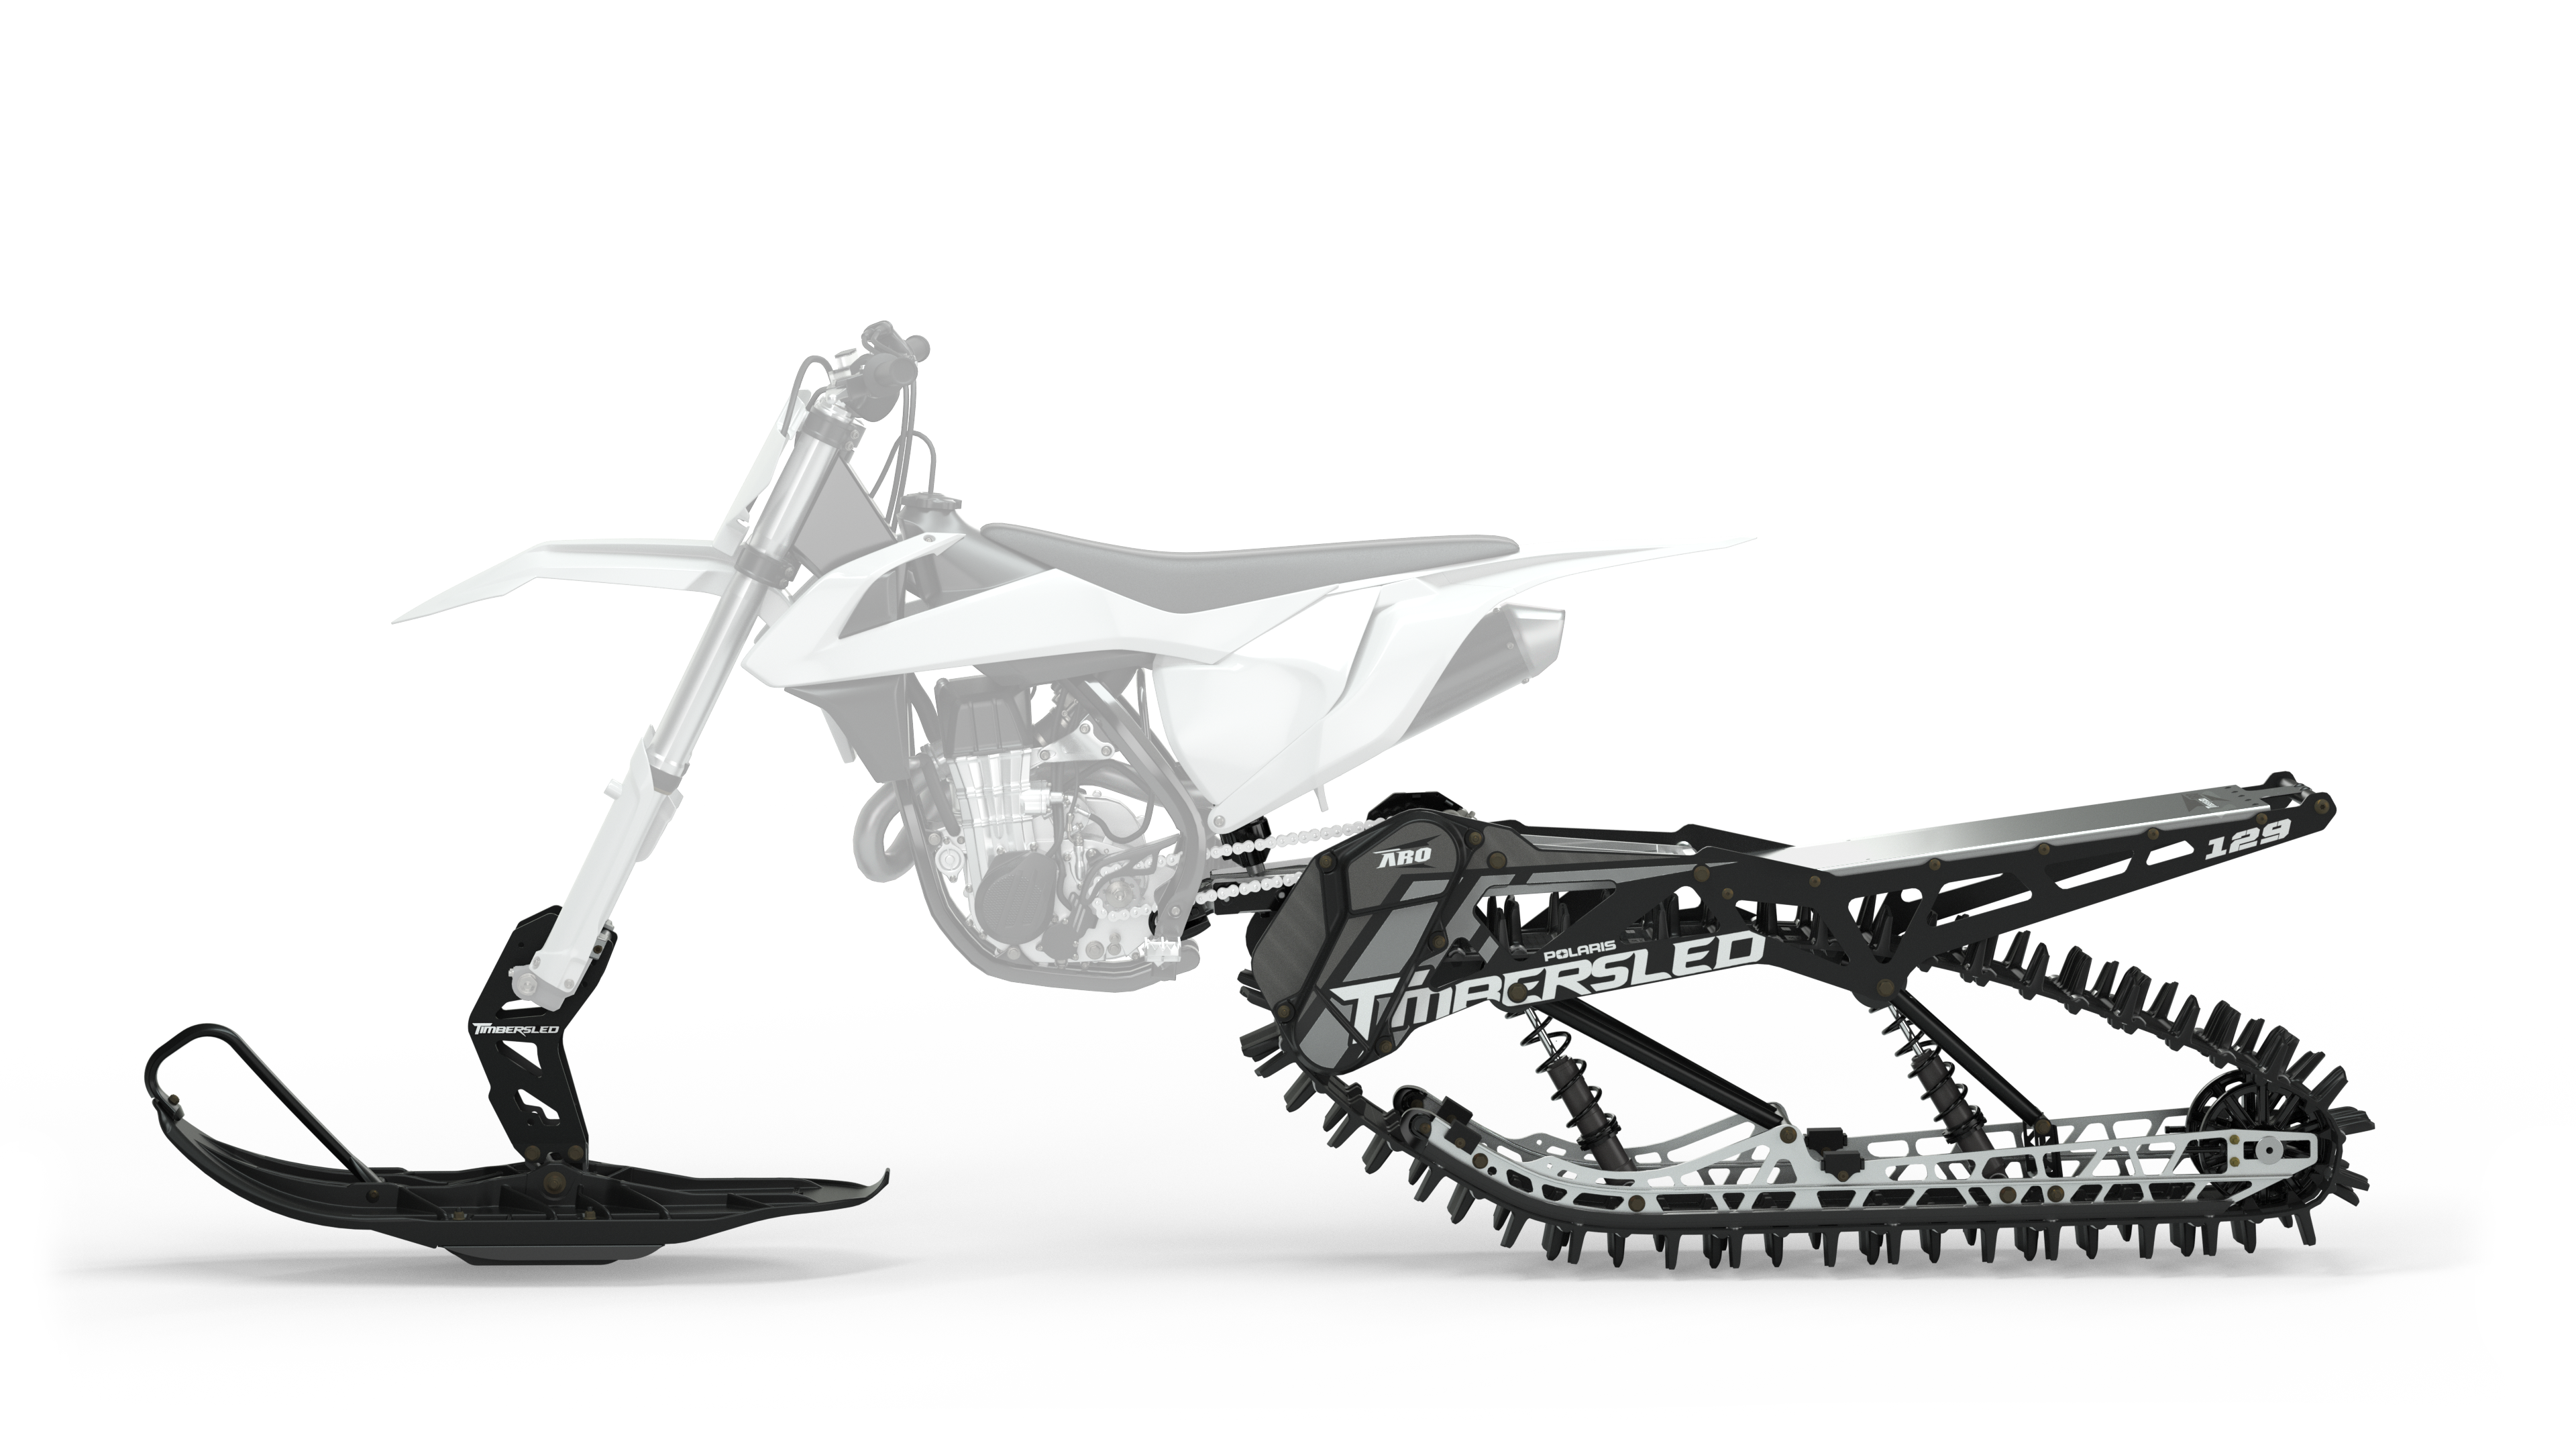
Content Source: 2021 Timbersled SX 120 / ARO / RIOT Owner’s Manual (9931501 R01) > The Perfect Fit Chapter
| IMPORTANT |
|
The Owner's Manual for this vehicle contains warnings, instructions and other information you must read and fully understand before safely riding or performing maintenance on this vehicle.Always follow the warnings and instructions in Owner's Manual. Click the CONTENTS link above for the Table Of Contents, or download a full PDF of the Owner Manual in the Owner Support area of Polaris.com |
| IMPORTANT |
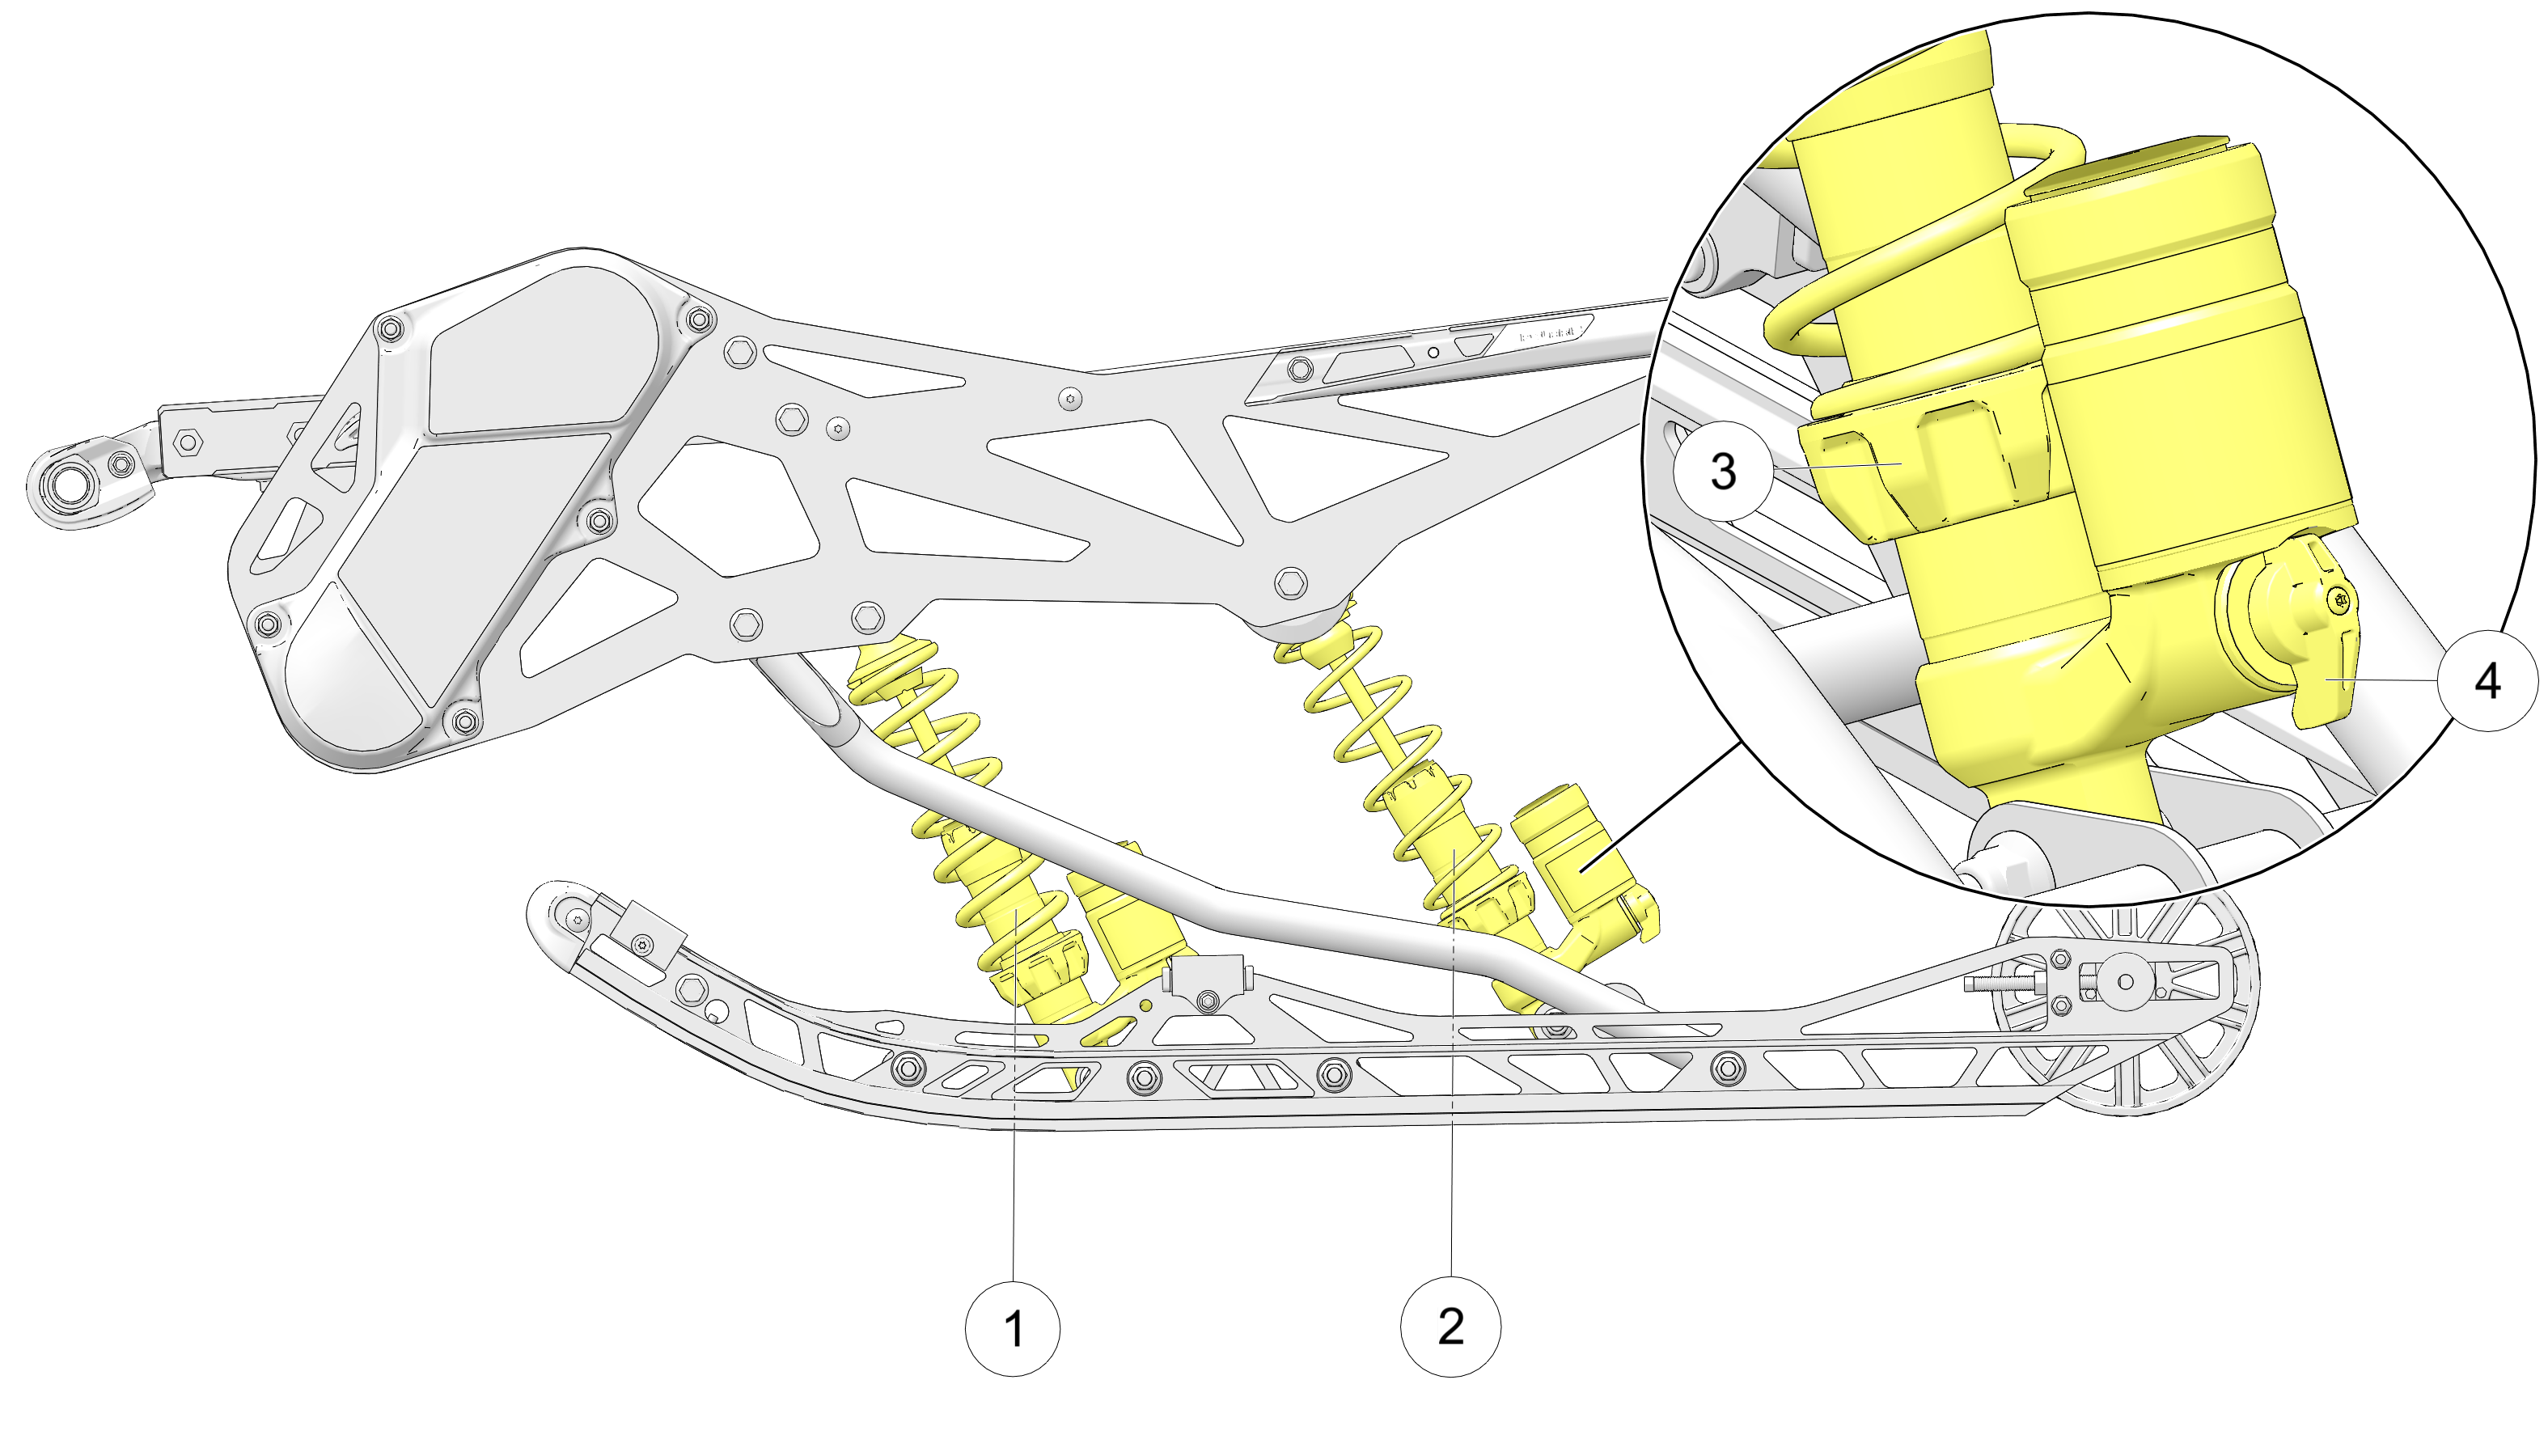
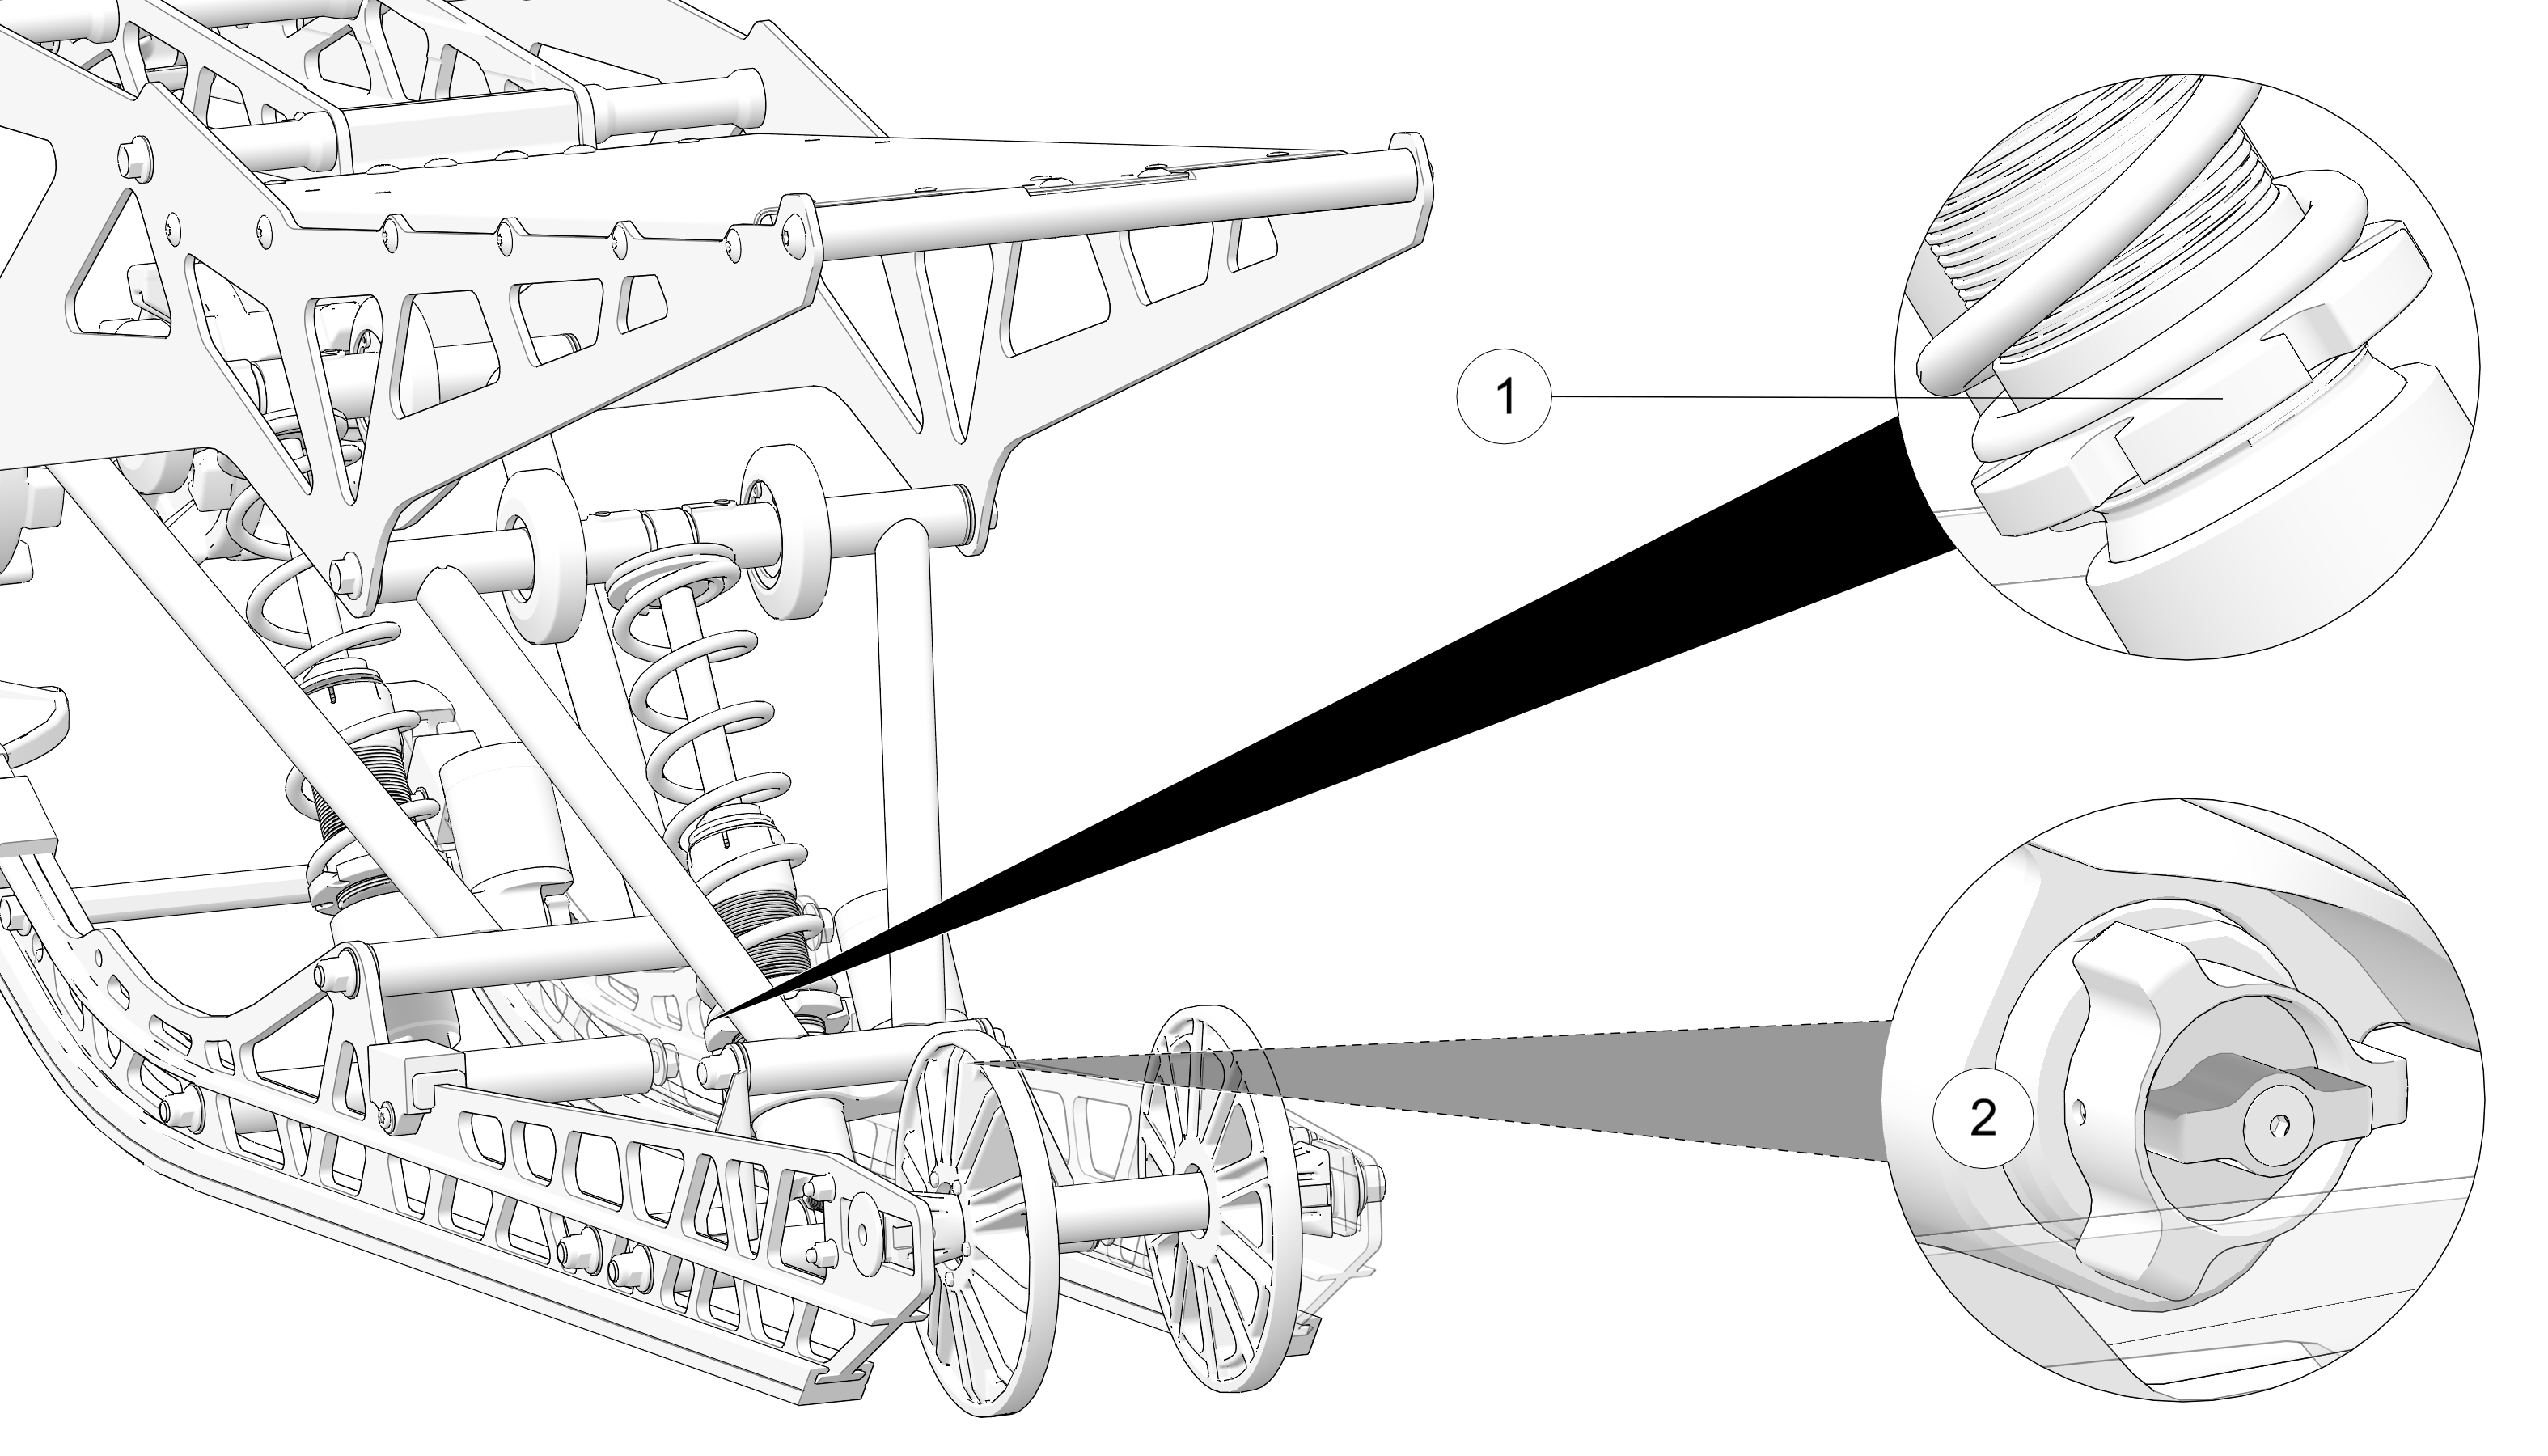
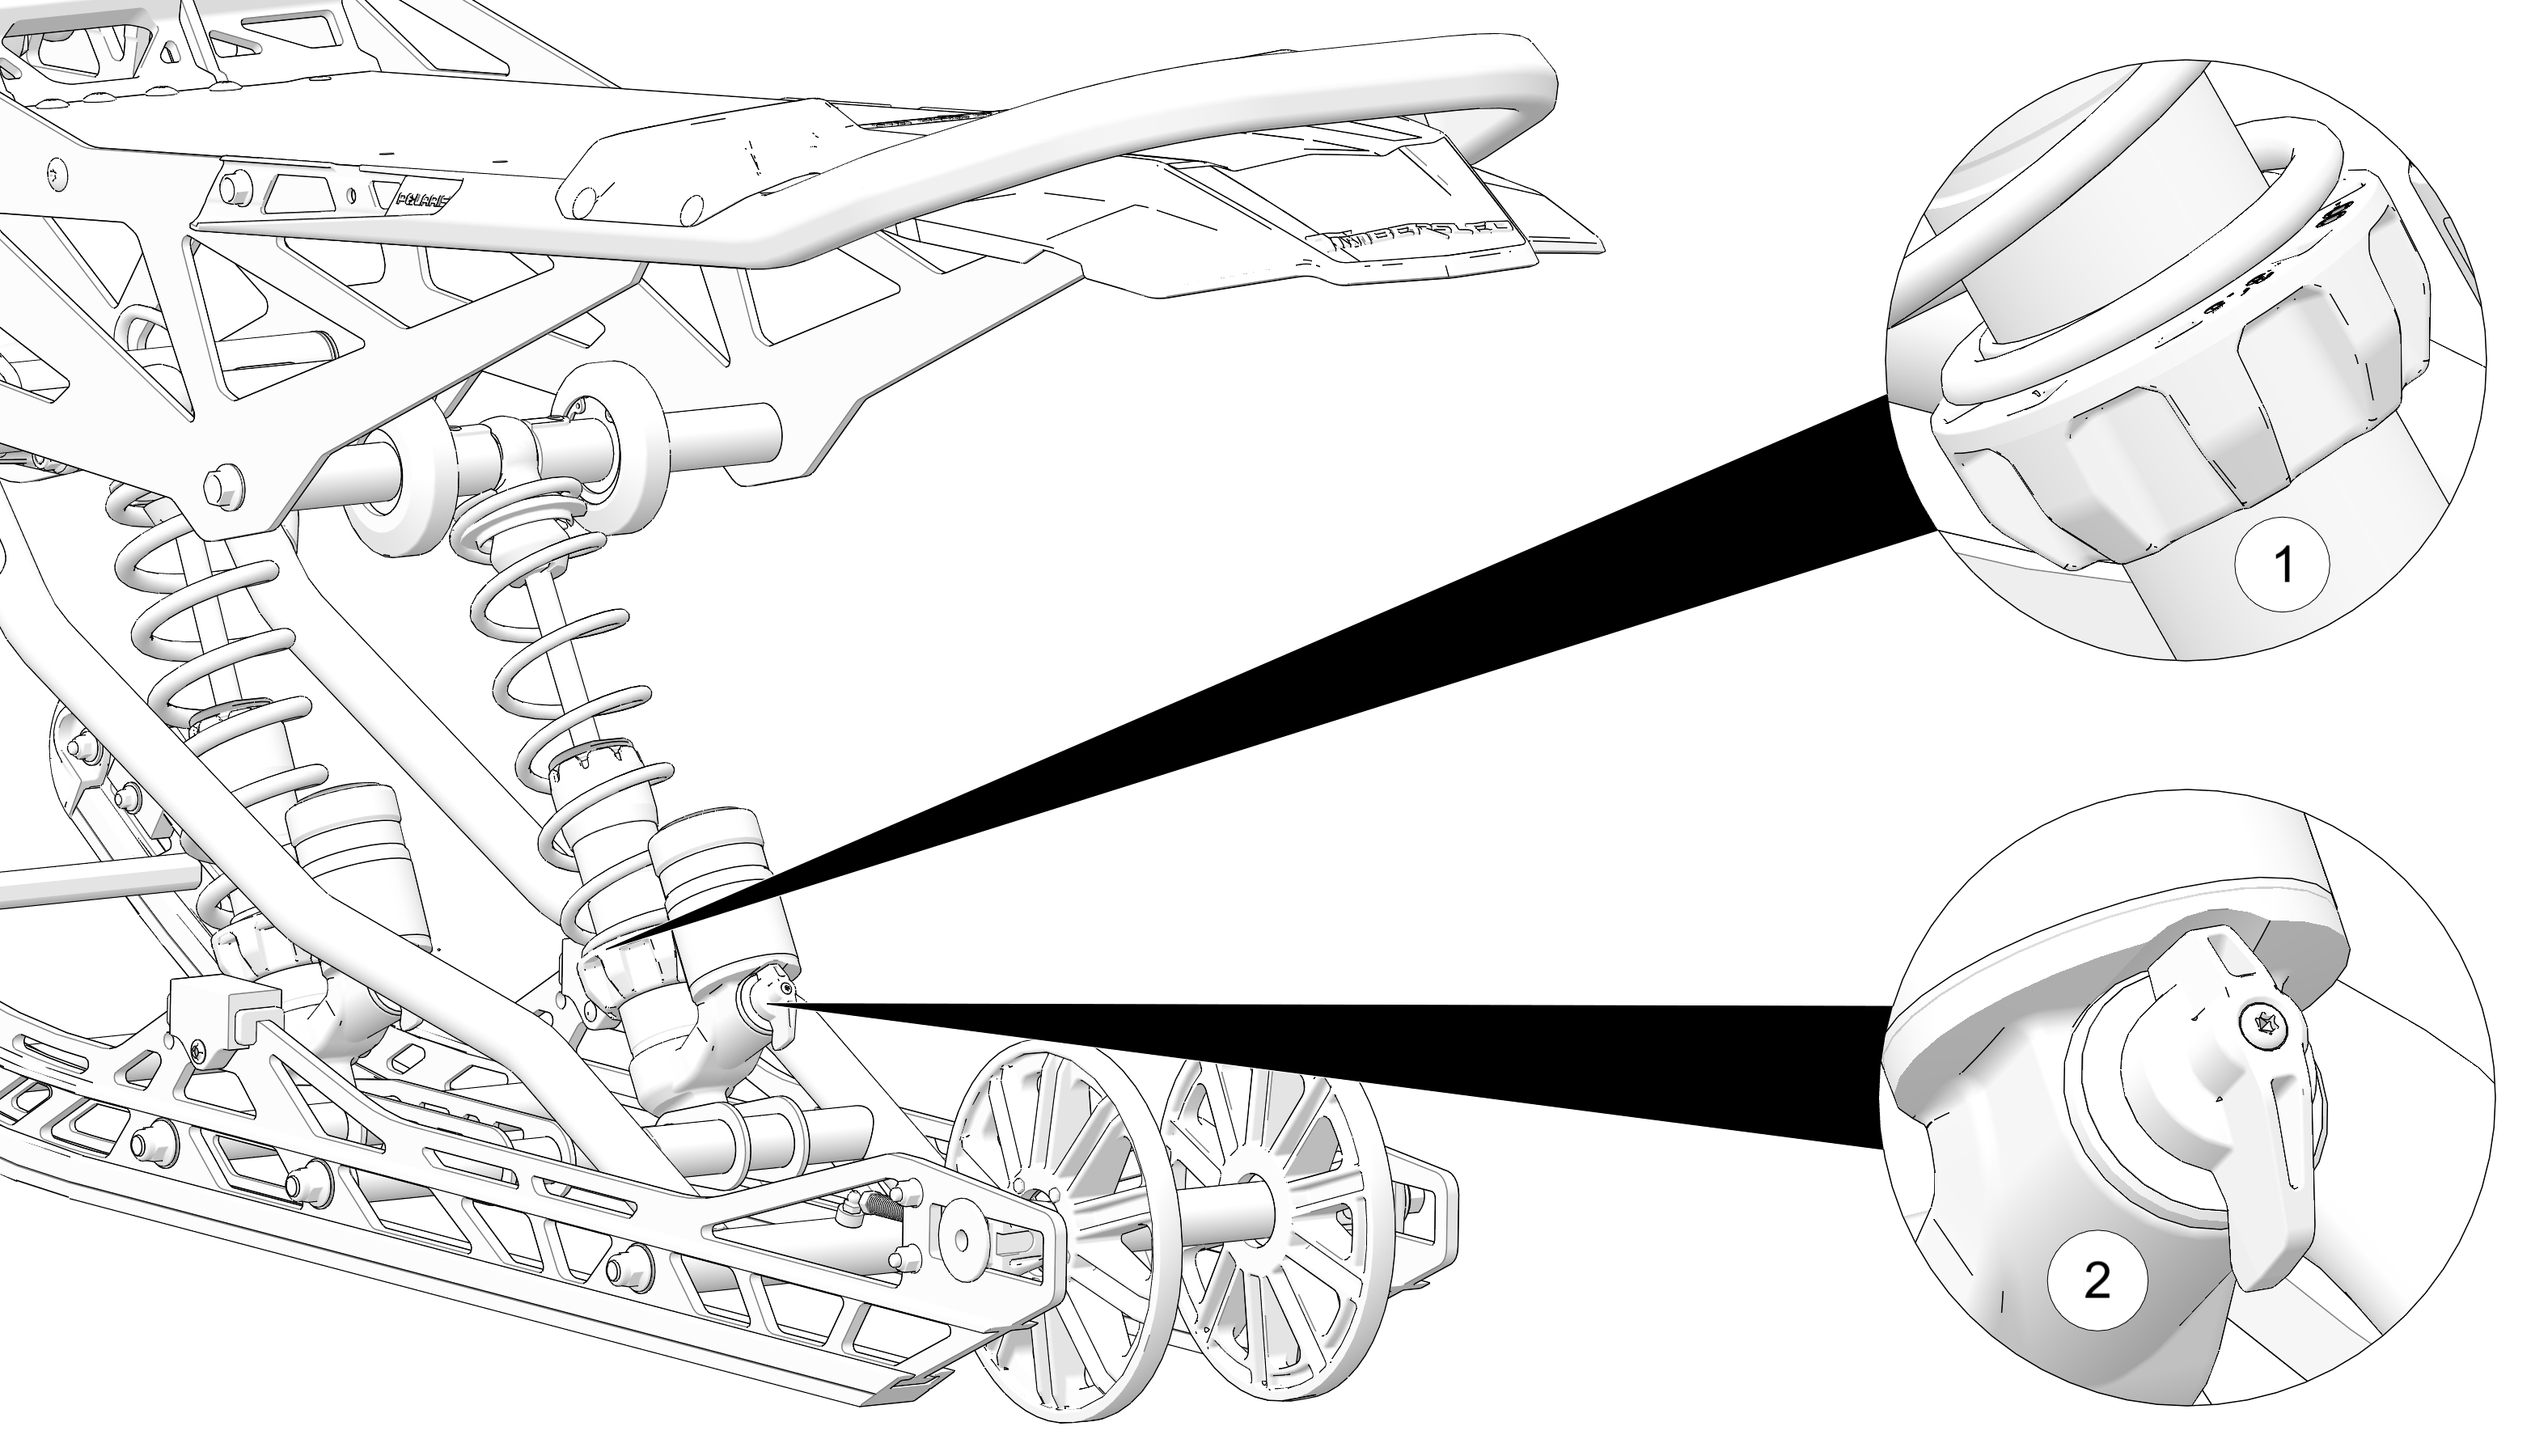
| Prior to adjusting spring preload, always lay the snow bike on it’s side or elevate it off the ground. The shocks must be fully extended for proper preload adjustment. |
|
DO NOT EXCEED the MIN / MAX preload values (defined by the tables in this section). Never adjust spring preload shorter than
the minimum allowable length. Adjusting shorter than this length could result in damage to the suspension. Failure to comply
may result in injury or damage to equipment.
|
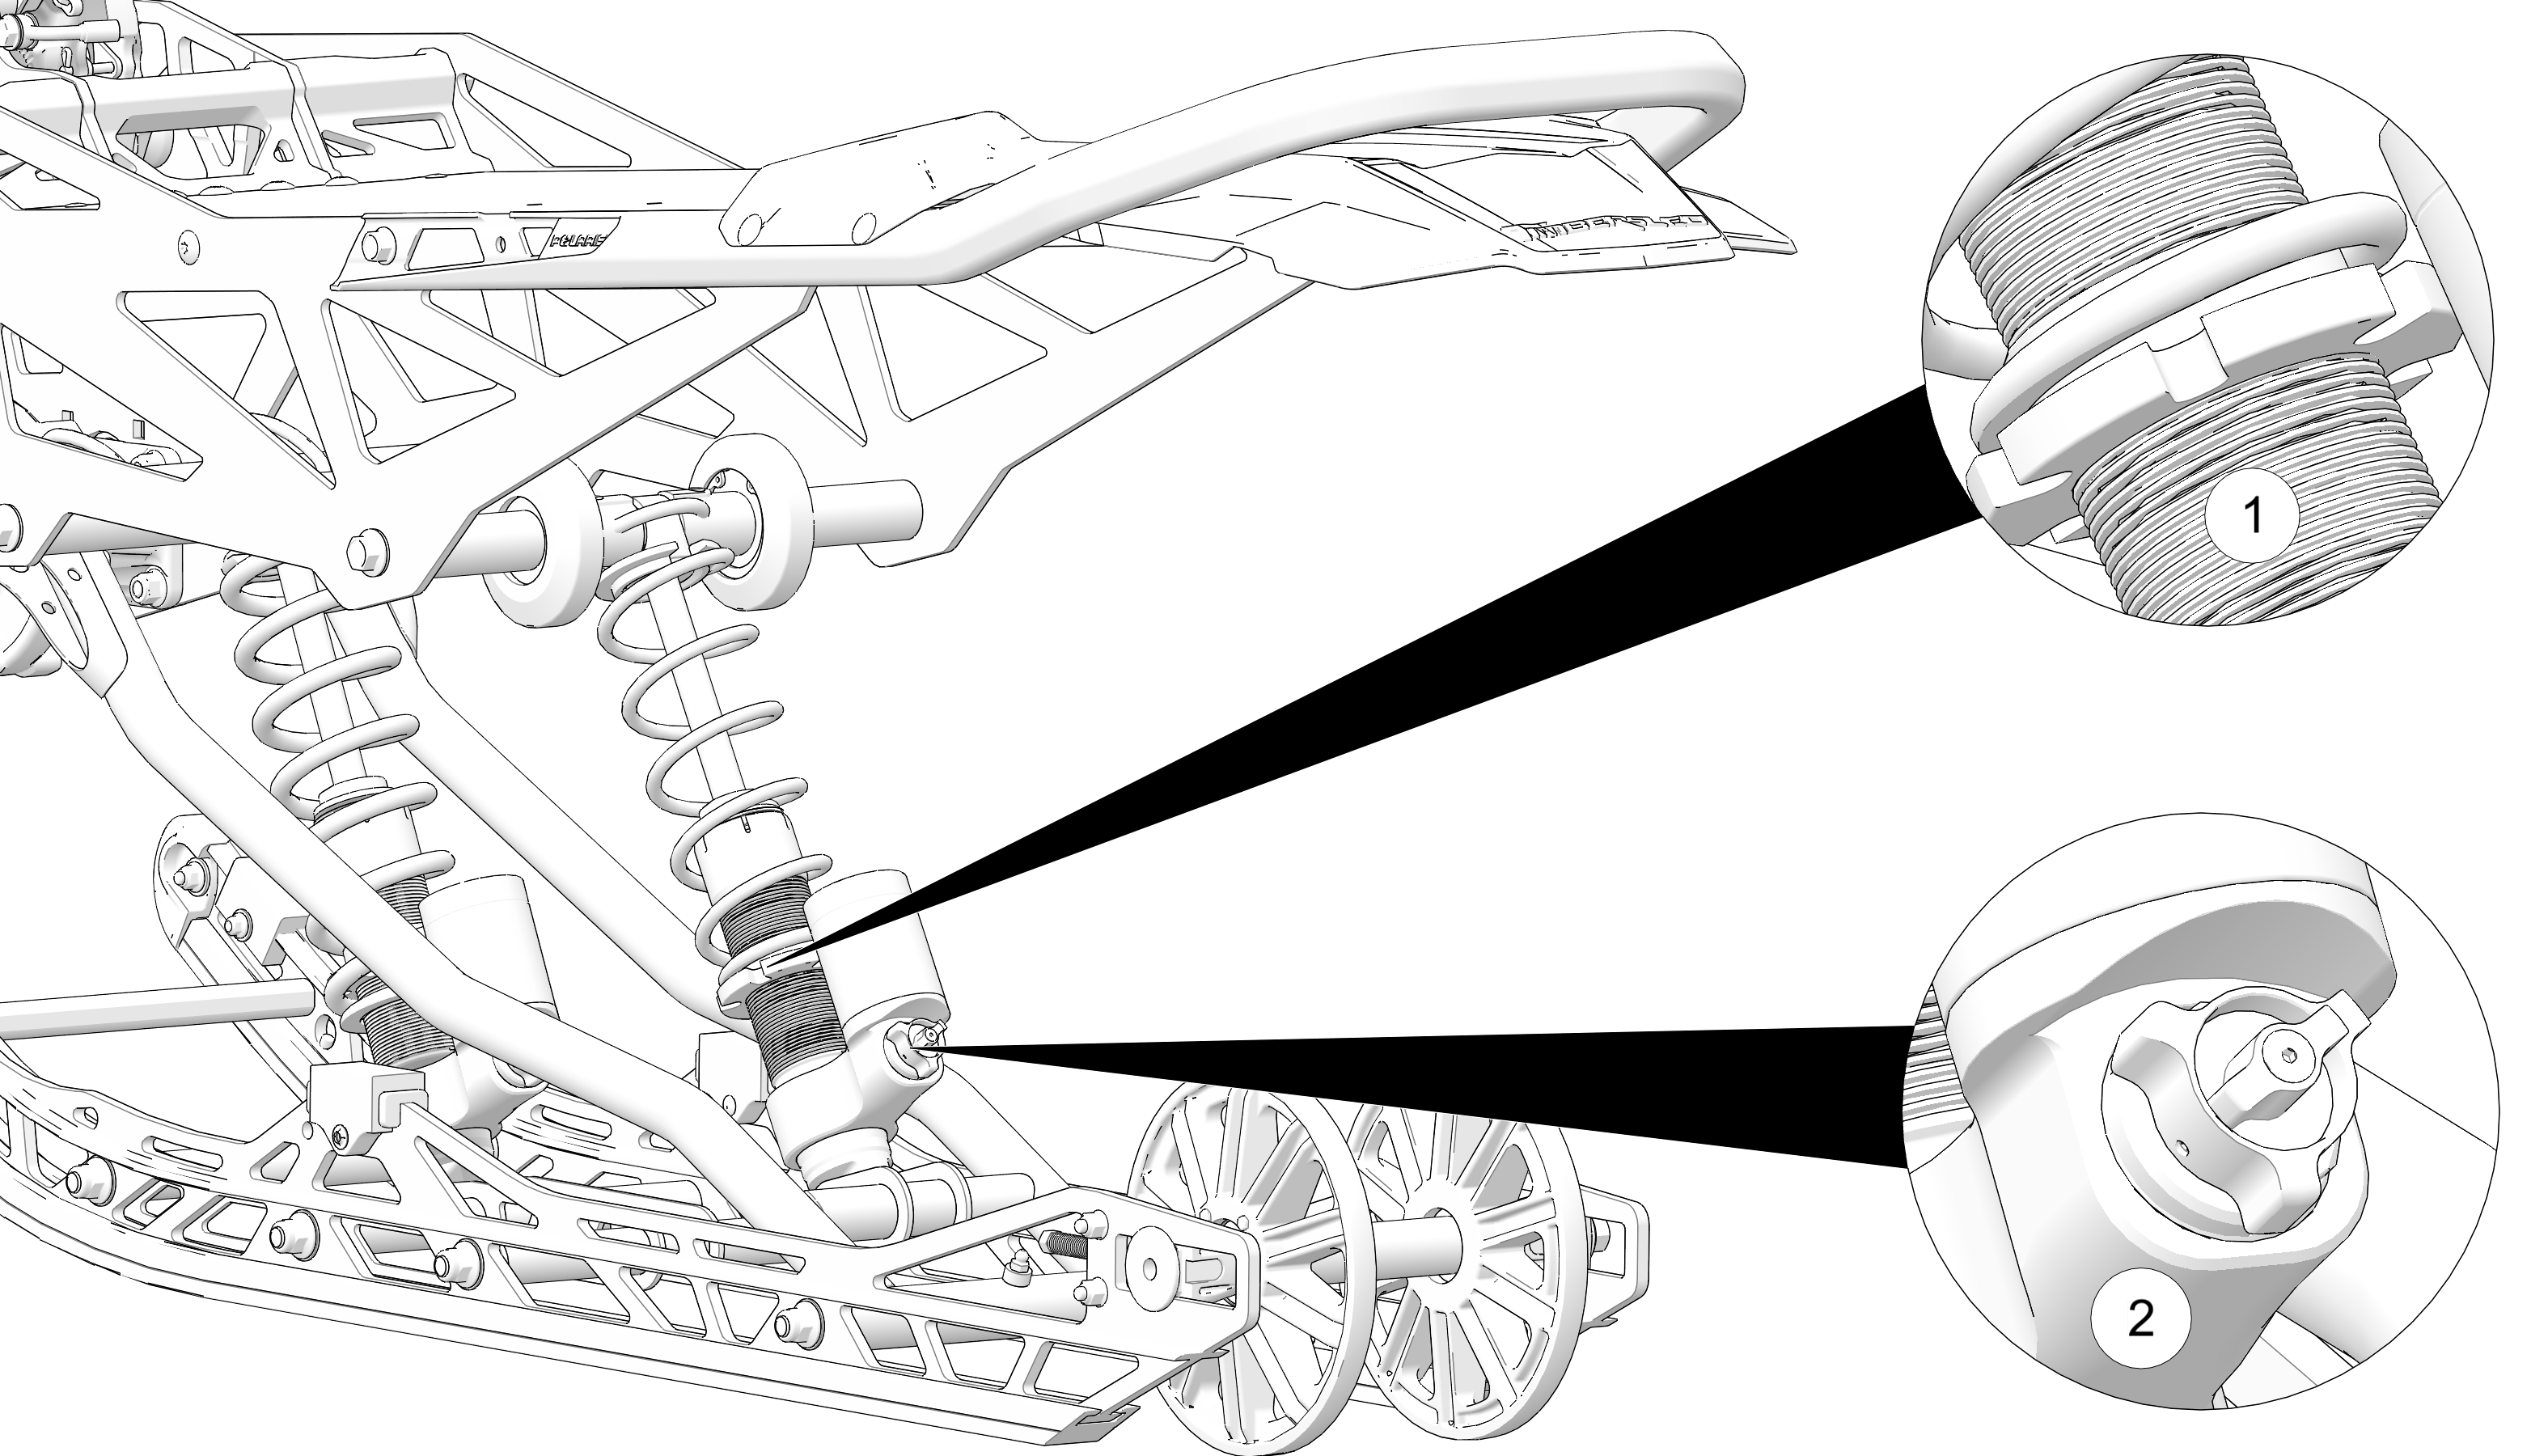
| NOTICE |
| Always perform shock spring preload adjustments with the weight of the vehicle removed from the shock and the shock is at full extension. Make spring preload adjustments in small increments (approximately 1/16th of an inch) and test ride quality between adjustments. |
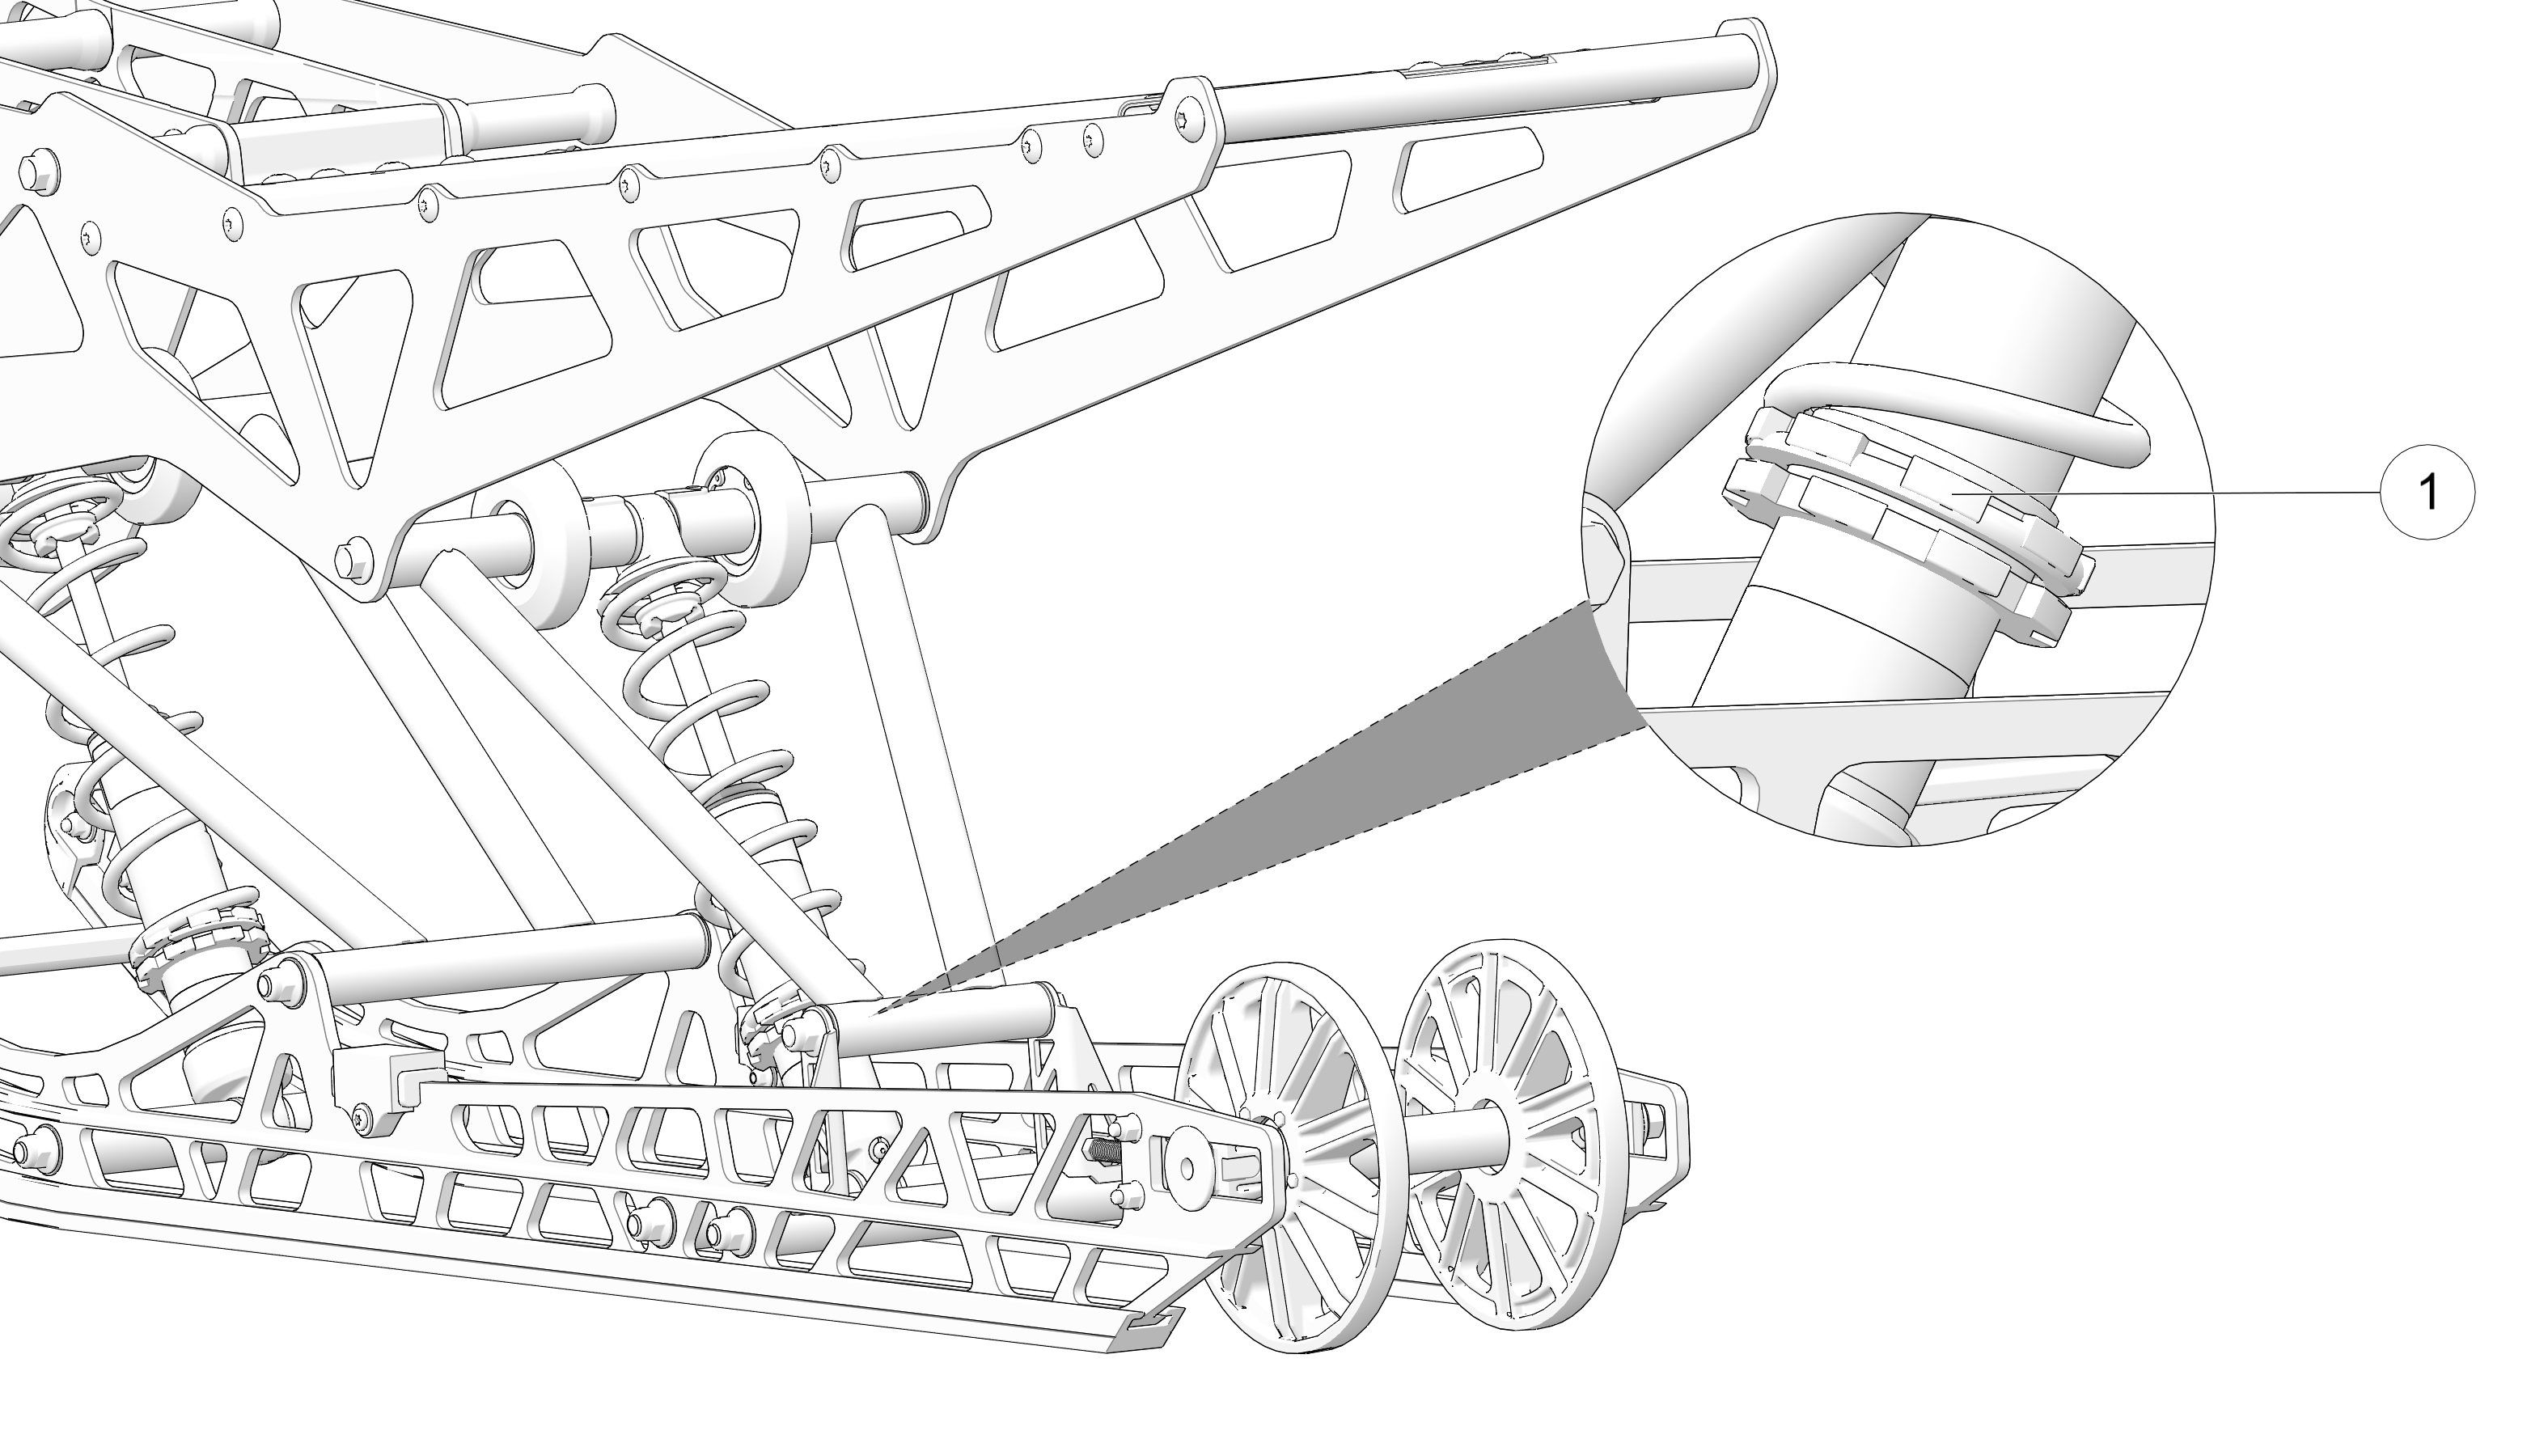
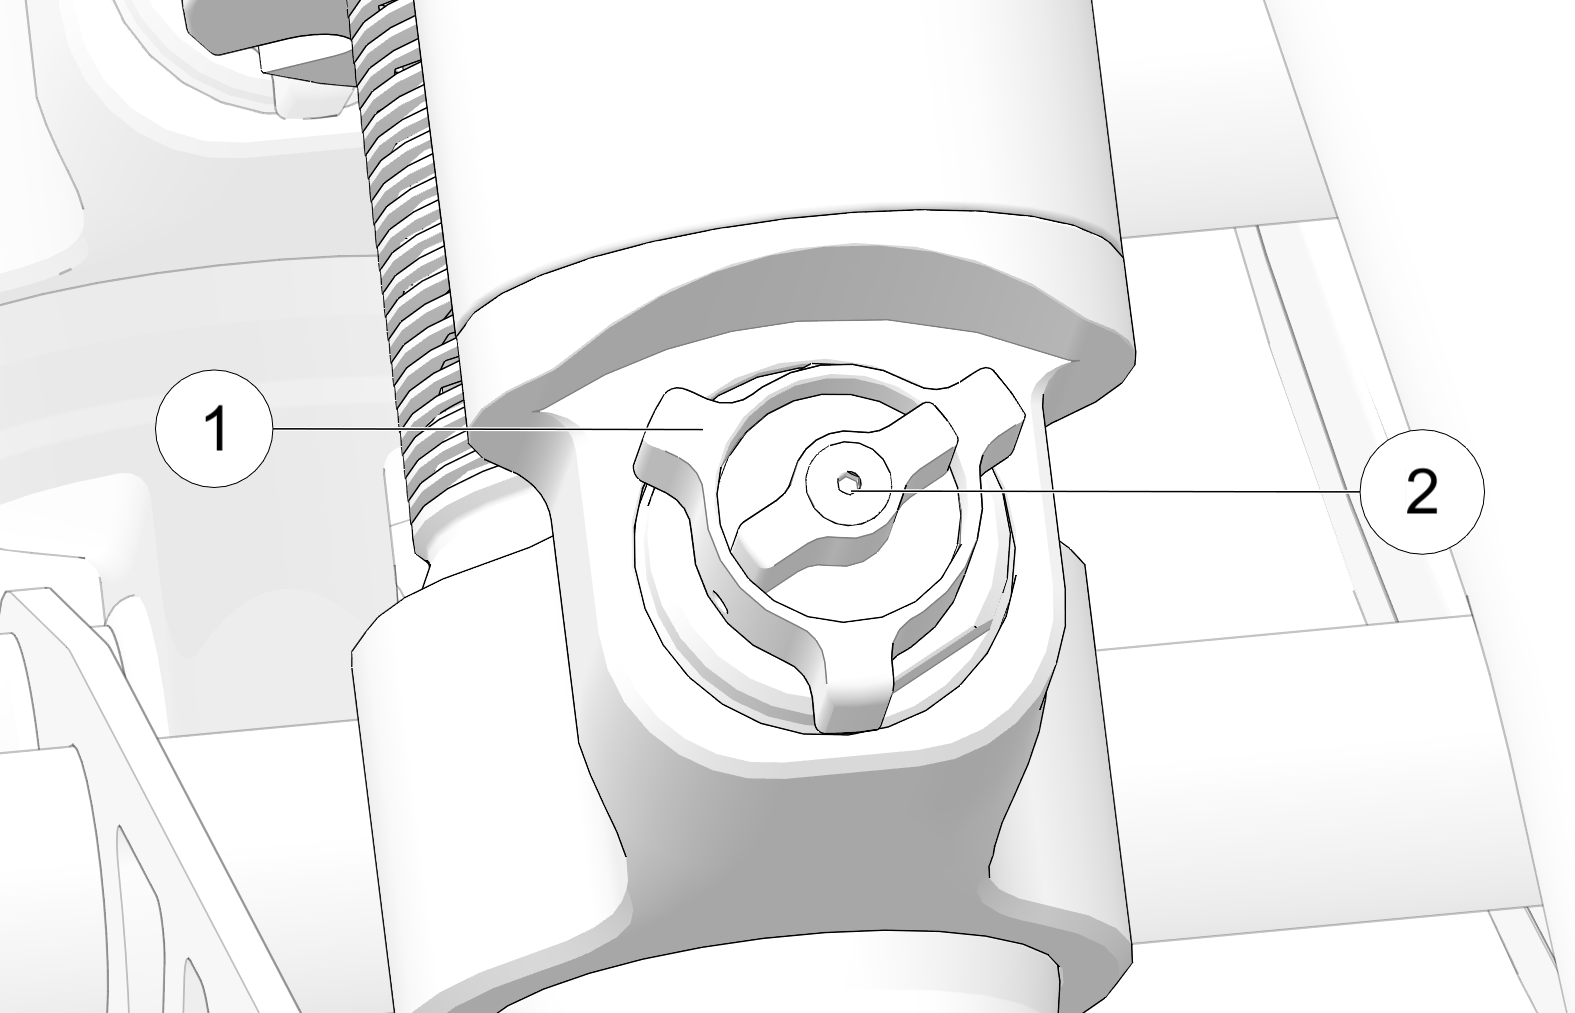
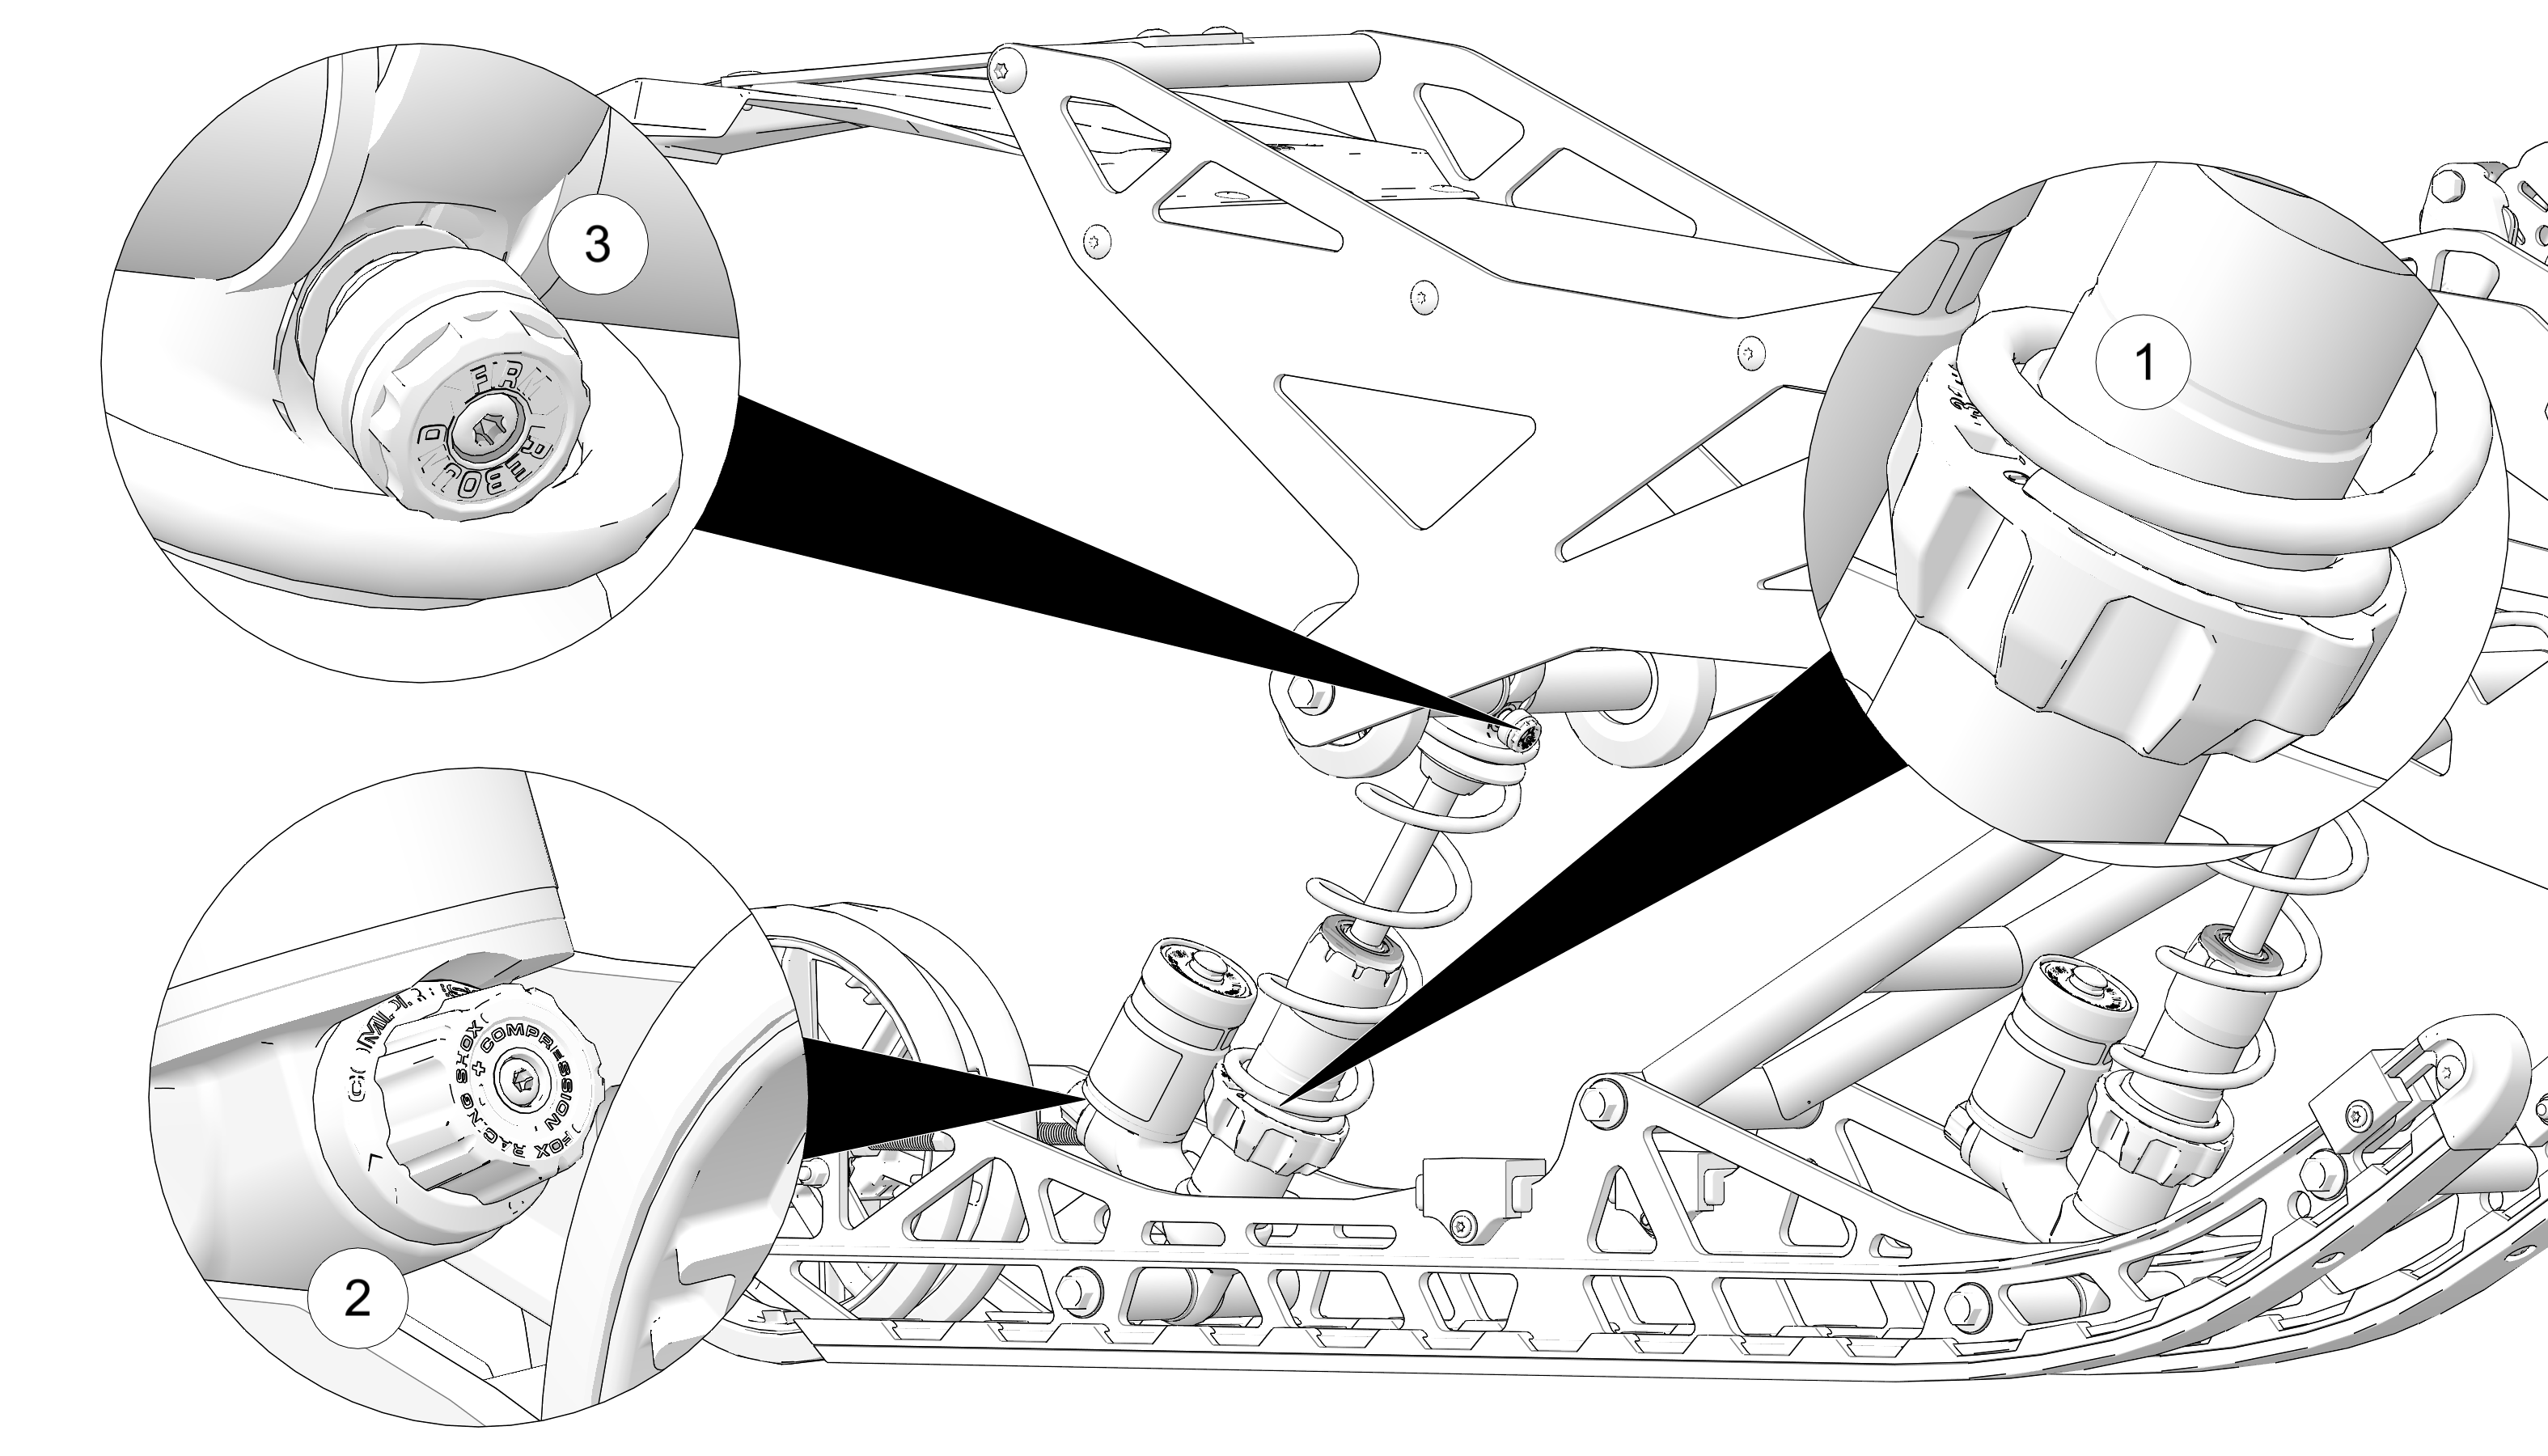
| TIP |
|
A spanner wrench is needed to adjust the preload on IFP and Walker Evans shocks. (Polaris P/N: 2871095-329) |
|
DO NOT EXCEED the MIN / MAX preload values (defined by the tables in this section). Never adjust spring preload shorter than
the minimum allowable length. Adjusting shorter than this length could result in damage to the suspension. Failure to comply
may result in injury or damage to equipment.
|
| Model | Front Shock | Spring Rate | Factory Installed Length | Minimum Allowable Length |
|---|---|---|---|---|
| ARO 129 | Timbersled IFP | 150 | 8 13/16 in | 8 7/16 in |
| ARO 129 S | Timbersled IFP | 250 | 6 1/2 in | 6 in |
| ARO 137 | Timbersled IFP | 150 | 8 13/16 in | 8 7/16 in |
| Model | Rear Shock | Spring Rate | Factory Installed Length | Minimum Allowable Length |
|---|---|---|---|---|
|
ARO 129 |
Timbersled IFP | 175 | 8 13/16 in | 8 7/16 in |
|
ARO 129 S |
Timbersled IFP | 250 | 6 1/2 in | 6 in |
|
ARO 137 |
Timbersled IFP | 175 | 8 13/16 in | 8 7/16 in |
|
DO NOT EXCEED the MIN / MAX preload values (defined by the tables in this section). Never adjust spring preload shorter than
the minimum allowable length. Adjusting shorter than this length could result in damage to the suspension. Failure to comply
may result in injury or damage to equipment.
|
| Clicker Position | Compression Setting |
|---|---|
| 1 | Soft |
| 2 | Medium |
| 3 | Firm |
| Model | Front Shock | Spring Rate | Factory Installed Length | Minimum Allowable Length |
|---|---|---|---|---|
|
ARO 129 LE |
FOX® QS3® | 150 | 7 7/8 in | 7 7/16 in |
|
ARO 129 3 LE |
FOX® QS3® | 150 | 7 7/8 in | 7 7/16 in |
|
ARO 137 LE |
FOX® QS3® | 150 | 7 7/8 in | 7 7/16 in |
| Model | Rear Shock | Spring Rate | Factory Installed Length | Minimum Allowable Length |
|---|---|---|---|---|
|
ARO 129 LE |
FOX® QS3® | 175 | 7 3/4 in | 7 7/16 in |
|
ARO 129 3 LE |
FOX® QS3® | 175 | 7 3/4 in | 7 7/16 in |
|
ARO 137 LE |
FOX® QS3® | 175 | 7 3/4 in | 7 7/16 in |
|
DO NOT EXCEED the MIN / MAX preload values (defined by the tables in this section). Never adjust spring preload shorter than
the minimum allowable length. Adjusting shorter than this length could result in damage to the suspension. Failure to comply
may result in injury or damage to equipment.
|
| NOTICE |
| Speed refers to the rate of shock compression, not speed of vehicle. |
| Shock Location | Shock Type | Spring Rate | Factory Installed Length | Minimum Allowable Length |
|---|---|---|---|---|
| Front Track | Walker Evans Velocity | 150 | 8 13/16 in | 8 7/16 in |
| Rear Track | Walker Evans Velocity | 175 | 8 13/16 in | 8 7/16 in |
|
DO NOT EXCEED the MIN / MAX preload values (defined by the tables in this section). Never adjust spring preload shorter than
the minimum allowable length. Adjusting shorter than this length could result in damage to the suspension. Failure to comply
may result in injury or damage to equipment.
|
| Model | Front Shock | Spring Rate | Factory Installed Length | Minimum Allowable Length |
|---|---|---|---|---|
| Timbersled RIOT 120 | Timbersled IFP | 250 | 8 1/2 in | 8 1/4 in |
| Timbersled RIOT 120 S | Timbersled IFP | 450 | 6 3/4 in | 6 7/16 in |
| Model | Rear Shock | Spring Rate | Factory Installed Length | Minimum Allowable Length |
|---|---|---|---|---|
| Timbersled RIOT 120 | Timbersled IFP | 80 | 8 1/2 in | 7 in |
| Timbersled RIOT 120 S | Timbersled IFP | 135 | 6 3/4 in | 6 in |
|
DO NOT EXCEED the MIN / MAX preload values (defined by the tables in this section). Never adjust spring preload shorter than
the minimum allowable length. Adjusting shorter than this length could result in damage to the suspension. Failure to comply
may result in injury or damage to equipment.
|
| Clicker Position | Compression Setting |
|---|---|
| 1 | Soft |
| 2 | Medium |
| 3 | Firm |
| Model | Front Shock | Spring Rate | Factory Installed Length | Minimum Allowable Length |
|---|---|---|---|---|
| Timbersled RIOT 120 LE | FOX® QS3® | 250 | 8 1/2 in | 8 1/4 in |
| Timbersled RIOT 120 S LE | FOX® QS3® | 450 | 6 3/4 in | 6 7/16 in |
| Model | Rear Shock | Spring Rate | Factory Installed Length | Minimum Allowable Length |
|---|---|---|---|---|
| Timbersled RIOT 120 LE | FOX® QS3® | 80 | 8 1/2 in | 7 in |
| Timbersled RIOT 120 S LE | FOX® QS3® | 135 | 6 3/4 in | 6 in |
|
DO NOT EXCEED the MIN / MAX preload values (defined by the tables in this section). Never adjust spring preload shorter than
the minimum allowable length. Adjusting shorter than this length could result in damage to the suspension. Failure to comply
may result in injury or damage to equipment.
|
| NOTICE |
| Speed refers to the rate of shock compression, not speed of vehicle. |
| Shock Location | Shock Type | Spring Rate | Factory Installed Length | Minimum Allowable Length |
|---|---|---|---|---|
| Front Track | Walker Evans Velocity | 250 | 8 1/2 in | 8 1/4 in |
| Rear Track | Walker Evans Velocity | 80 | 8 1/2 in | 7 in |
| NOTICE |
|
Set your snow bike’s spring preload adjustments BEFORE adjusting the shock clickers. |
| IMPORTANT |
|
Never adjust the shocks beyond their minimum or maximum preload values. |
| Shock Location | Shock Type | Spring Rate | Factory Installed Length | Minimum Allowable Length |
|---|---|---|---|---|
| Front Track | FOX® 1.5 Zero LSC-R | 200 | 7 7/8 in | 7 25/32 in |
| Rear Track | FOX® 1.5 Zero LSC-R | 200 | 7 7/8 in | 7 25/32 in |
| NOTICE |
| Installation instructions are provided with the TSS accessory kit. For replacement instructions, see your local Timbersled dealer or visit the Timbersled website. |
| NOTICE |
|
O-ring movement equals the amount of TSS shock travel. The TSS shock has a max travel distance of 1.5 in until it will bottom out. The recommended amount of shock travel is approximately 1-1/8 in of stroke. |
| NOTICE |
|
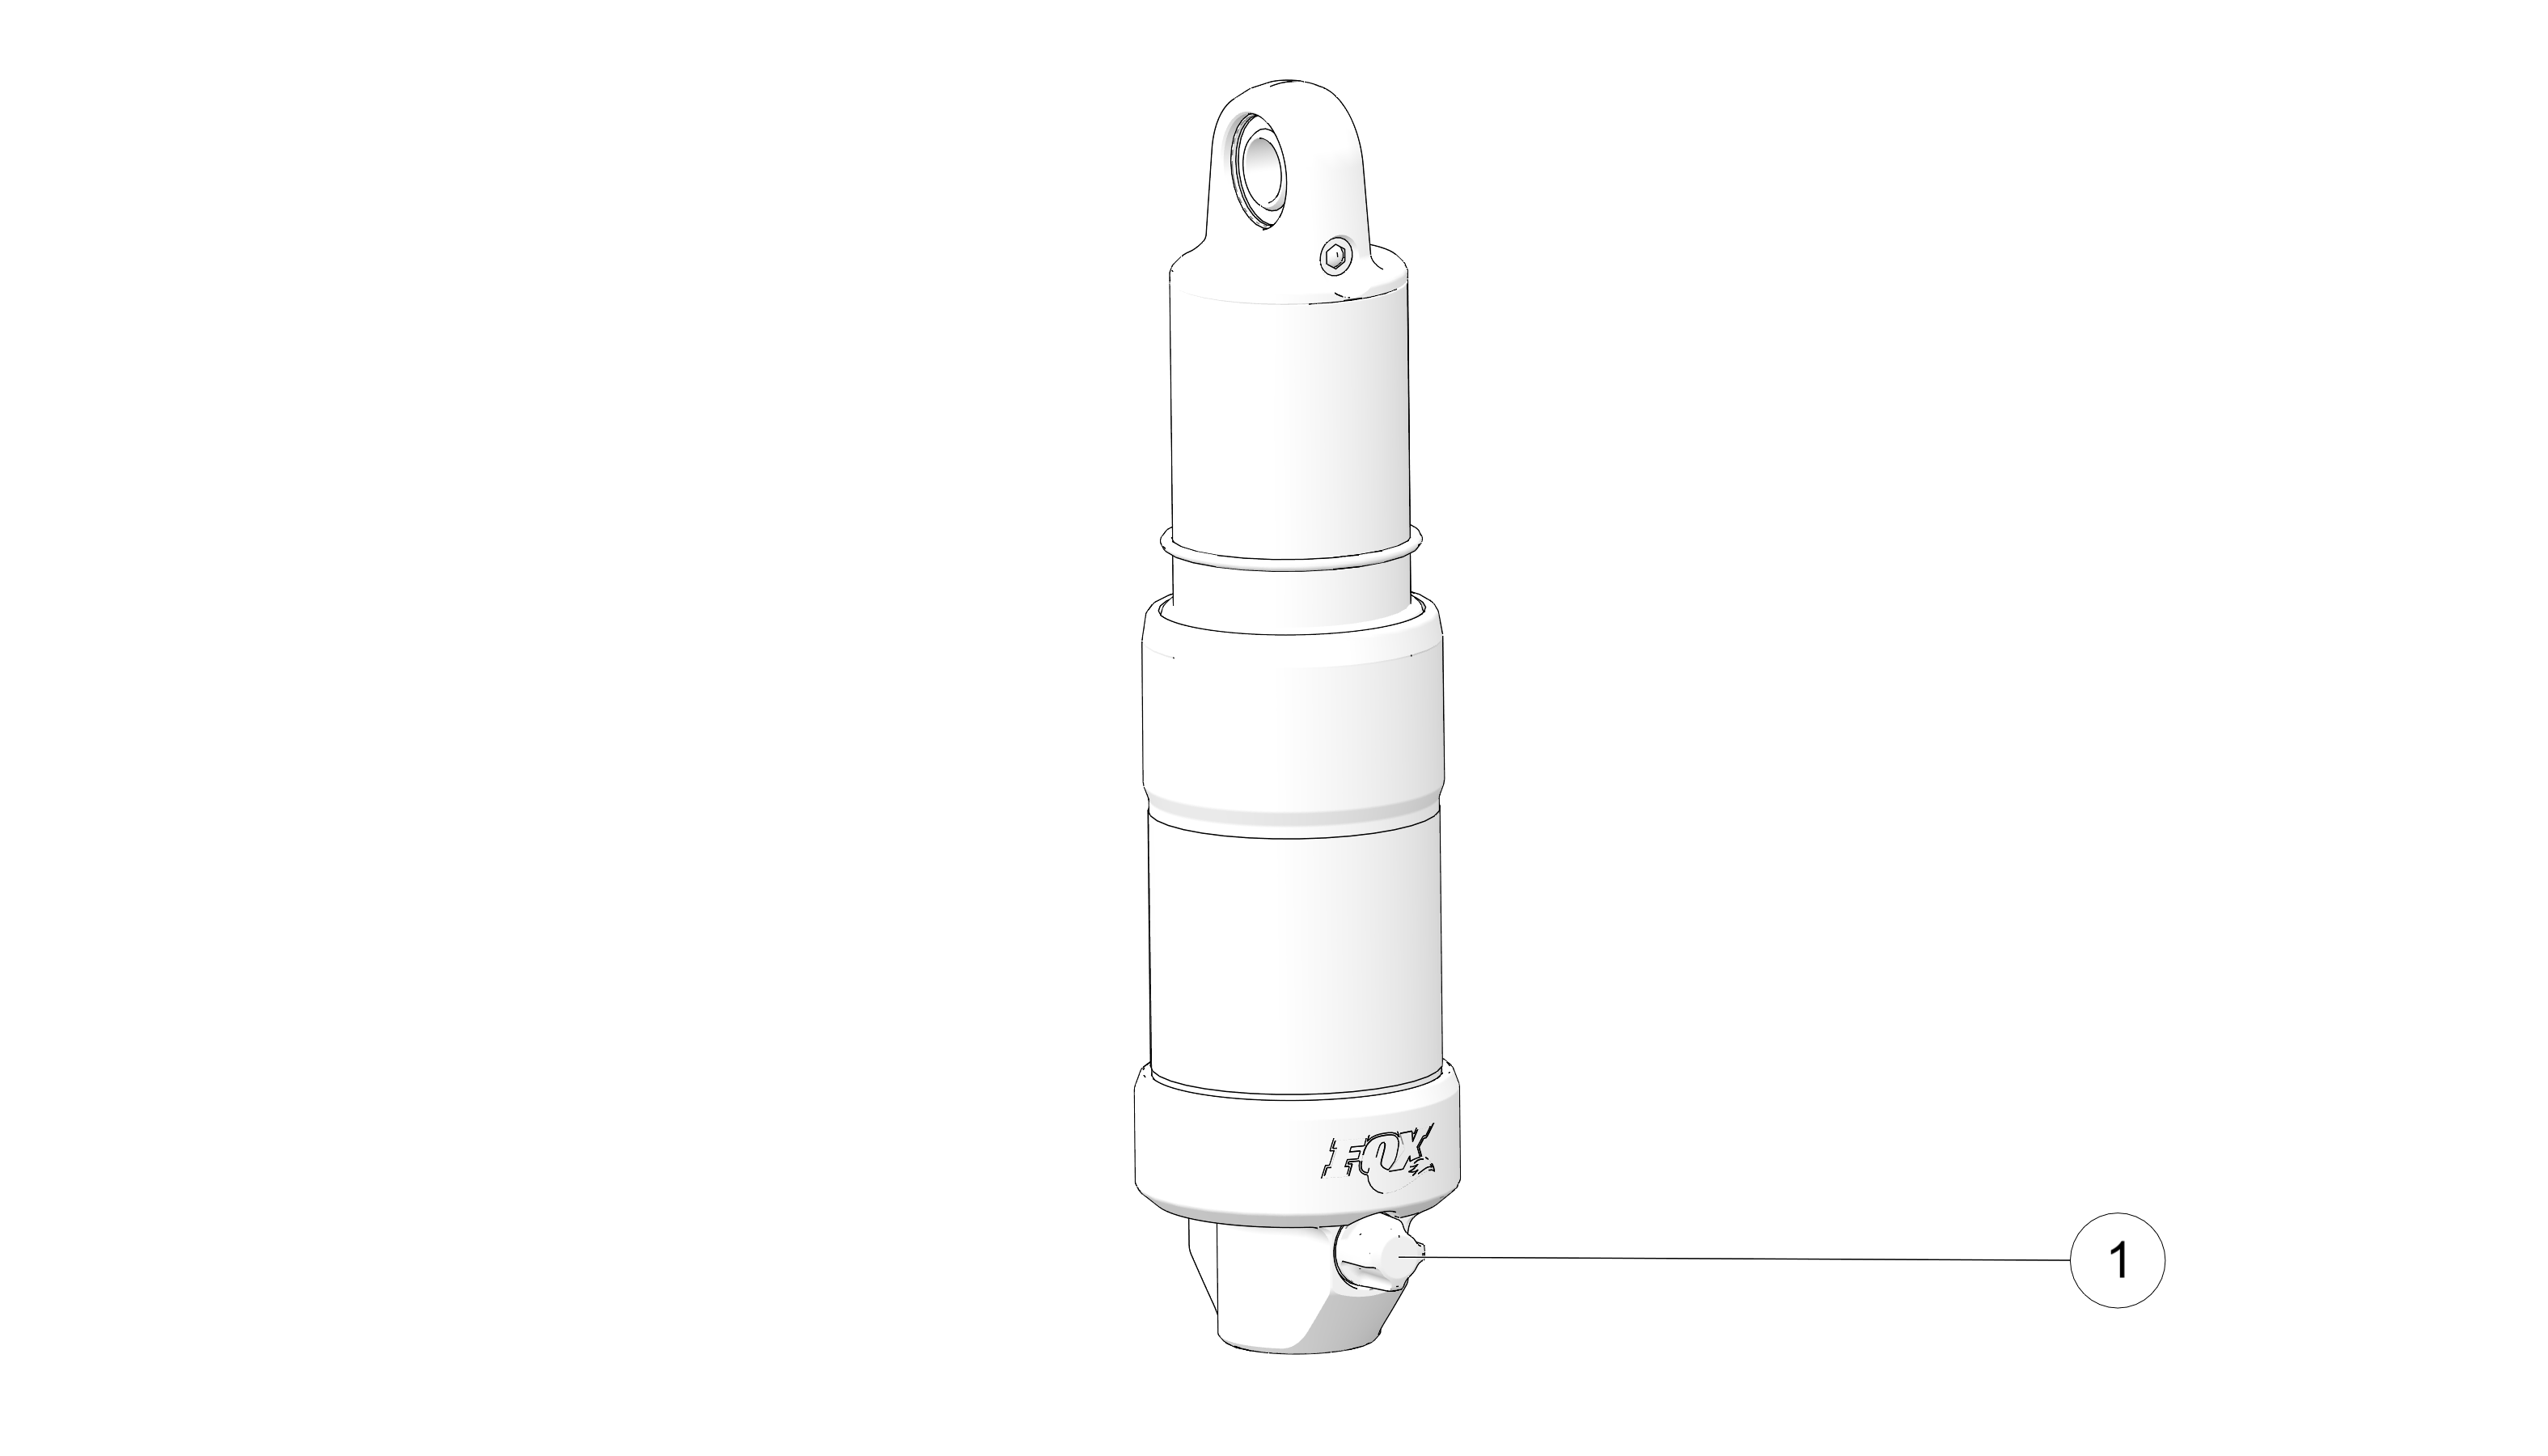
The TSS Shock is factory preset at 260 psi. Use a FOX® Float air pump to adjust the spring rate and preload of the TSS Shock. |
|
DO NOT EXCEED the minimum or maximum pressure values specified below. Pressurizing above or below these settings could result
in damage to the suspension. Failure to comply may result in injury or damage to equipment.
|
| Suggested TSS Pressures | |
| Setting | PSI |
| Minimum Setting | 200 |
| Factory Setting | 260 |
| Maximum Setting | 400 |
| NOTICE |
| During pressurization of the air pump, the shock will depress 20 psi to fill the pump hose. When checking the air pressure, compensate for this loss by adding 20 psi to the reading. |
| NOTICE |
| When tuning your TSS shock, add or subtract air pressure in increments of 25 psi at a time. Do not get snow or water inside the valve stem as this could cause an air leak in the shock. After each 25 psi increment of adjusted air pressure, slide the O-ring back to the lowest position and ride your snow bike for approximately 10 minutes before rechecking shock travel distance. |
© Copyright Polaris Inc. All rights reserved.