
Content Source: 2021 Timbersled SX 120 / ARO / RIOT Owner’s Manual (9931501 R01) > Maintenance Chapter
| IMPORTANT |
|
The Owner's Manual for this vehicle contains warnings, instructions and other information you must read and fully understand before safely riding or performing maintenance on this vehicle.Always follow the warnings and instructions in Owner's Manual. Click the CONTENTS link above for the Table Of Contents, or download a full PDF of the Owner Manual in the Owner Support area of Polaris.com |
| IMPORTANT |
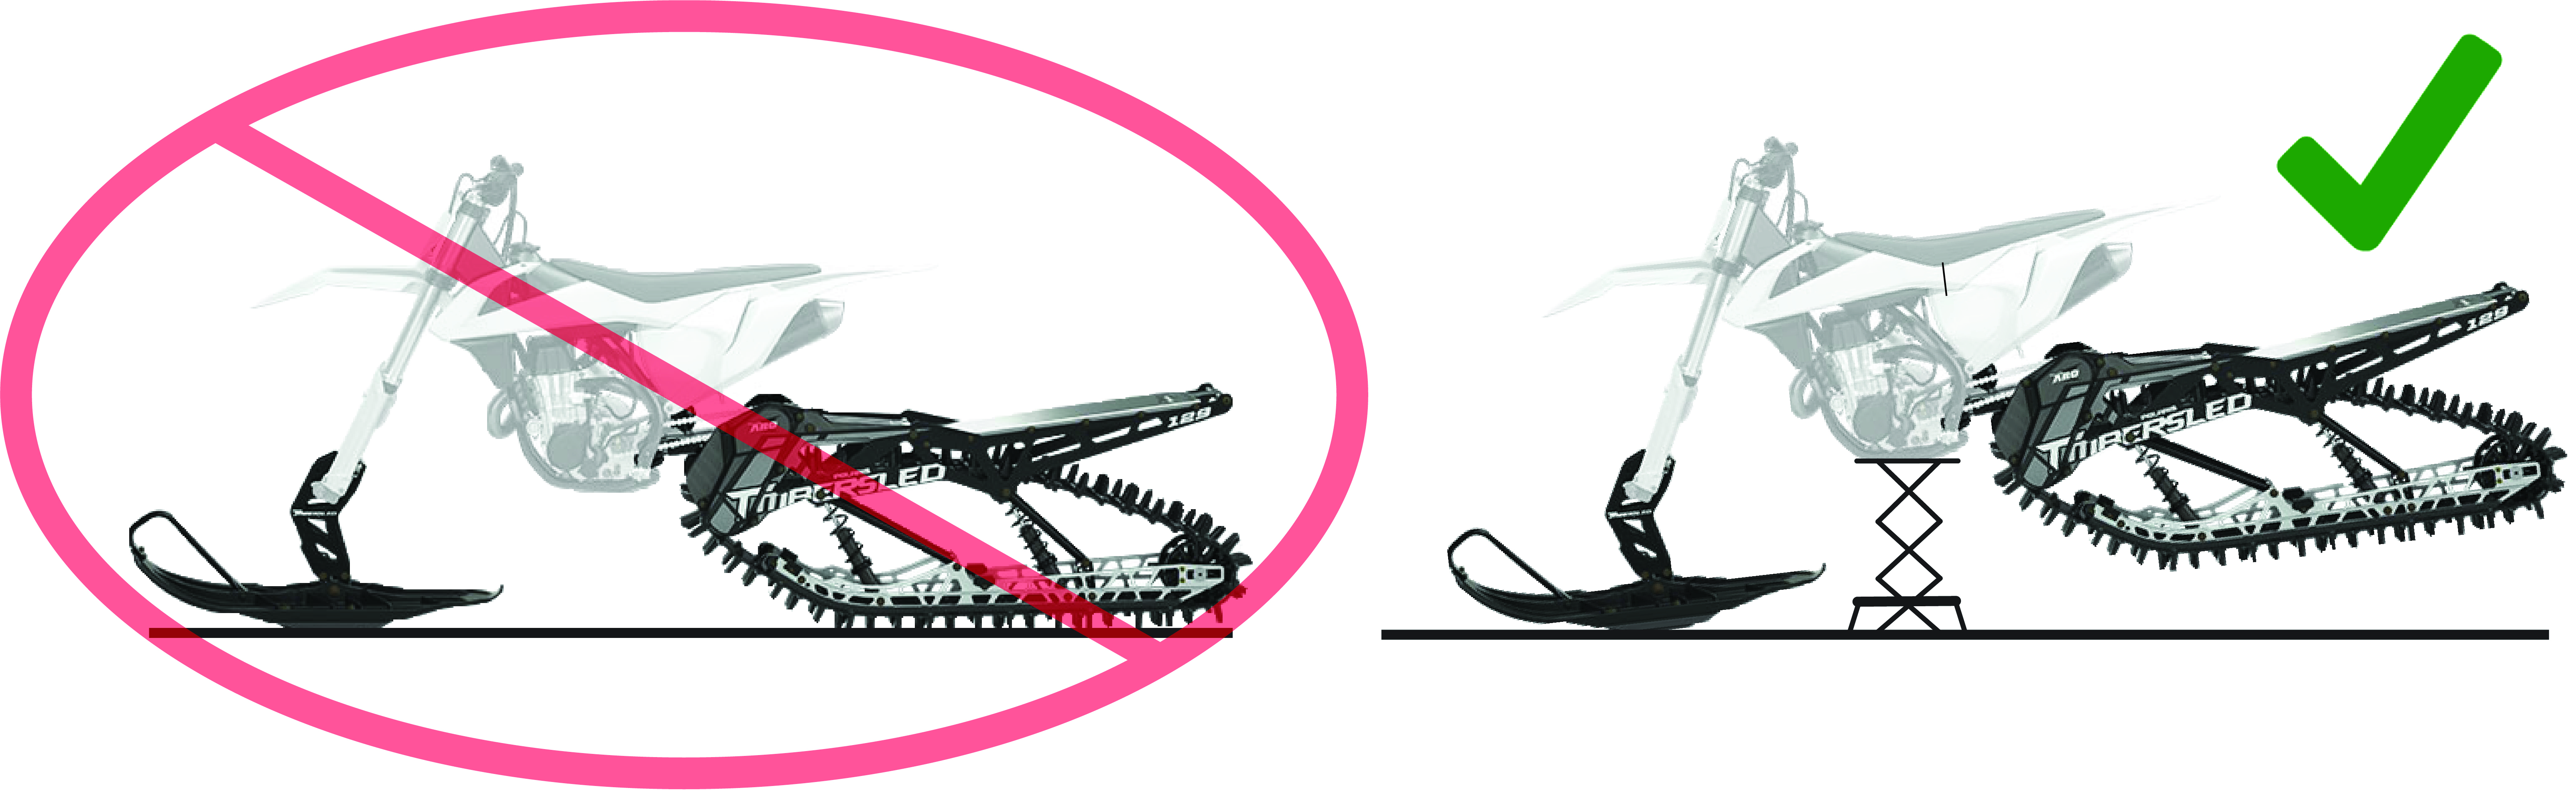
| TIMBERSLED SUSPENSION STRUT (TSS) MODELS: The TSS MUST be at full extension and set to at least 200 PSI to measure and adjust drive chain tension properly. To ensure the TSS is at full extension, remove all weight from the shock by tipping the bike on its side or by using an appropriate stand to lift the bike under its engine ensuring the track is suspended off the ground. Inspecting and adjusting a chain without the suspension at full extension will indicate a loose chain and lead to over-tensioning and excessive chain stretch and wear. |
| NOTE |
| The drive chain may loosen on the first ride due to initial chain stretch and slider break-in. Re-tighten drive chain after first few rides. If problem persists, your dealer can assist. |
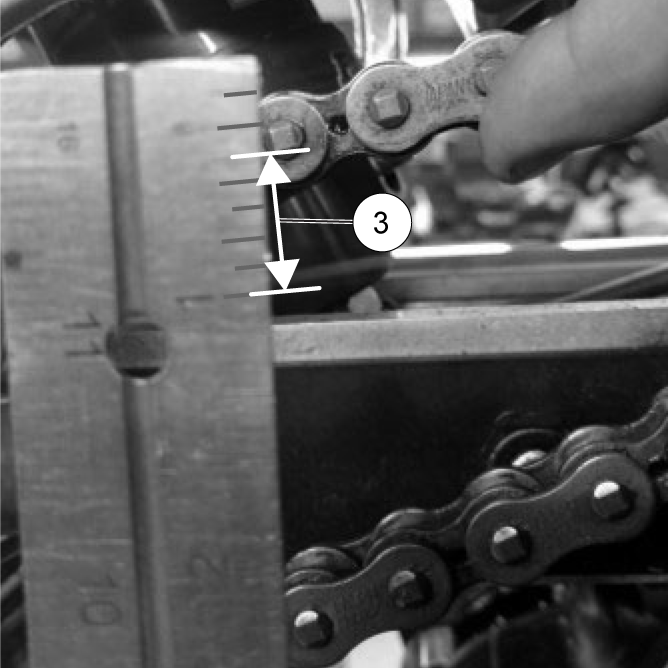
If the chain is properly tensioned, there should be between 0.75 in. and 1.250 in. between the 1 inch mark (the position of the chosen chain pin when pressed down) and the current position of the chosen chain pin (when pressed up). This is the drive chain’s displacement measurement. If the drive chain’s displacement measurement is less or more than 0.75 in. and 1.25 in. the chain needs to be adjusted (see Adjusting Drive Chain Tension).
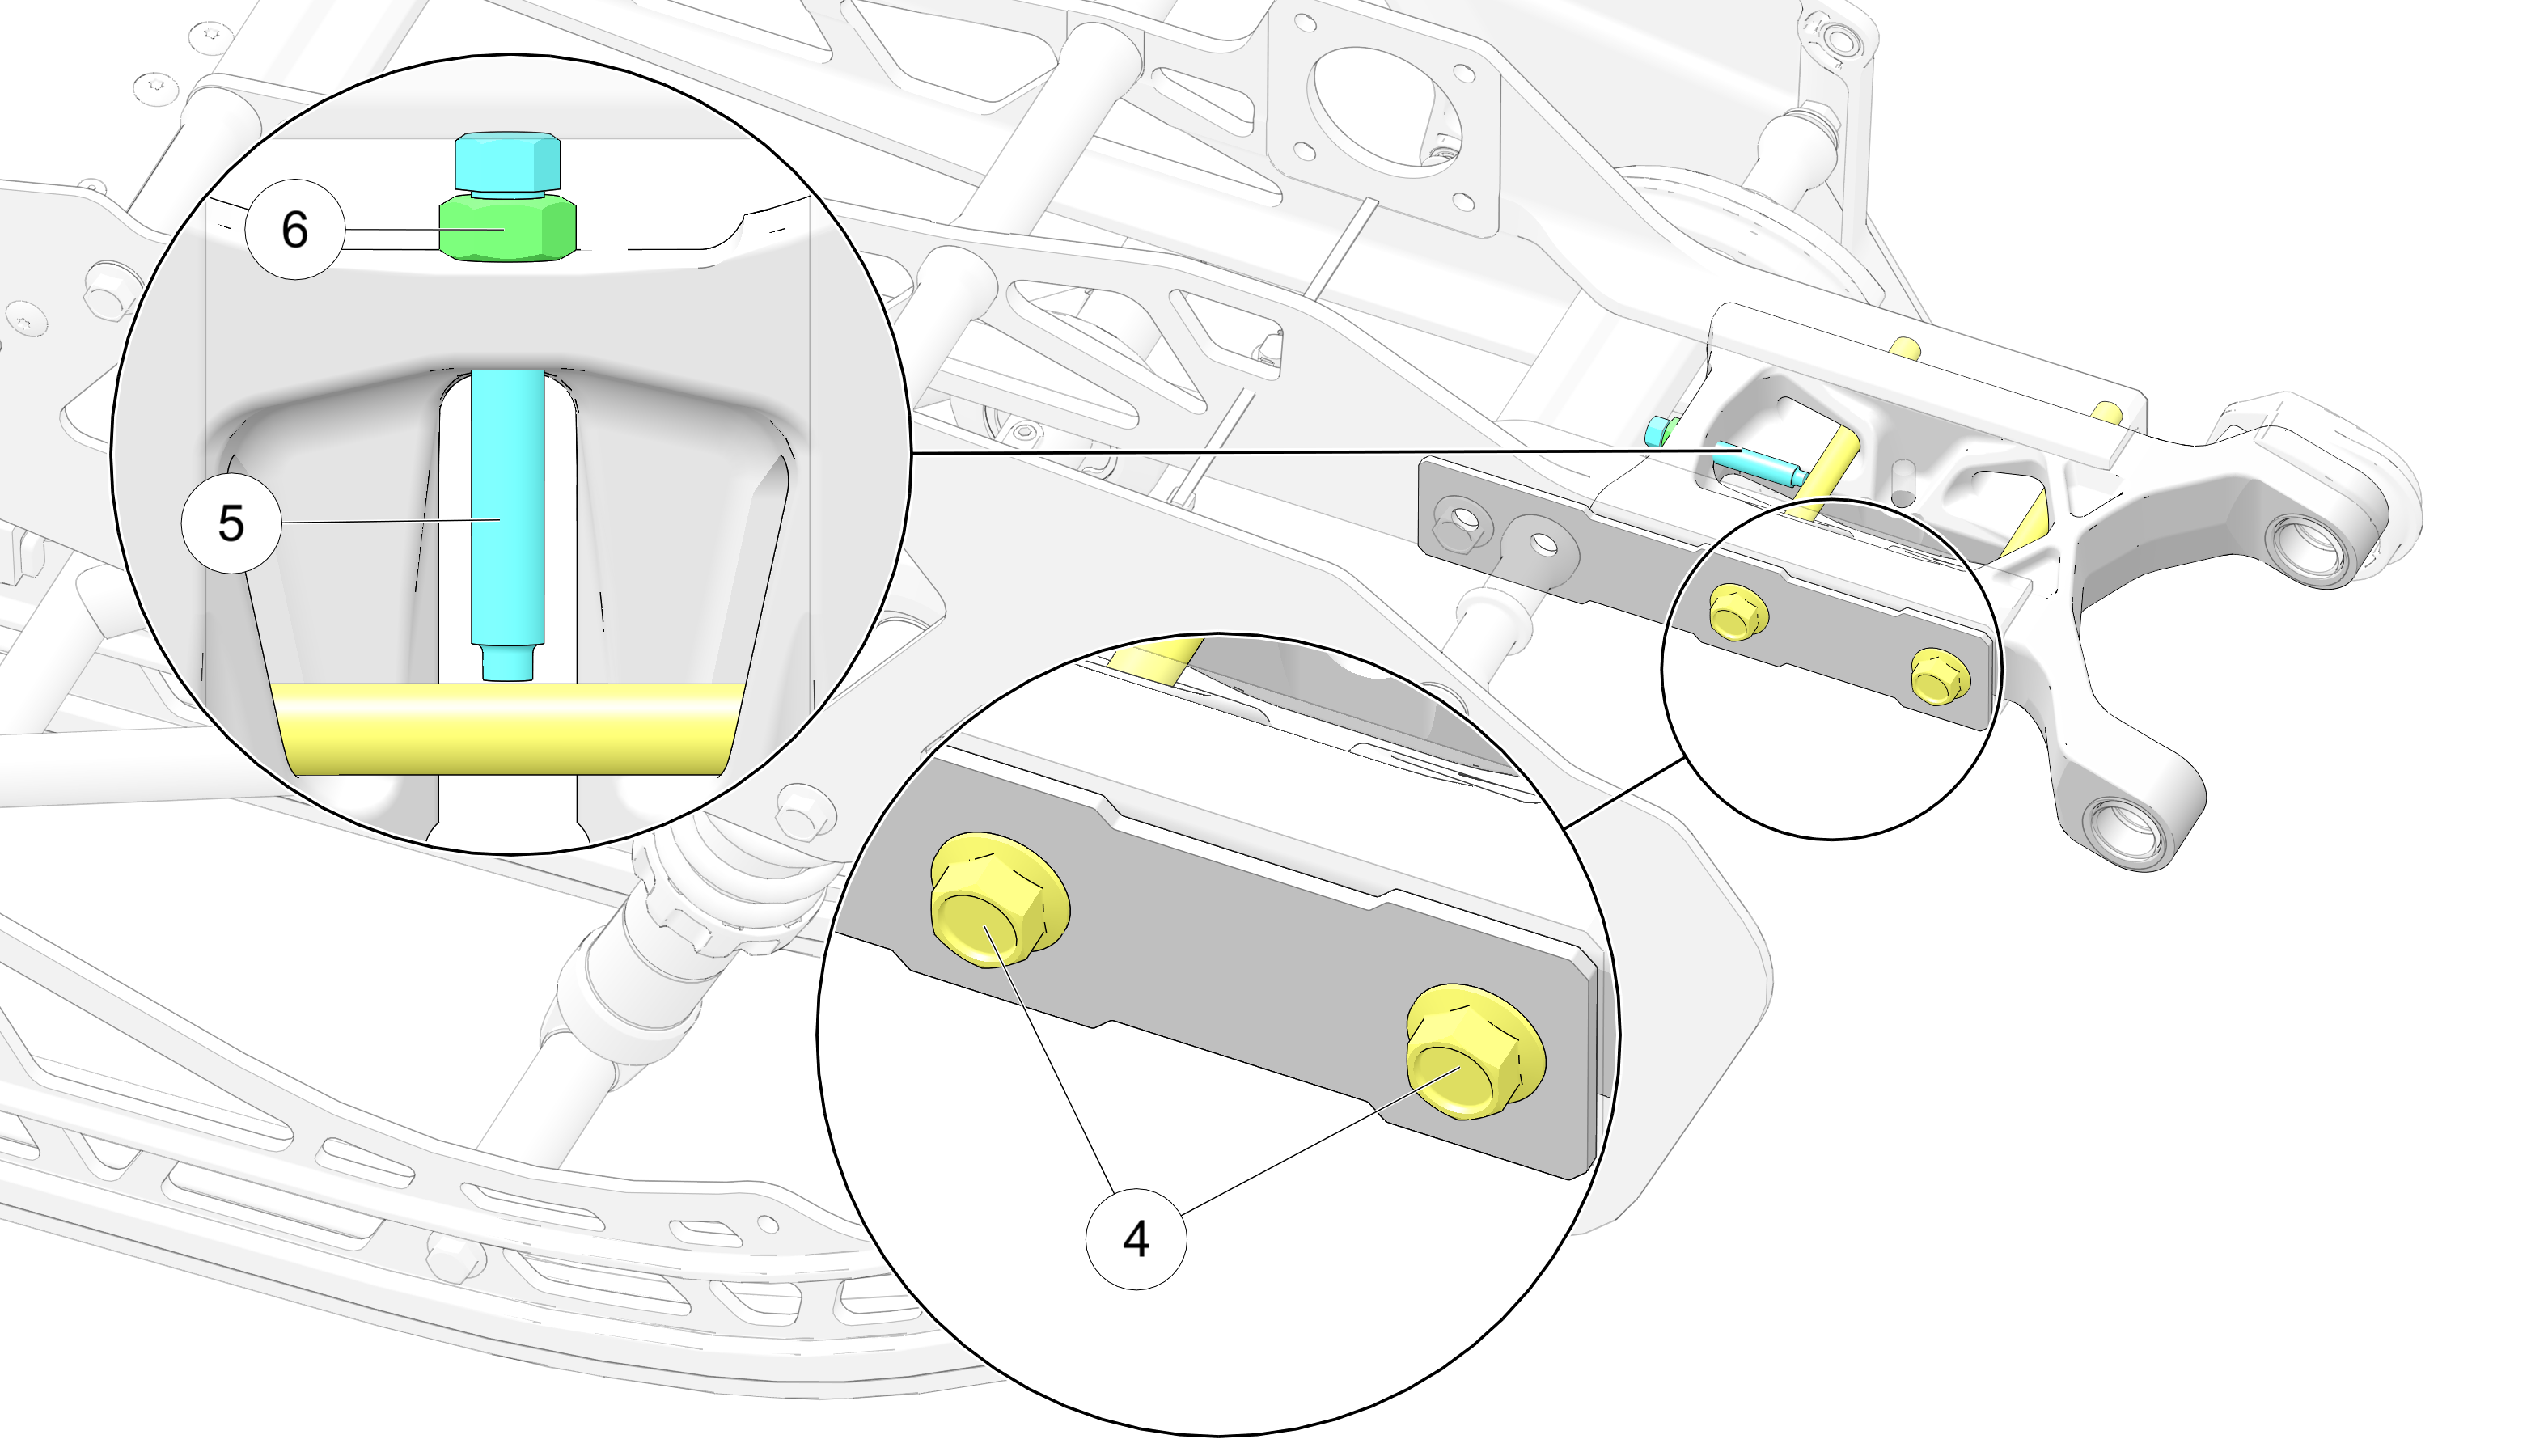
| TORQUE | |
|
Jam Nut 18.4 ft-lbs (25 N·m) |
| TORQUE | |
|
Frame Rail Slide Bolts 36.9 ft-lbs (50 N·m) |
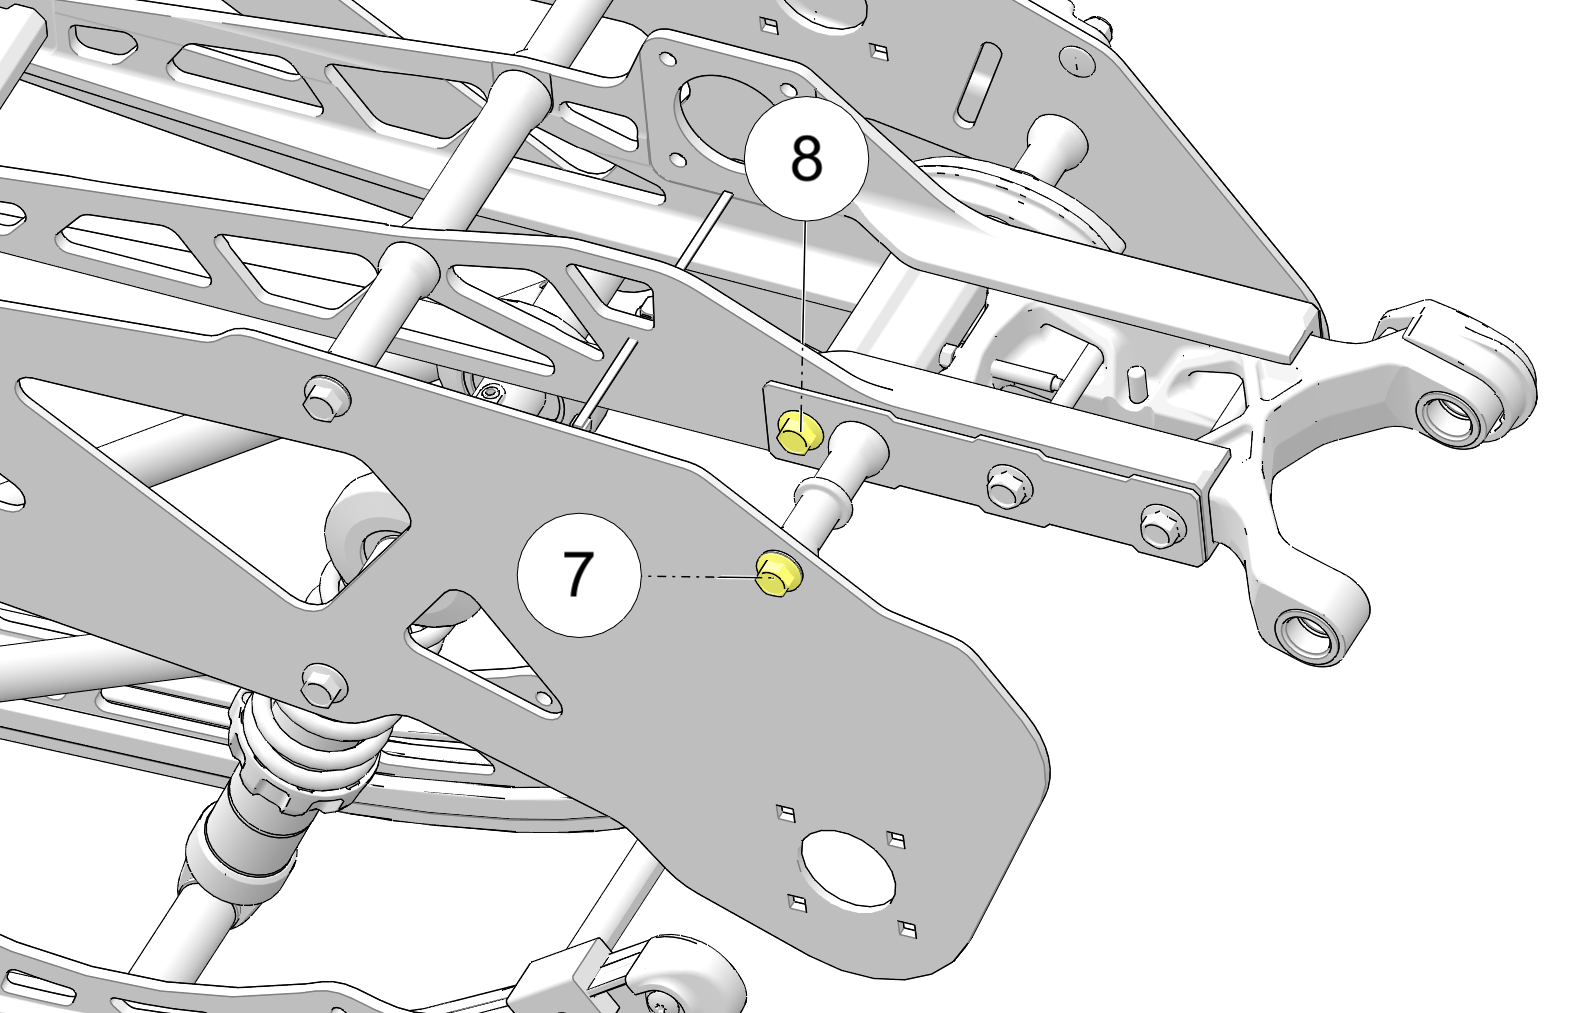
If the chain is
too tight and the frame is difficult to compress, you may loosen the
front right-hand side panel bolt ![]() and
the front right-hand frame bolt
and
the front right-hand frame bolt ![]() to
allow the frame to slide easier. Re-torque both bolts to 60 Nm prior
to tensioning the chain.
to
allow the frame to slide easier. Re-torque both bolts to 60 Nm prior
to tensioning the chain.
| Do not over-tension the chain. Improper chain tension can cause excessive wear to the chain and the tension roller bolt. |
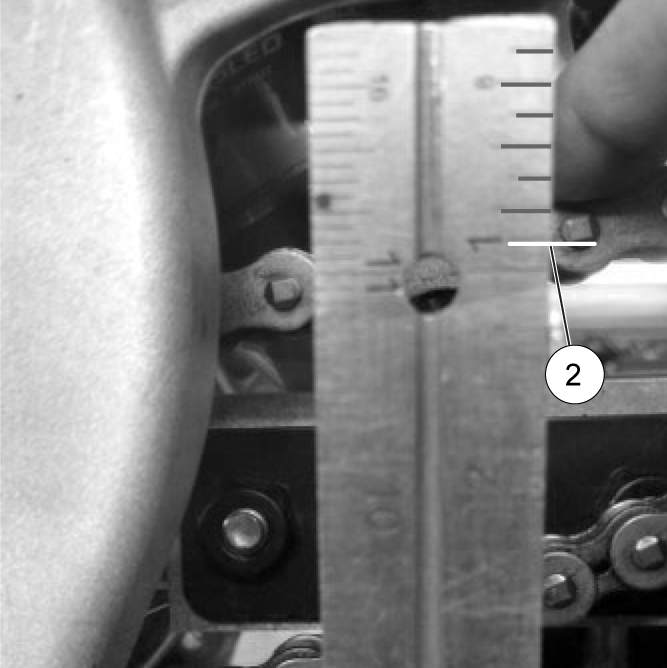
If the chain is properly tensioned,
there should be between ½ in and 3∕₄ in between the 1 inch mark (the position of the chosen
chain pin when pressed to the left) and the current position of
the chosen chain pin (when pressed to
the right). This is the chain case chain’s displacement measurement ![]() . If the chain’s displacement measurement
is less or more than ½” to 3∕₄”, the chain tension needs to be adjusted (see Adjusting Chain Case Chain Tension).
. If the chain’s displacement measurement
is less or more than ½” to 3∕₄”, the chain tension needs to be adjusted (see Adjusting Chain Case Chain Tension).
| IMPORTANT |
| Regular drive chain and chain case chain inspection is important. A broken chain can cause host bike damage. |
| NOTICE |
| A chain with 1000 miles or 75 hours of use will need to be replaced (see Periodic Maintenance Interval Table in the Maintenance chapter). |
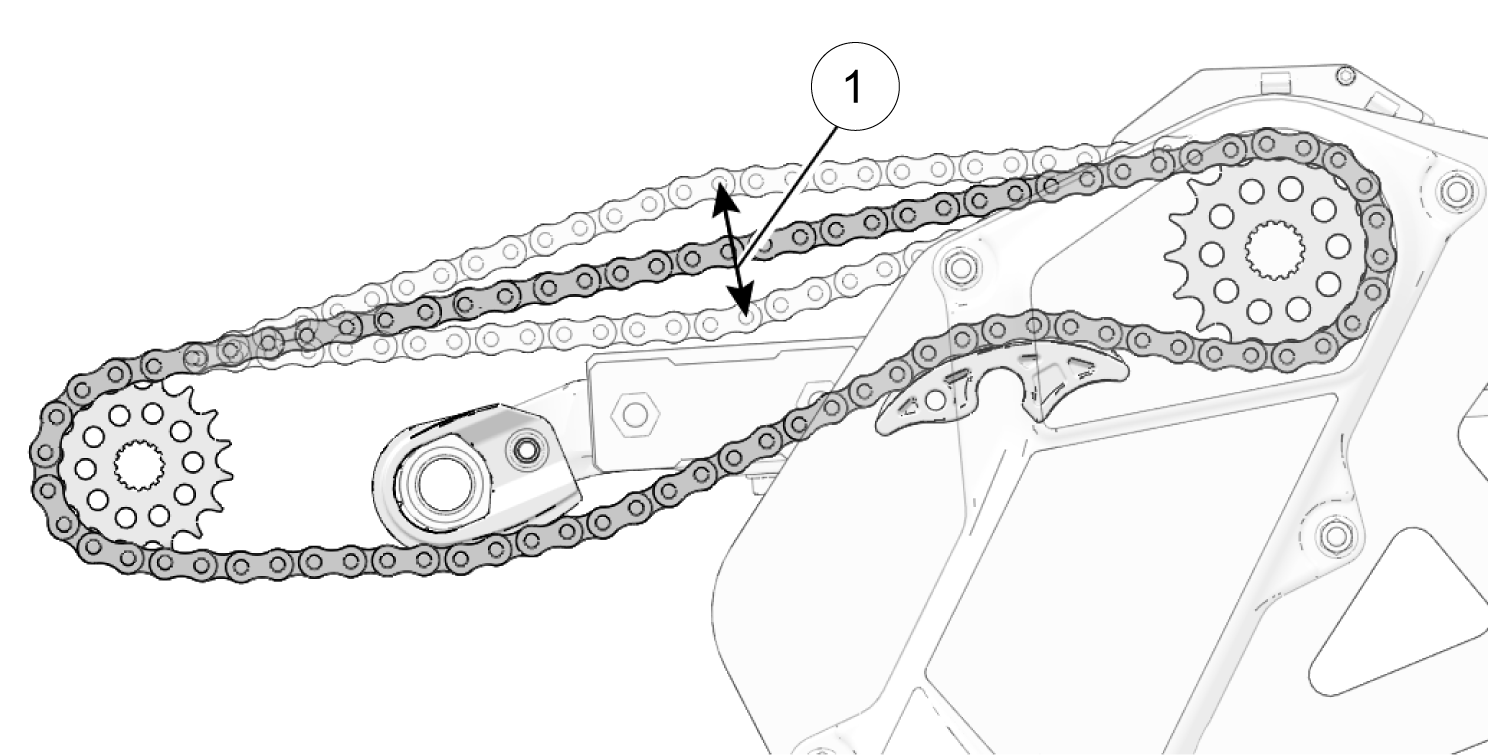
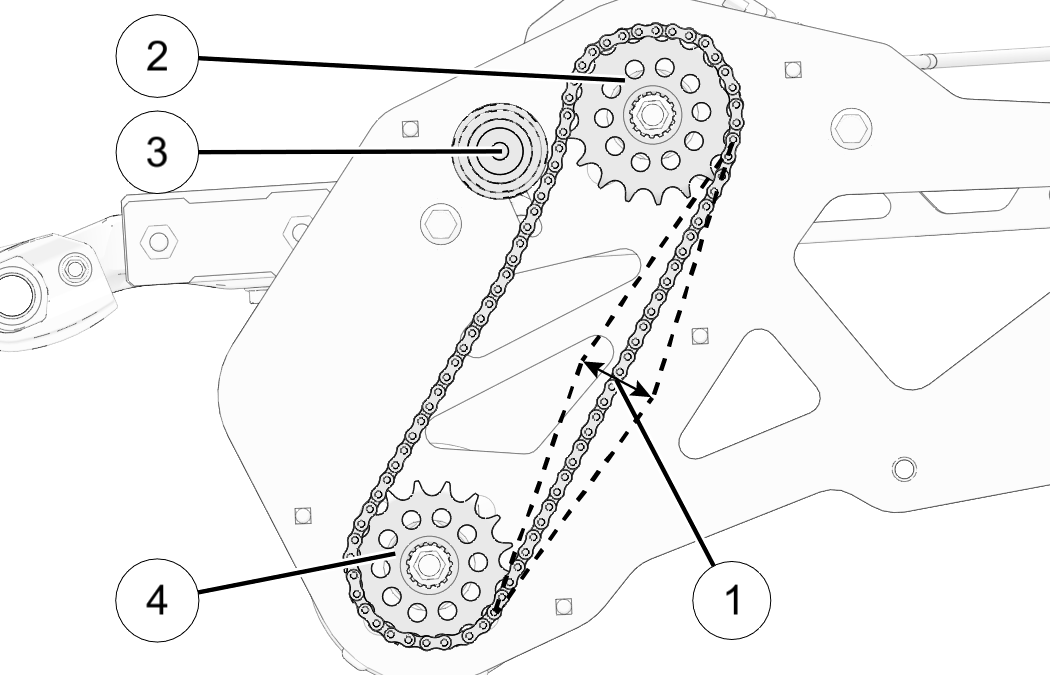
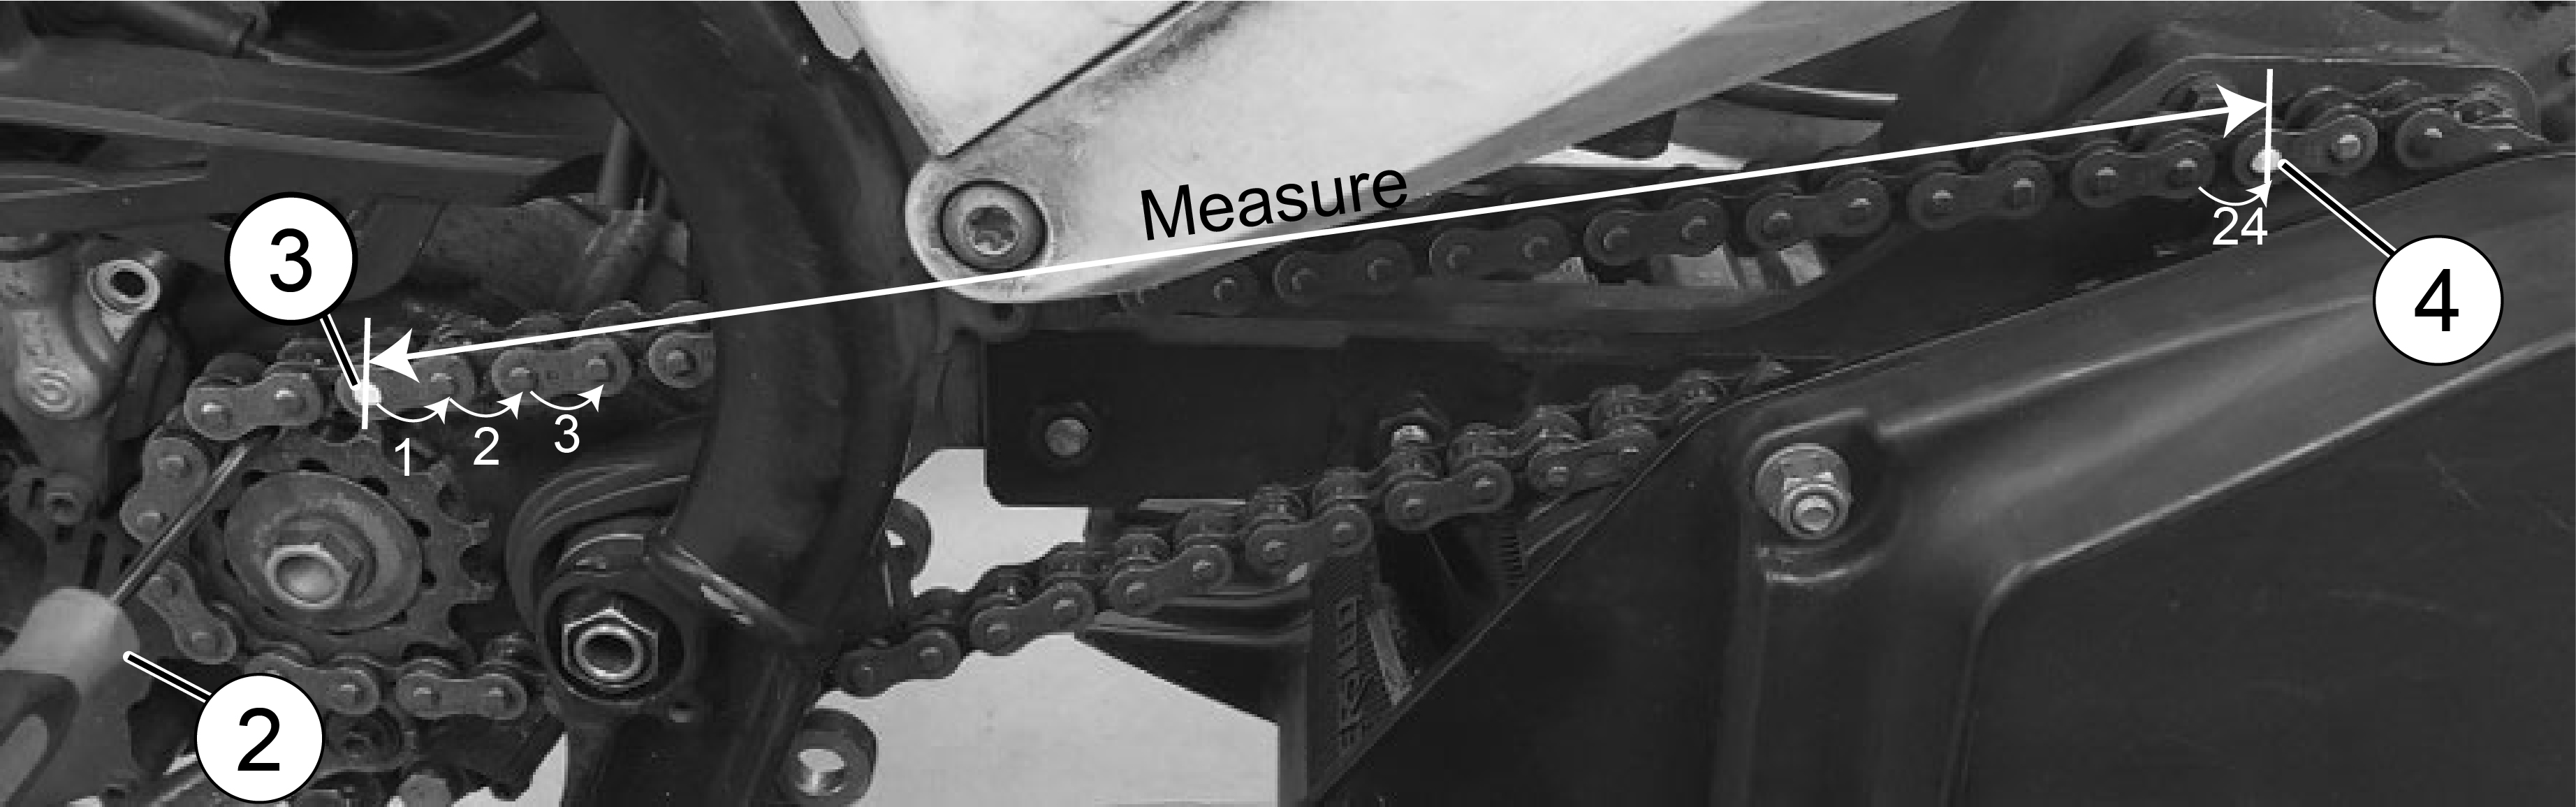
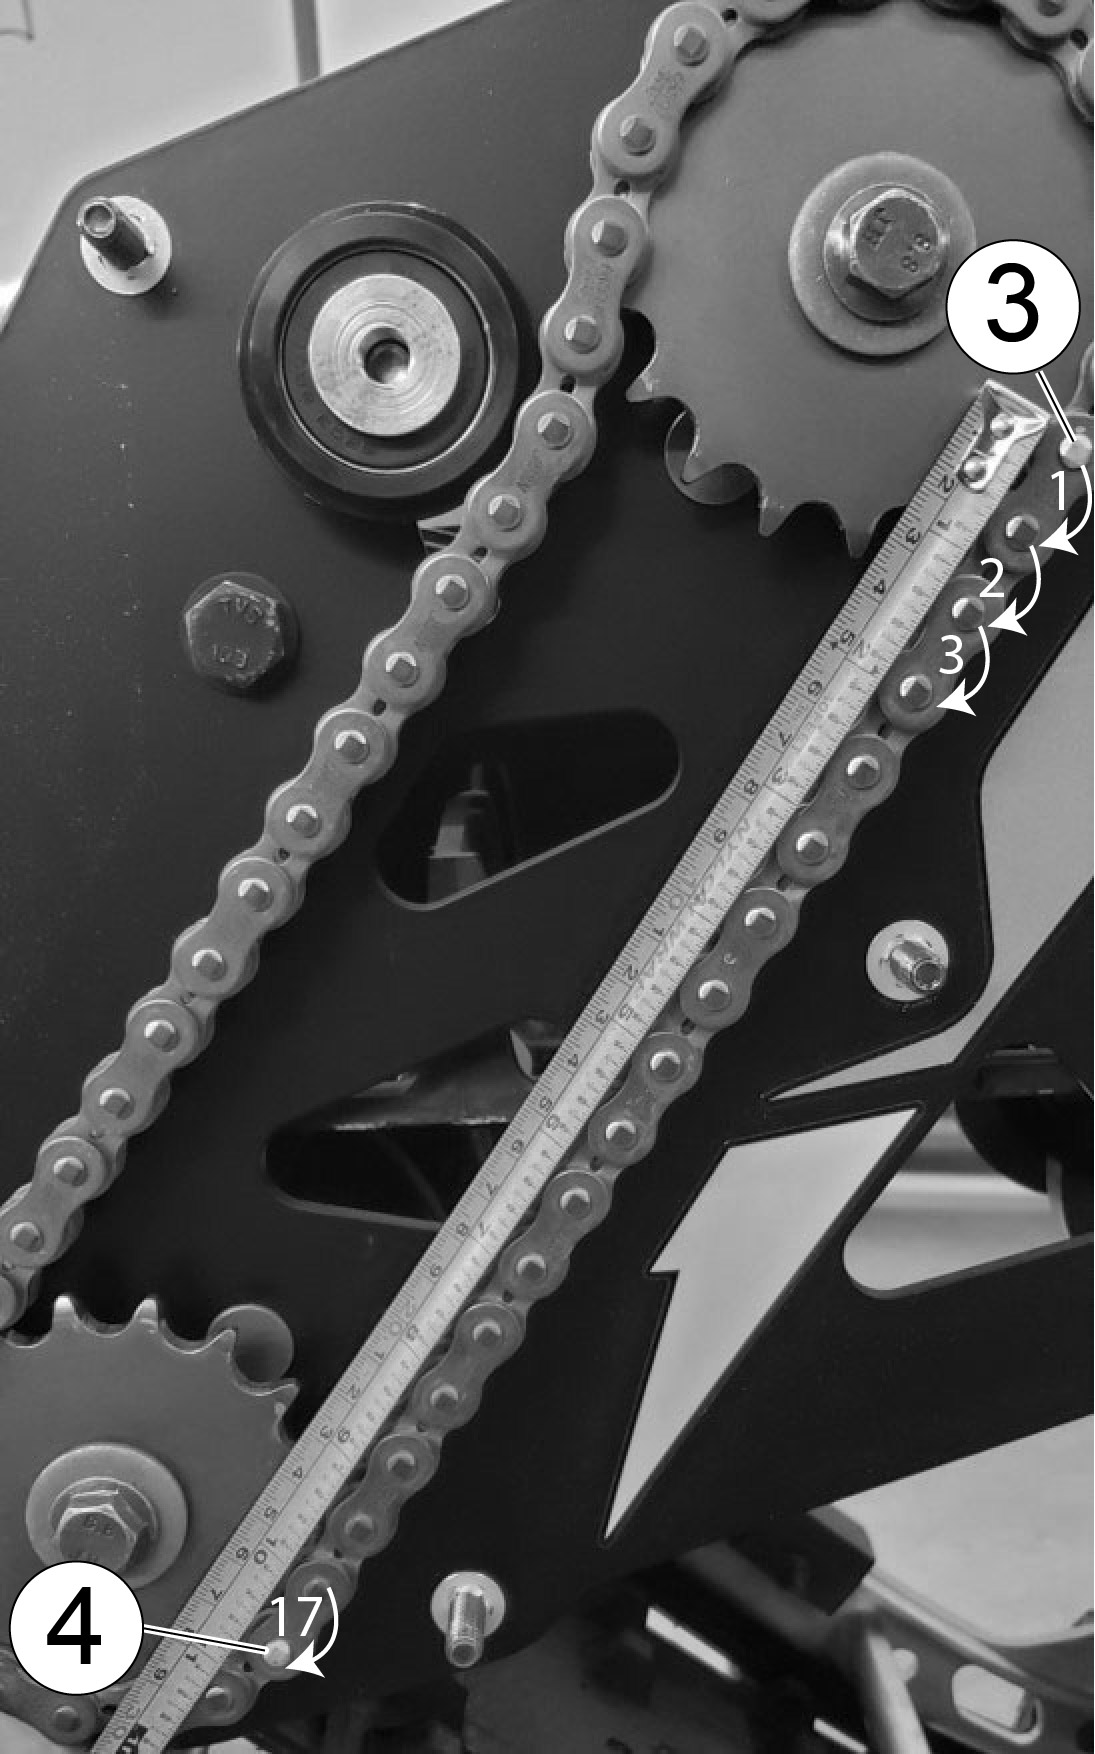
Timbersled RIOT and ARO snow bikes are equipped with 520 drive and
chain case chains which have a pitch of ⁵∕₈ in or 0.625
in. (A chain’s pitch is the length of a
single link which is measured from the center of one pin to the center
of the next
pin ![]() ).
).
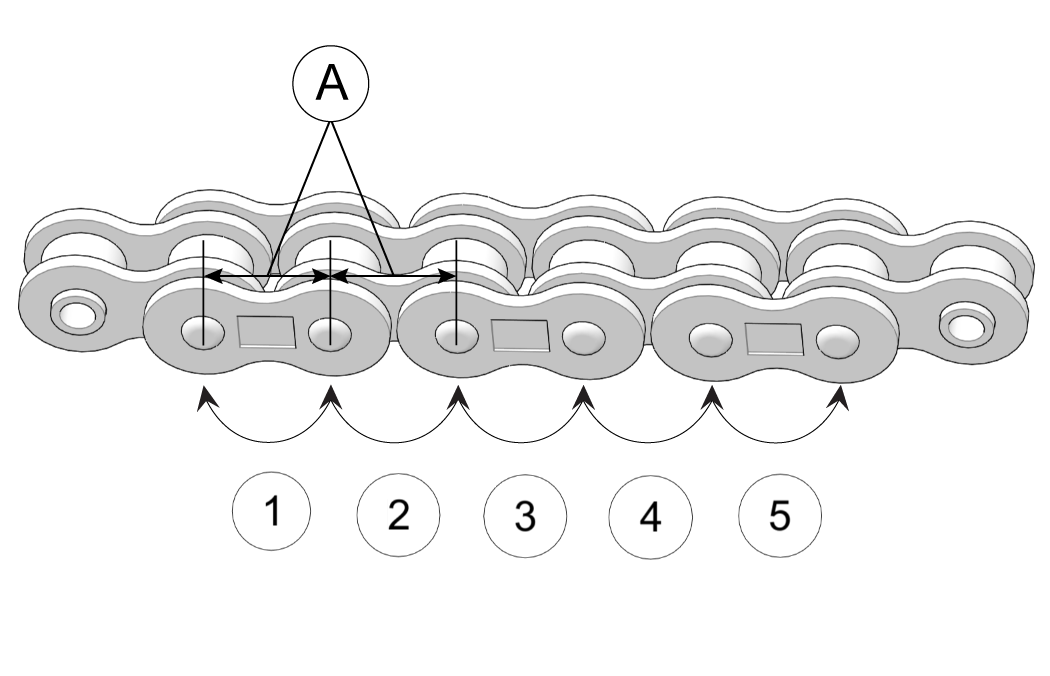
|
CHAIN TYPE |
# OF LINKS TO MEASURE |
EXPECTED LENGTH |
EXPECTED LENGTH +1% |
ACCEPTABLE LENGTH RANGE |
|
Drive Chain |
24 |
15” |
15.15” or slightly < 15 ⅟₈” |
Between 15” and 15.15” |
|
Chain Case Chain |
17 |
10.625”
or 10 ⁵∕₈” |
10.731” or slightly < 10 3∕₄” |
Between 10.625” and 10.731” |
If the length of the chain links is less than the expected length plus 1% (i.e. the length is within the acceptable length range), the chain does not need to be replaced at this time.
© Copyright Polaris Inc. All rights reserved.