Content Source: 2021 550 Indy 144 Owner’s Manual (9931273 R01) > Maintenance Chapter

IMPORTANT

The Owner's Manual for this vehicle contains warnings, instructions and other information you must read and fully understand before safely riding or performing maintenance on this vehicle.Always follow the warnings and instructions in Owner's Manual.

Click the CONTENTS link above for the Table Of Contents, or download a full PDF of the Owner Manual in the Owner Support area of Polaris.com

Track

Track Inspection

WARNING
Broken track rods can cause a rotating track to come off the snowmobile, which could cause serious injury or death. Never operate with a damaged track. Never rotate a damaged track under power.
NOTICE
The figures below are for reference only. Your model may differ slightly.

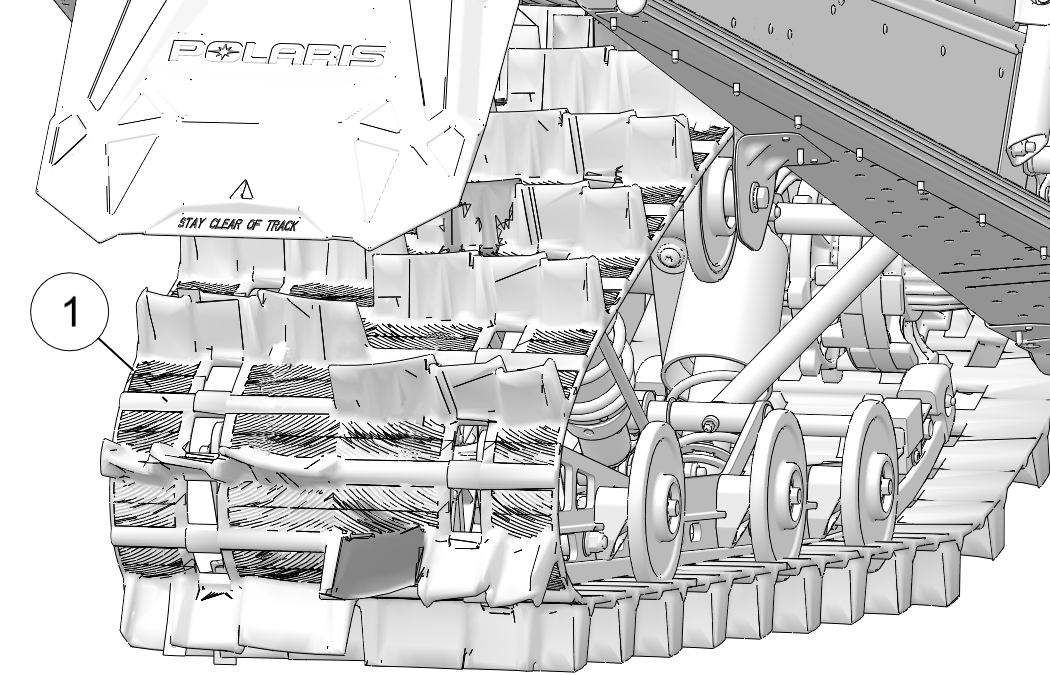
  1. Using a hoist, safely lift and support the rear of the snowmobile off the ground.
  2. Rotate the track by hand to check for damage.
  3. Carefully examine the track along the entire length of each rod . Bend the track to check for breakage.
  4. Replace the track if any rod damage is found.

Image

Track Lubrication

The slide rail needs snow for lubrication. Excessive wear indicates insufficient lubrication. A new rail slide can cause faster heat build-up in limited lubrication, resulting in excessive wear.
WARNING
Operating with insufficient lubrication between the rail slide and track guide clips can cause track failure, loss of vehicle control and loss of braking ability, which can result in serious injury or death. Avoid operating for extended periods on ice and other surfaces that have little or no snow for lubrication.
If excessive rail slide wear occurs due to poor snow conditions, additional wheel kits are available. Your dealer can provide more information.
Track damage or failure caused by operation on ice or under other poor lubrication conditions will void the track warranty.

Track Tension

WARNING
Moving parts can cut and crush body parts. When performing the checks and adjustments recommended on the following pages, stay clear of all moving parts. Never perform track measurement or adjustments with the engine running.
Track adjustment is critical for proper handling. Always maintain correct tension and alignment.

TRACK TENSION DATA CHART

Suspension

Weight

Measurement Location

Slack Measurement

144 10 lbs. (4.54 kg) 16 in. (40 cm) ahead of rear idler shaft 7/8-1 1/8 in. (2.2-2.9 cm)
155 10 lbs. (4.54 kg) 16 in. (40 cm) ahead of rear idler shaft 3/8-1/2 in. (1.0-1.3 cm)
INDY (121) 10 lbs. (4.54 kg) 16 in. (40 cm) ahead of rear idler shaft 7/8-1 1/8 in. (2.2-2.9 cm)
INDY EVO 10 lbs. (4.54 kg) 16 in. (40 cm) ahead of rear idler shaft 7/8-1 1/8 in. (2.2-2.9 cm)
TIP
Tension adjustments should be made only after the track is warmed up and limber.
  1. Turn the engine off.
  2. Lift the rear of the snowmobile and safely support it off the ground.
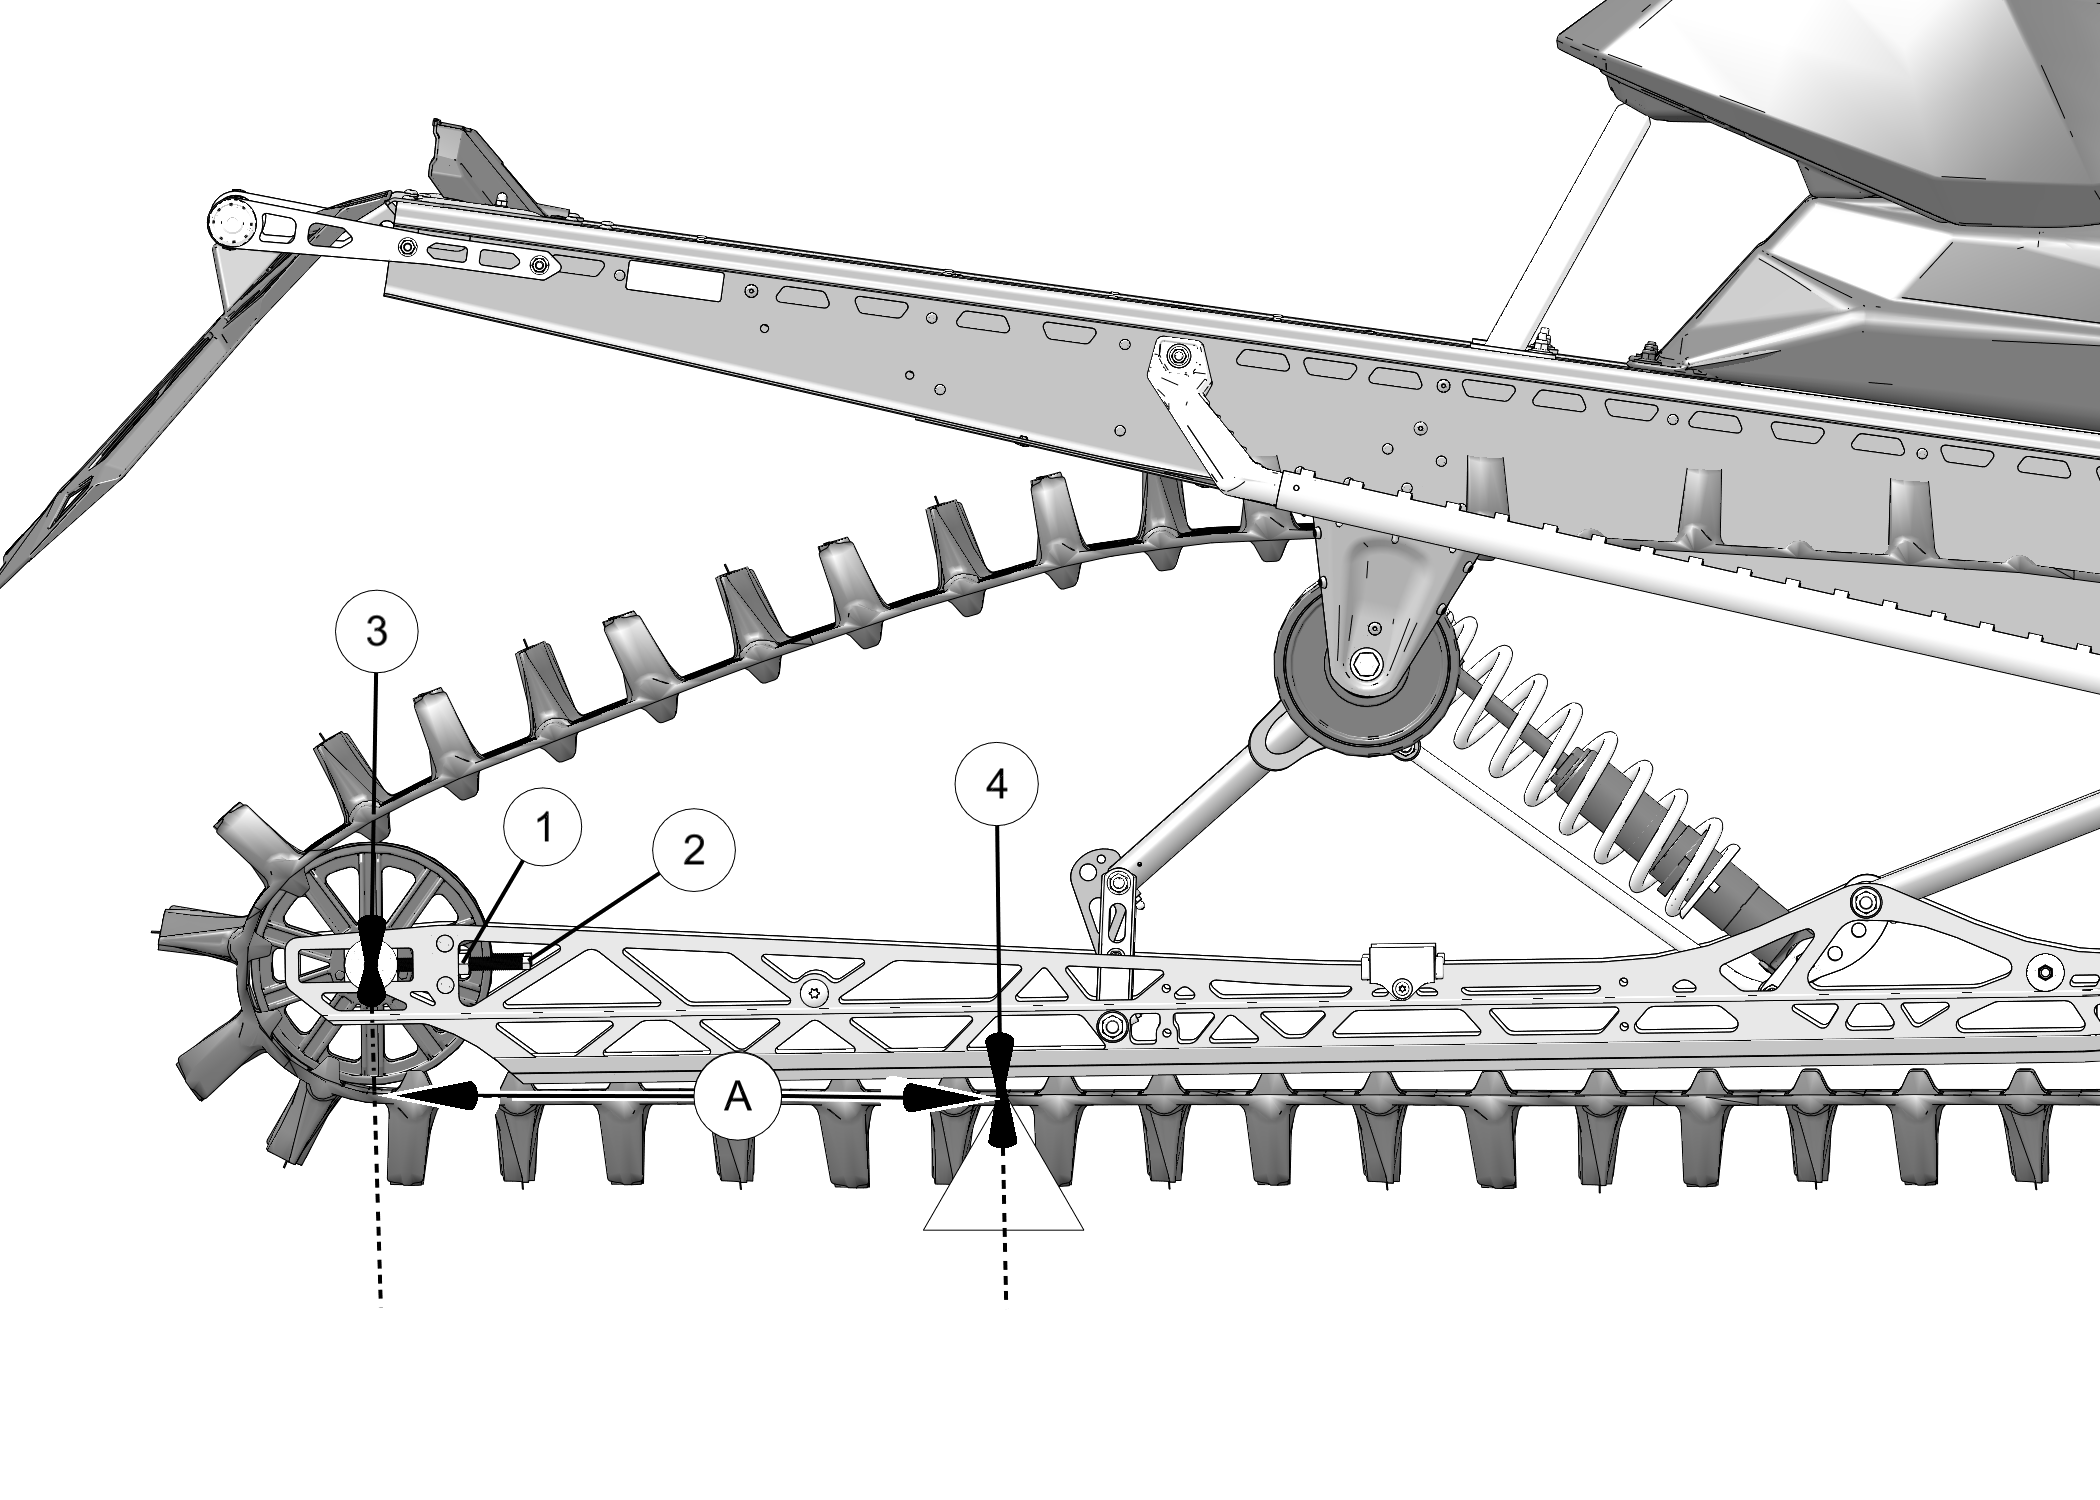
  3. Place the recommended weight or downward pressure on the track at the specified distance (see chart) ahead of the center of the rear idler wheel.
  4. Measure at the point where the weight is hanging.
  5. Check for specified slack between the wear surface of the track clip and the plastic slider.

    If the track needs adjustment:

  6. Loosen the rear idler shaft bolt .
  7. Loosen the locknuts .
    Image
  8. Tighten or loosen the track adjusting screws to provide equal adjustment on both sides of the track.
  9. Repeat the measurement on the other side of the track.
    TIP
    Check more frequently when the snowmobile is new.
  10. Start the engine and slowly rotate the track at least five revolutions. Let the track come to a stop (do not apply brakes).
  11. Check track alignment (see Track Alignment) and adjust as necessary.
  12. Tighten the locknuts.
  13. Tighten the idler shaft bolts.
    TORQUE
    35 ft. lbs. (47.5 Nm)

Track Alignment

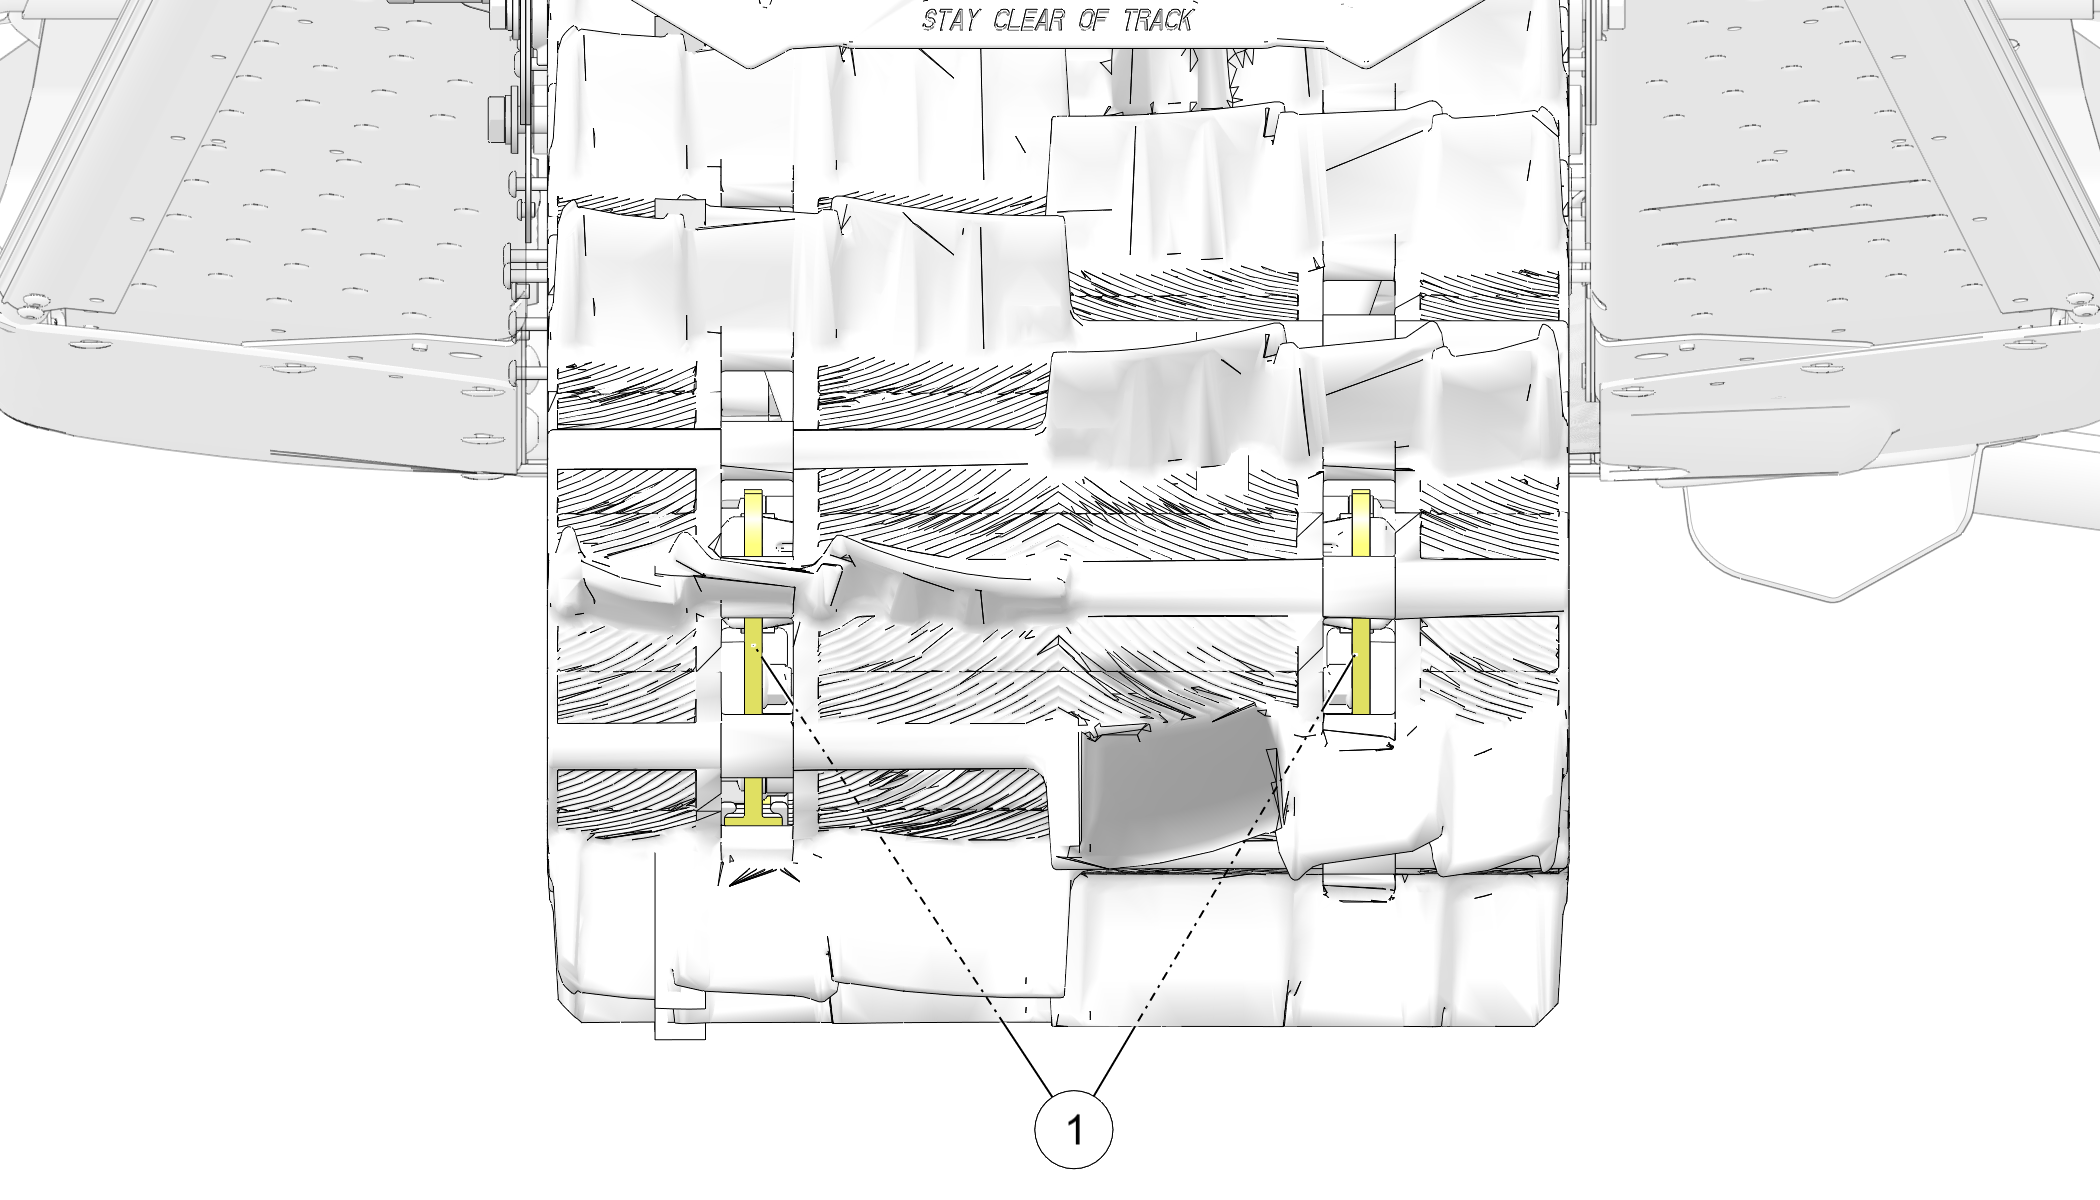
Periodically check that the track is centered and running evenly on the slide rails . Misalignment will cause excessive wear to the track and slide rail.
Image
  1. Safely support the rear of the snowmobile with the track off the ground.
  2. Start the engine and apply a small amount of throttle until the track turns slowly at least five complete revolutions. Stop the engine and let the track come to a stop (do not apply brakes).
  3. Inspect track alignment by looking through the track window to make sure the rails are evenly spaced on each side. If the track runs to the left, loosen the idler shaft bolt, then loosen the left locknut and tighten the left adjusting bolt. If the track runs to the right, loosen the idler shaft bolt, then loosen the right locknut and tighten the right adjusting bolt.
  4. After adjustments are complete, tighten the locknuts.
    TORQUE

    Locknuts

    35 ft-lbs (47.5 N·m)

  5. Repeat steps 2–3 to verify proper alignment.

© Copyright Polaris Inc. All rights reserved.