
Content Source: 2021 INDY VR1 / INDY XC / Switchback ASSAULT Owner’s Manual (9931271 R01) > Ride Command Display Chapter
| IMPORTANT |
|
The Owner's Manual for this vehicle contains warnings, instructions and other information you must read and fully understand before safely riding or performing maintenance on this vehicle.Always follow the warnings and instructions in Owner's Manual. Click the CONTENTS link above for the Table Of Contents, or download a full PDF of the Owner Manual in the Owner Support area of Polaris.com |
| NOTICE |
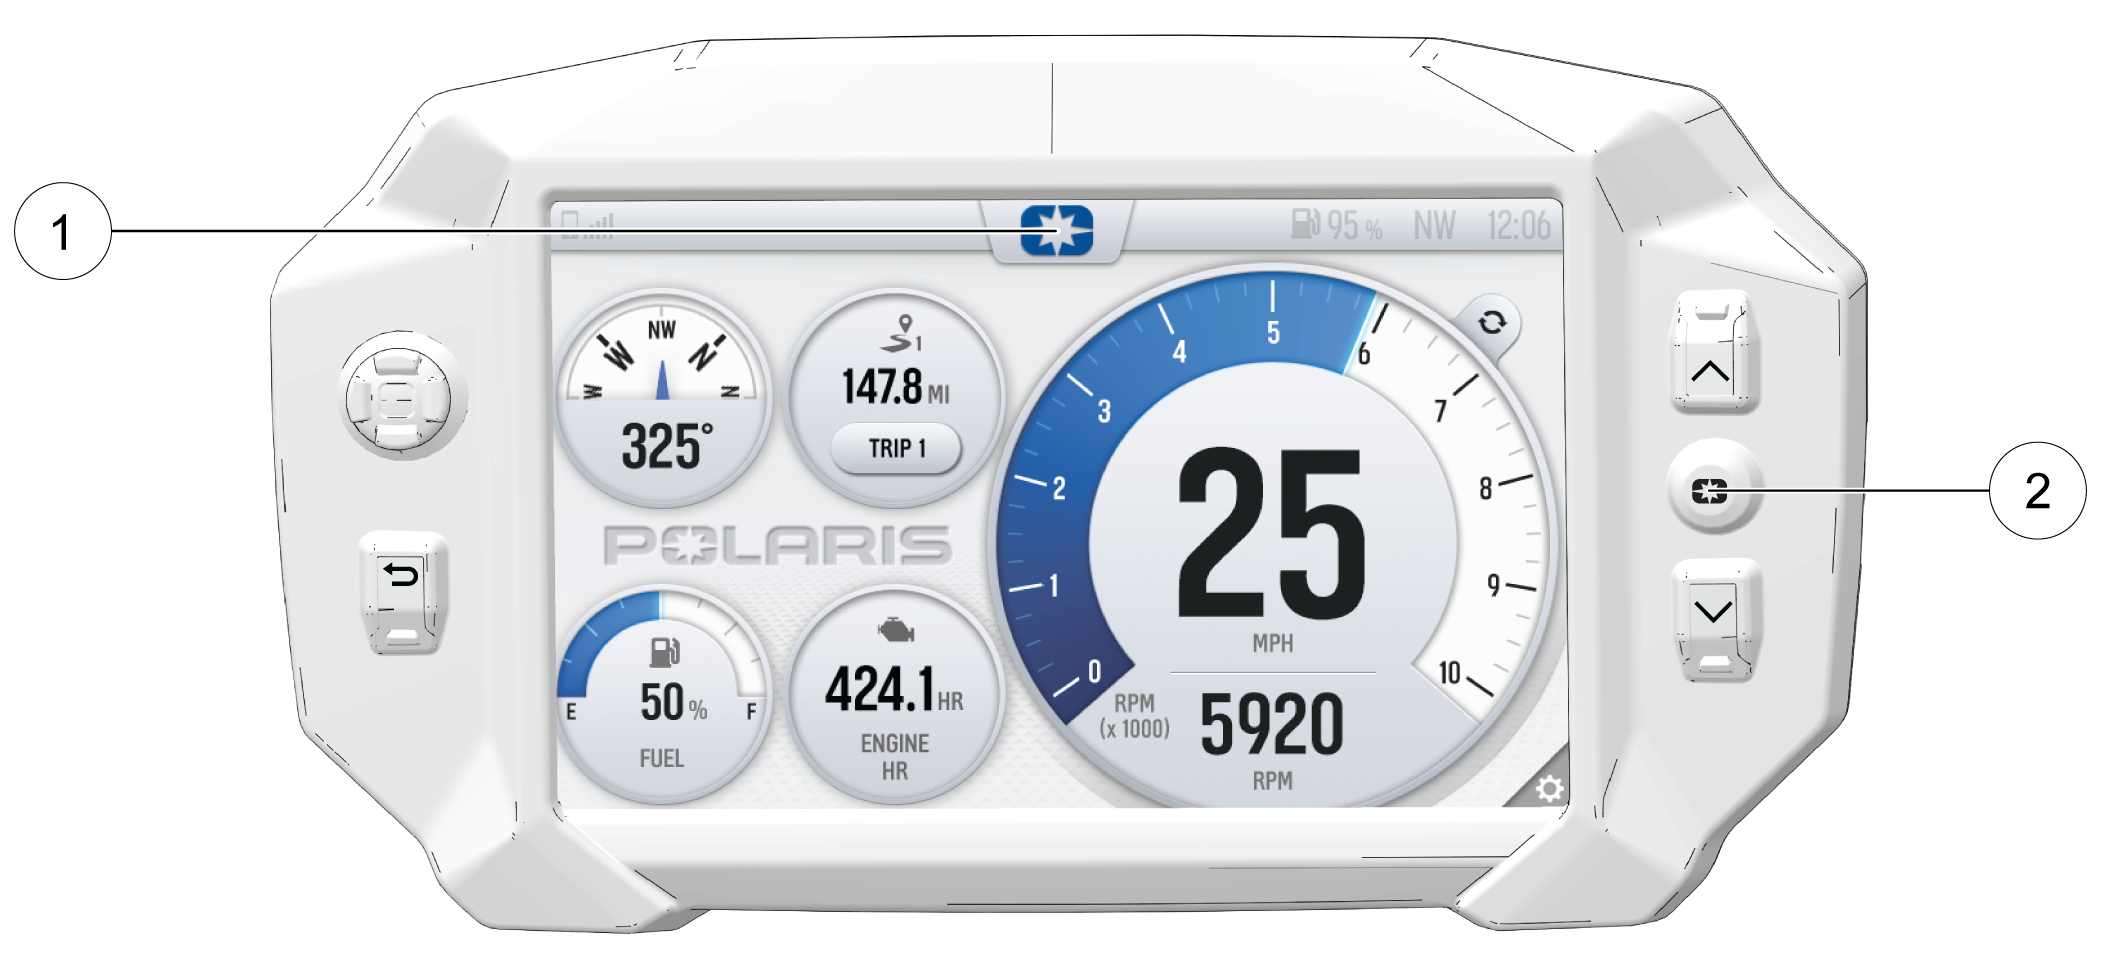
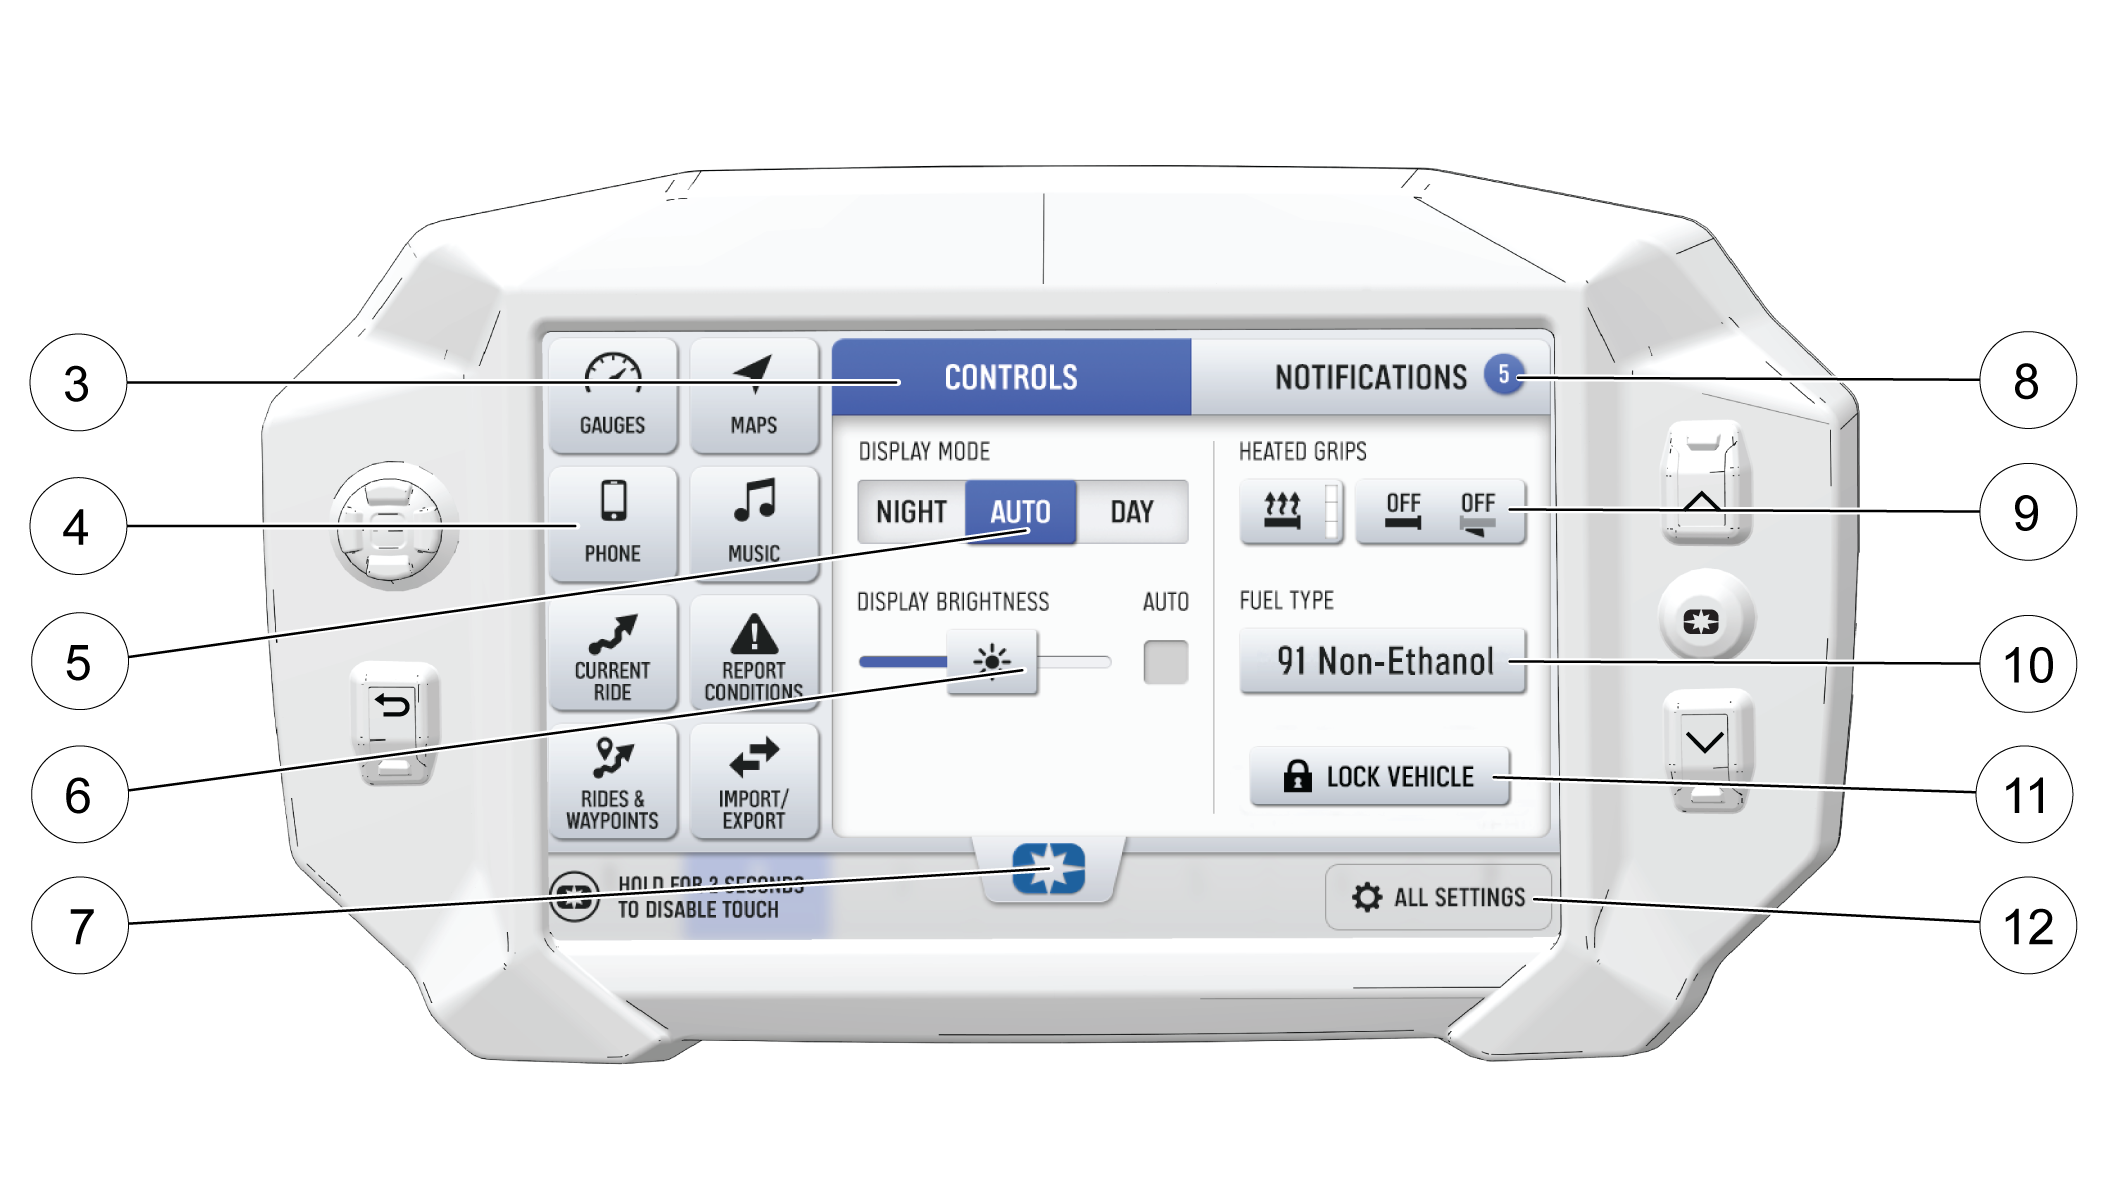
| PRESS and HOLD the Polaris Icon for 2 seconds to disable the touchscreen. |
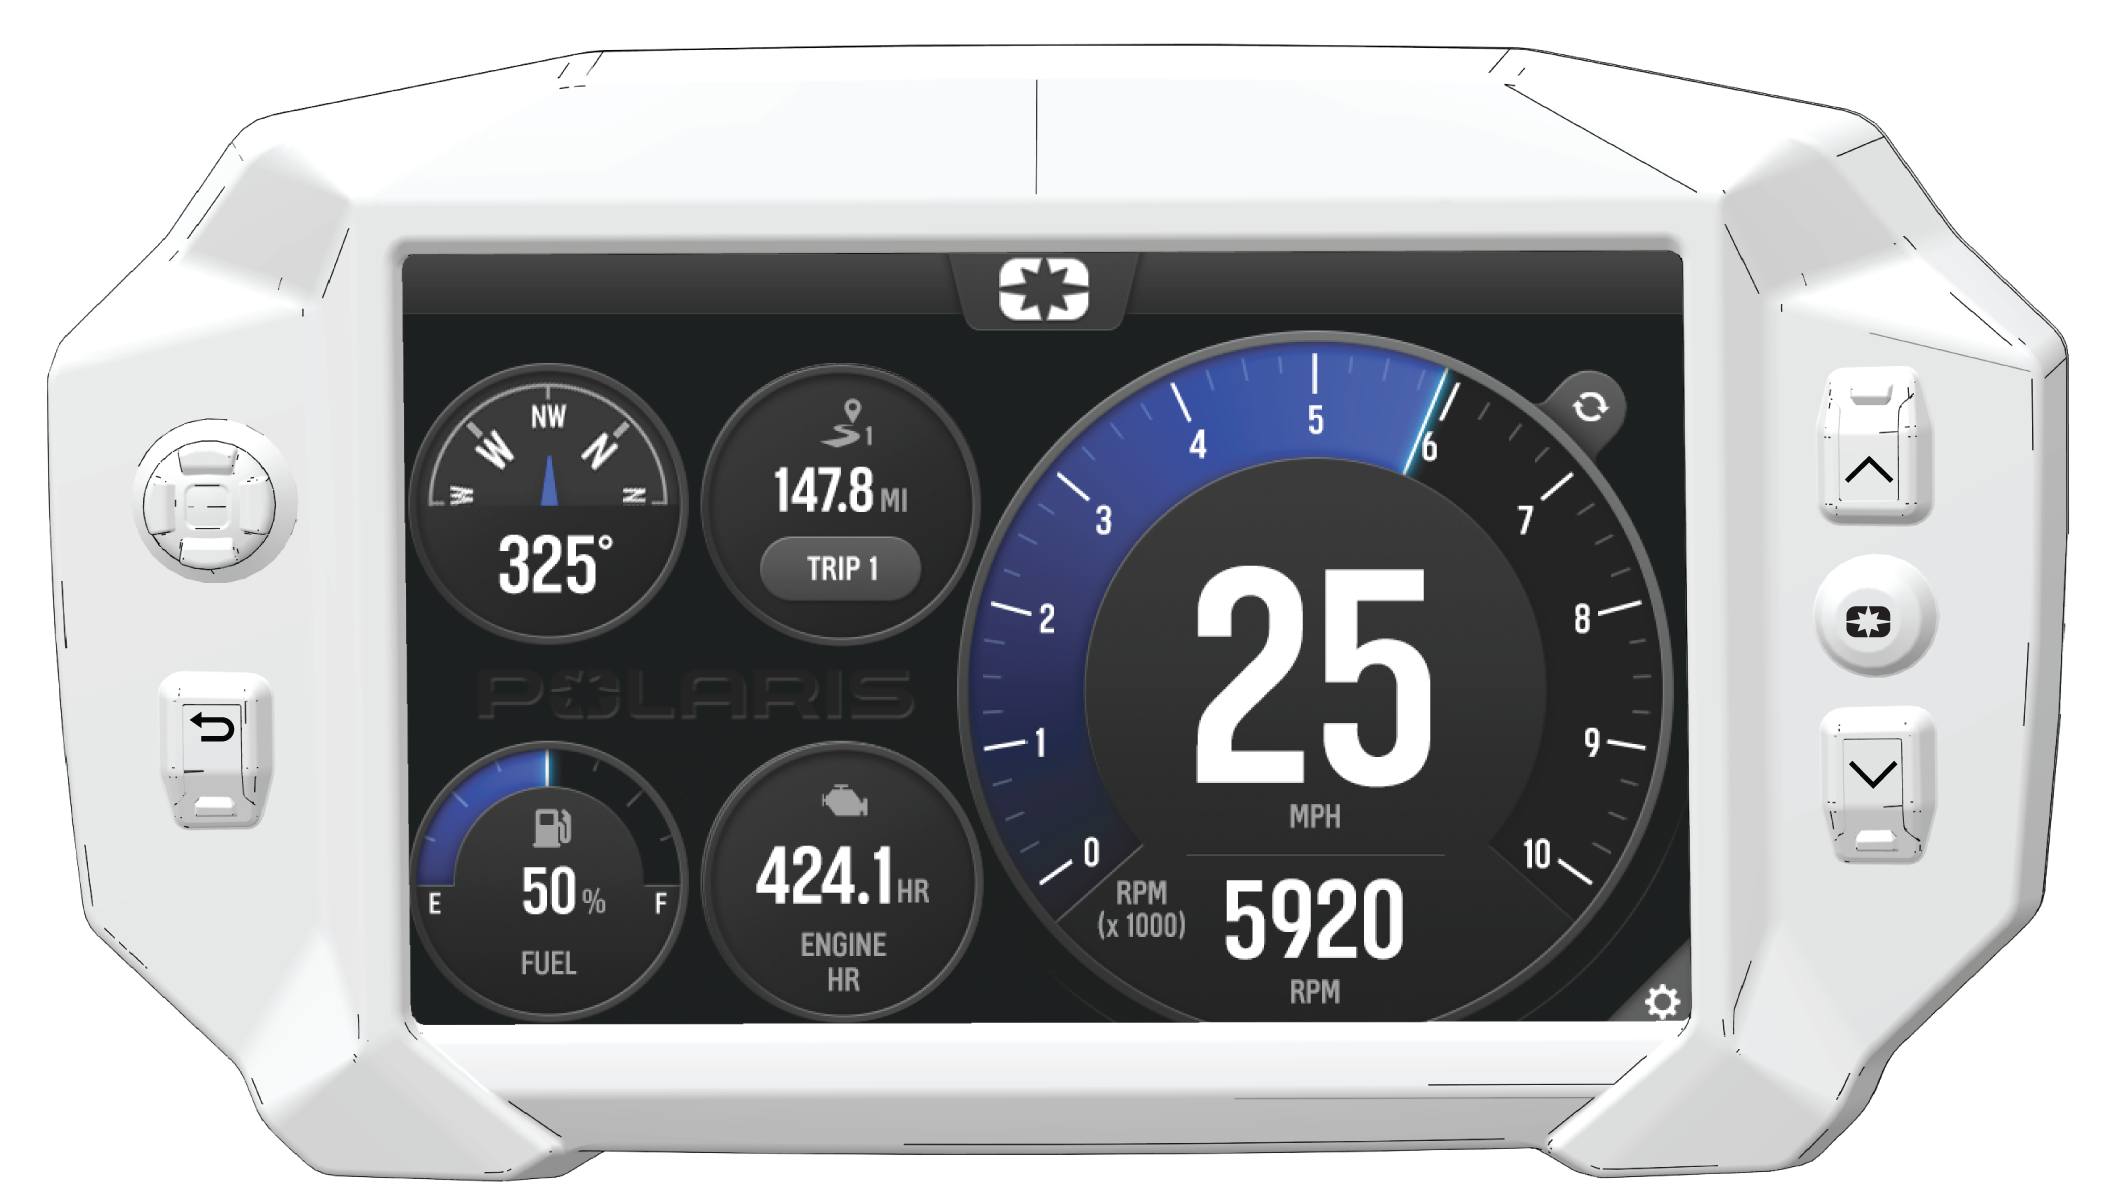
Day Mode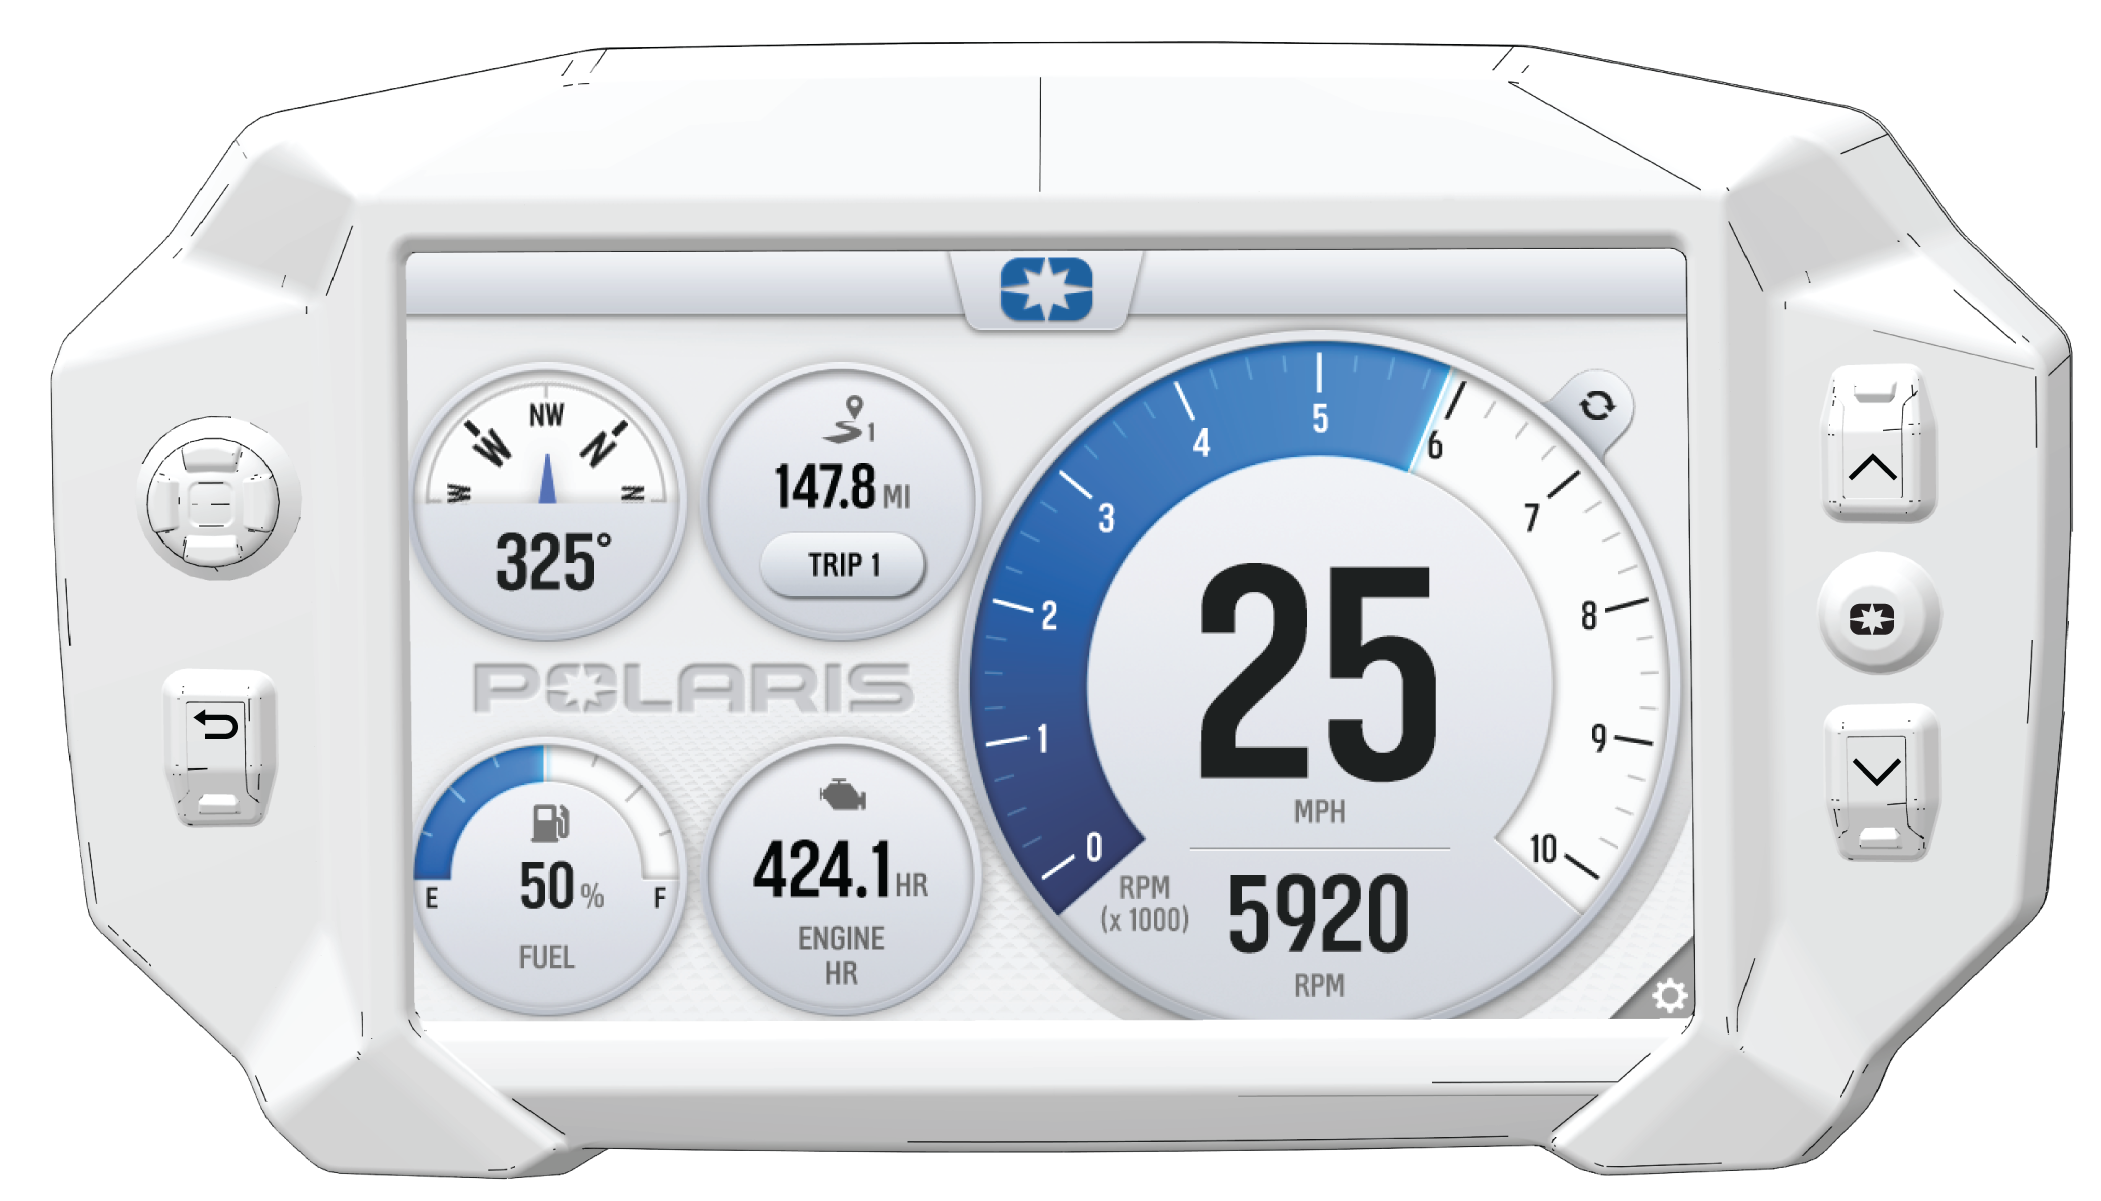
| NOTICE |
| If engine overheating seems to be caused by something other than poor cooling conditions, see your dealer or other qualified technician for service. |
There are four heat settings:
| Button | Button Name | Function |
|---|---|---|
 |
Heated Grips Button | Changes the level of hand grip warmth to low, medium, high, or off. |
 |
Heated Grips Settings | Opens the Smartwarmer settings to customize the temperature of each heat level. |
 |
Plus Button | Increases the grip warmth by one degree. |
 |
Minus Button | Decreases the grip warmth by one degree. |
| NOTICE |
| To change the temperature units from Fahrenheit or Celsius, open the All Settings menu from the Badge Panel and navigate to the General tab. |
| NOTICE |
| The P.A.S.S. feature must be activated by your dealer using Polaris Digital Wrench. See dealer for setup and activation. |
© Copyright Polaris Inc. All rights reserved.