Content Source: 2021 600R Owner’s Manual (9931266 Rev 01) > The Perfect Fit Chapter

IMPORTANT

The Owner's Manual for this vehicle contains warnings, instructions and other information you must read and fully understand before safely riding or performing maintenance on this vehicle.Always follow the warnings and instructions in Owner's Manual.

Click the CONTENTS link above for the Table Of Contents, or download a full PDF of the Owner Manual in the Owner Support area of Polaris.com

Rear Suspension Adjustments

Rear Suspension Adjustments

The following information is provided only as a guideline to be used for initial suspension set-up. Your set-up may vary based on your desired riding style. Rider weight, riding style, trail conditions, and vehicle speed all affect suspension action.
Each rear suspension can be adjusted to suit rider preference and deliver the best performance for a given set of conditions. However, all suspension designs and adjustments involve a compromise, or trade-off. For example, a suspension set up for snow-cross racing would provide a very stiff ride on the trail. A suspension set up for trail riding would bottom out harshly on a snow-cross course.
Make adjustments to one area at a time so you can evaluate the change. For further assistance, see your dealer.

Suspension Performance Tips

  • Rider weight usually determines the position at which the spring preload should be set. However, this may vary with riding style. With a little experimentation, each rider can find a preferred setup. These adjustments are easy to make, involve very little time or effort, and greatly affect the ride.
  • When riding on ice or hard-packed snow, adding a set of bogie wheels to the rail may enhance the machine’s performance. Bogie wheel kits are available from your dealer.
TIP
Keep the suspension pivot points lubricated. This will reduce moisture and rust build-up and ensure proper function of the suspension components. Grease rear suspension pivots before adjusting the rear suspension. Refer to Suspension Maintenance beginning on page 98.

Track Tension

Track adjustment is critical for proper handling. Always maintain correct tension and alignment. Refer to the track tension maintenance section beginning on page 92.

Torsion Spring Adjustment

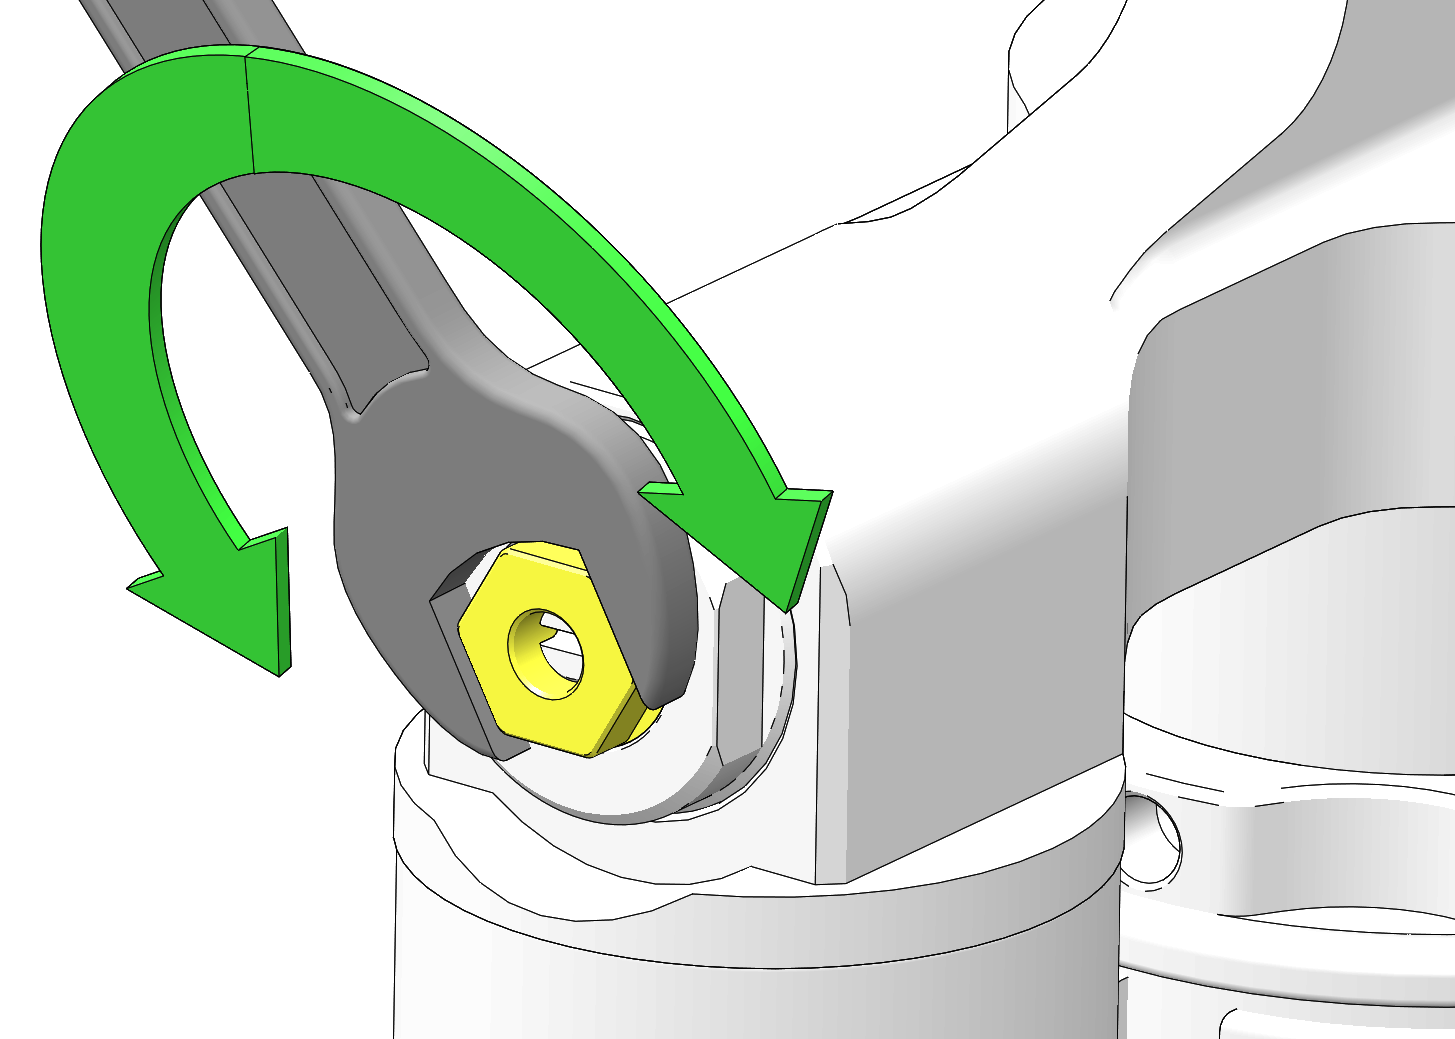
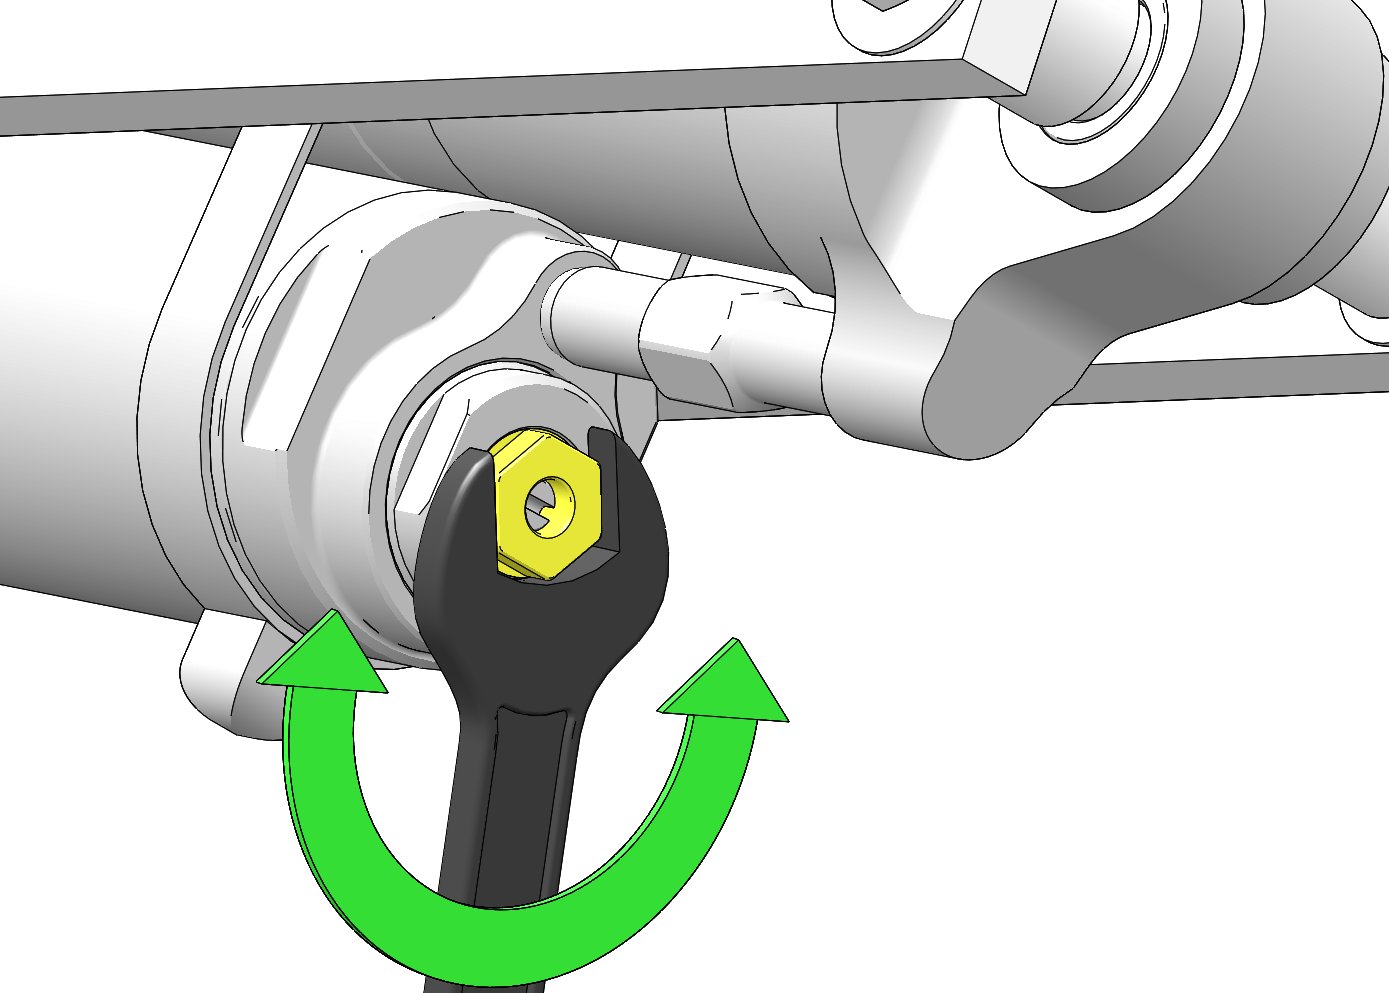
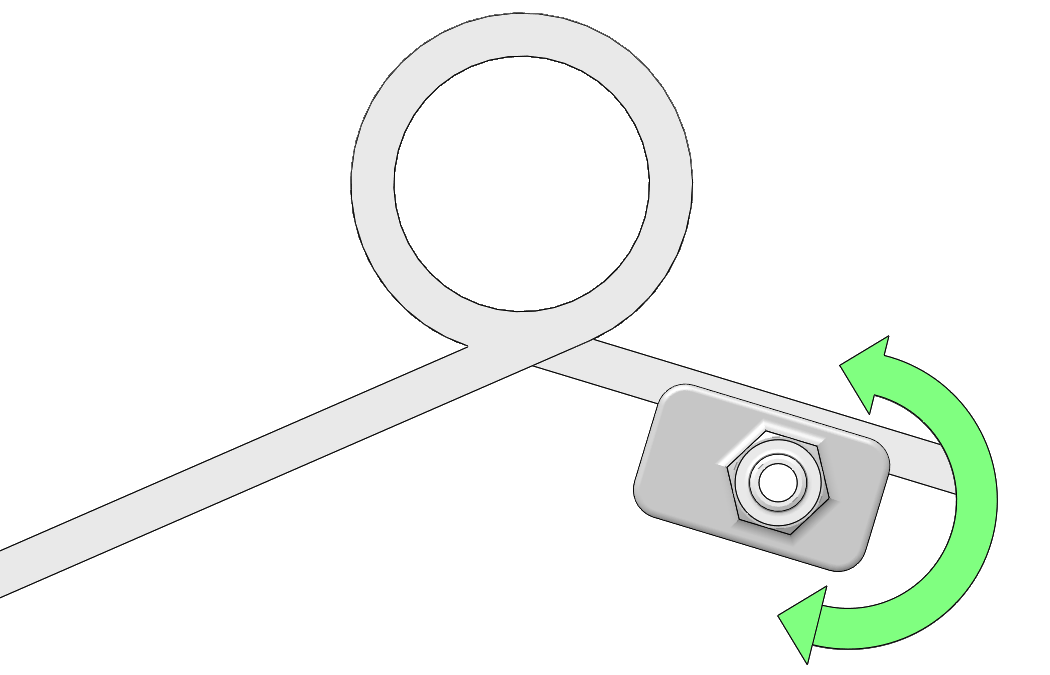
To adjust the rear torsion spring, rotate the adjuster cam to the desired adjustment. The cam has three sides, LOW, MEDIUM and HIGH.

Image
NOTICE
Cam shown in low position.

Limiter Strap Adjustment

One method of changing ski-to-snow pressure is to change the length of the front limiter straps.
  • Lengthening the straps decreases ski pressure under acceleration.
  • Shortening the straps increases ski pressure under acceleration.

Compression Damping

High Compression Adjustment

Increase the high compression damping force by turning the adjuster clockwise to increase the stiffness. Decrease the high compression damping force by turning the adjuster counter-clockwise to increase the softness. The maximum adjustment for this adjuster is the fully turned in position. The minimum adjustment is just 22 clicks out from the maximum position.
Image
Image
Front Track Suspension Rear Track Suspension
Standard Position
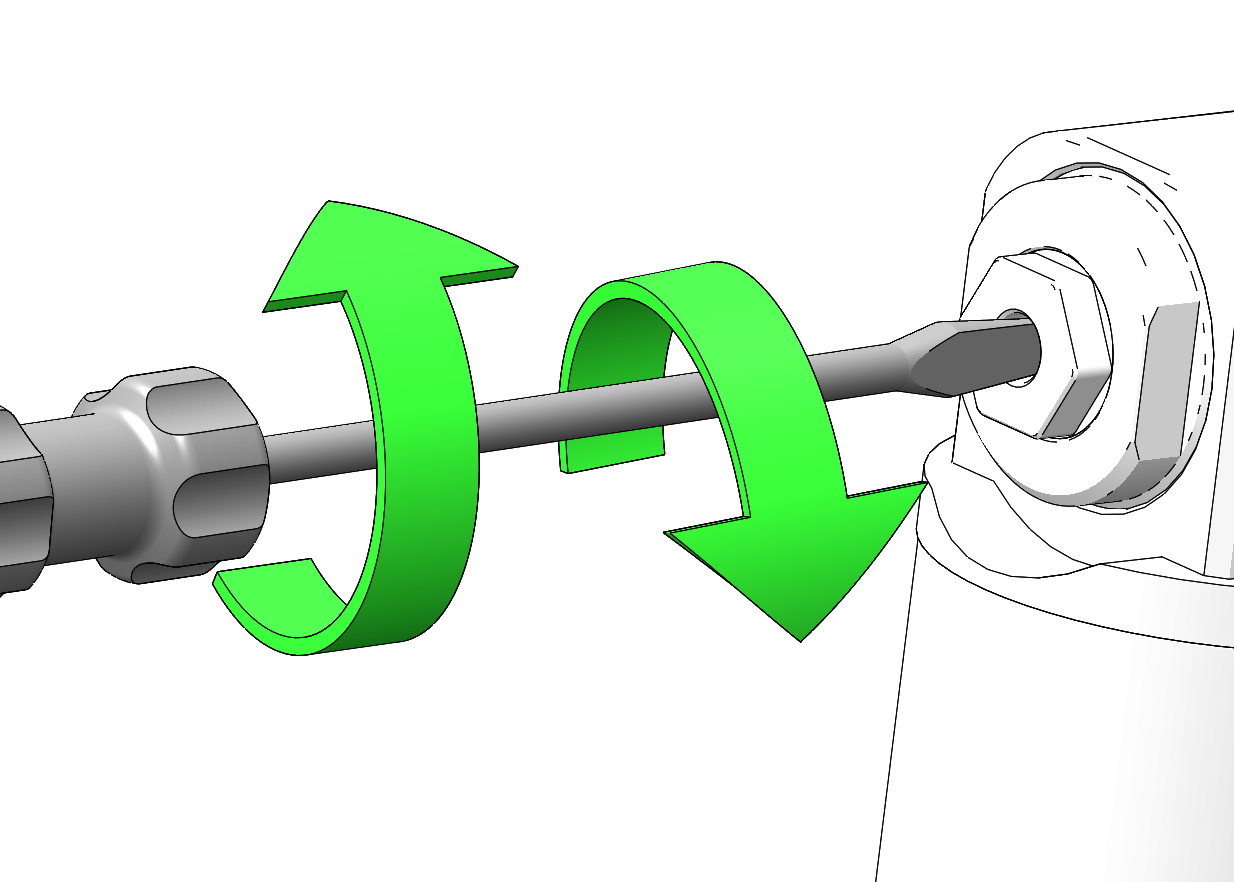
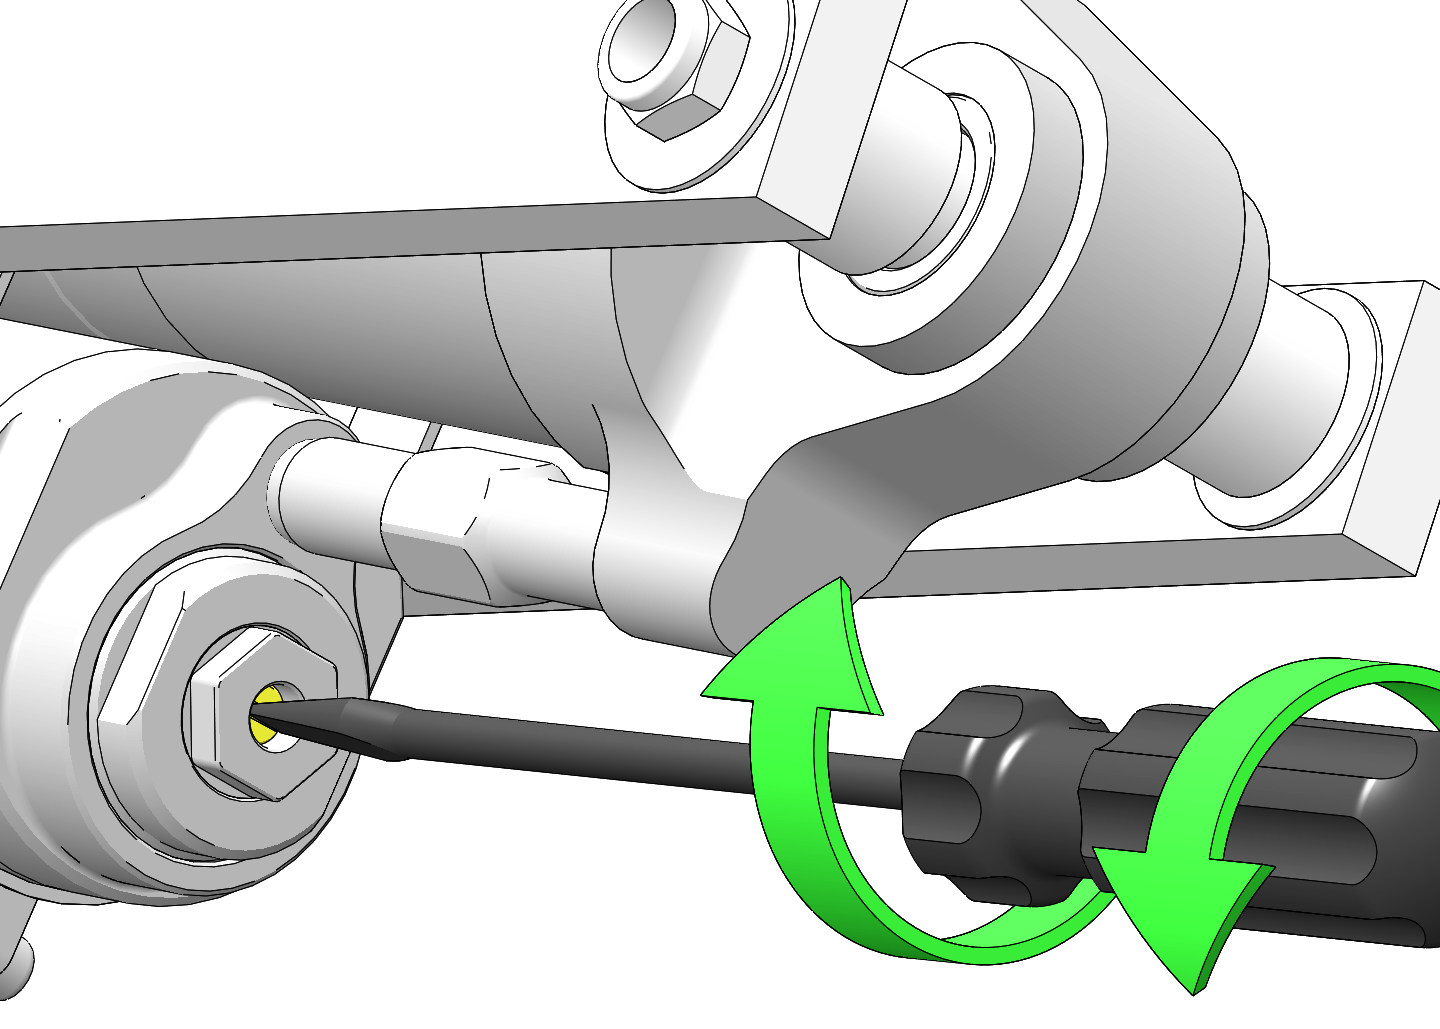
Front Track suspension high speed adjuster 20 clicks out from fully turned in position
Rear Track suspension high speed adjuster 16 clicks out from fully turned in position
caution
Do not turn the adjuster past the minimum or maximum adjustment. The adjuster may be damaged.

Low Compression Adjustment

Increase the low compression damping force by turning the adjuster clockwise to increase the stiffness. Decrease the low compression damping force by turning the adjuster counter-clockwise to increase the softness. The maximum adjustment for this adjuster is the fully turned in position. The minimum adjustment is 28 clicks out from the maximum position.
Image
Image
Front Track Suspension Rear Track Suspension
Standard Position
Front Track suspension low speed adjuster 20 clicks out from fully turned in position
Rear Track suspension low speed adjuster 12 clicks out from fully turned in position
caution
Do not turn the adjuster past the minimum or maximum adjustment. The adjuster may be damaged.

© Copyright Polaris Inc. All rights reserved.