Content Source: 2019 PRO XD Diesel (9930762 Rev 01) > Maintenance Chapter

IMPORTANT

The Owner's Manual for this vehicle contains warnings, instructions and other information you must read and fully understand before safely riding or performing maintenance on this vehicle.Always follow the warnings and instructions in Owner's Manual.

Click the CONTENTS link above for the Table Of Contents, or download a full PDF of the Owner Manual in the Owner Support area of Polaris.com

Lights

Poor lighting can result in reduced visibility when driving. Headlight and taillight lenses become dirty during normal operation. Clean lights frequently and replace burned out lamps promptly. Do not operate this vehicle at night or in low light conditions until the headlight is replaced. Always make sure lights are adjusted properly for best visibility.
When servicing a halogen lamp, don't touch the lamp with bare fingers. Oil from your skin leaves a residue, causing a hot spot that will shorten the life of the lamp.

Headlight Bulb Replacement

  1. Remove the hood from the front cab.
  2. Locate the bulb on the back side of the headlight housing.
  3. Disconnect the harness from the bulb. Be sure to pull on the connector, not on the wiring.
    Image
  4. Turn the bulb counterclockwise and remove it from the headlight housing.
    Image
  5. Install the new bulb into the housing and rotate it clockwise 90° to lock it in place.
    NOTICE

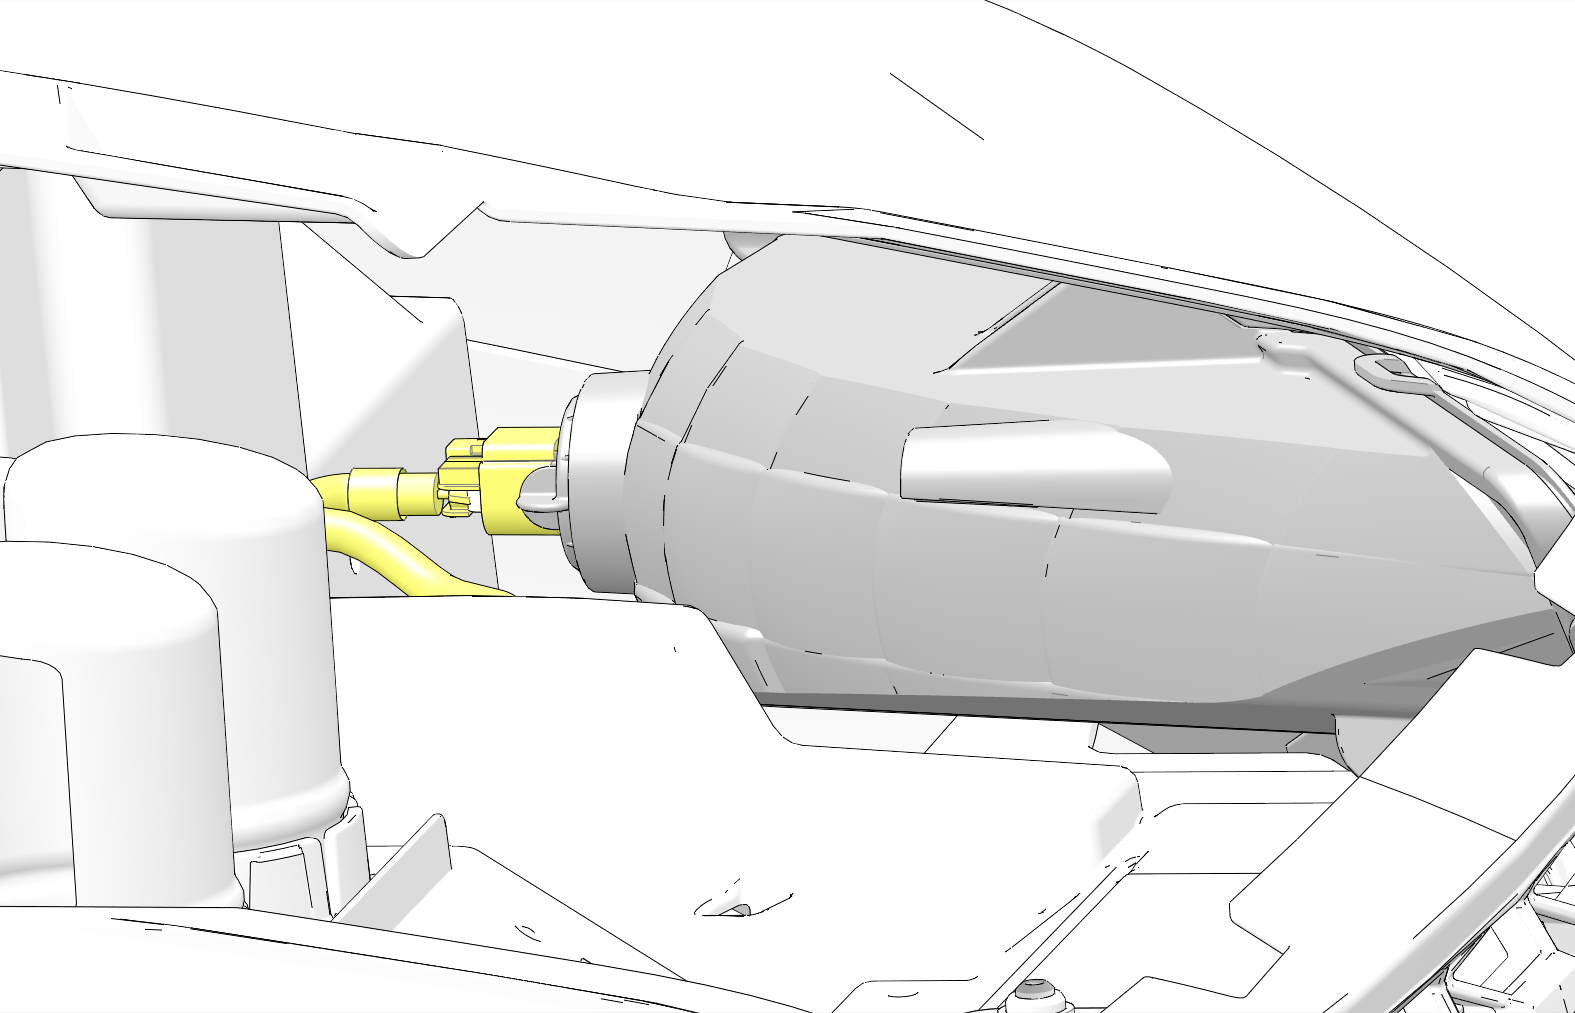
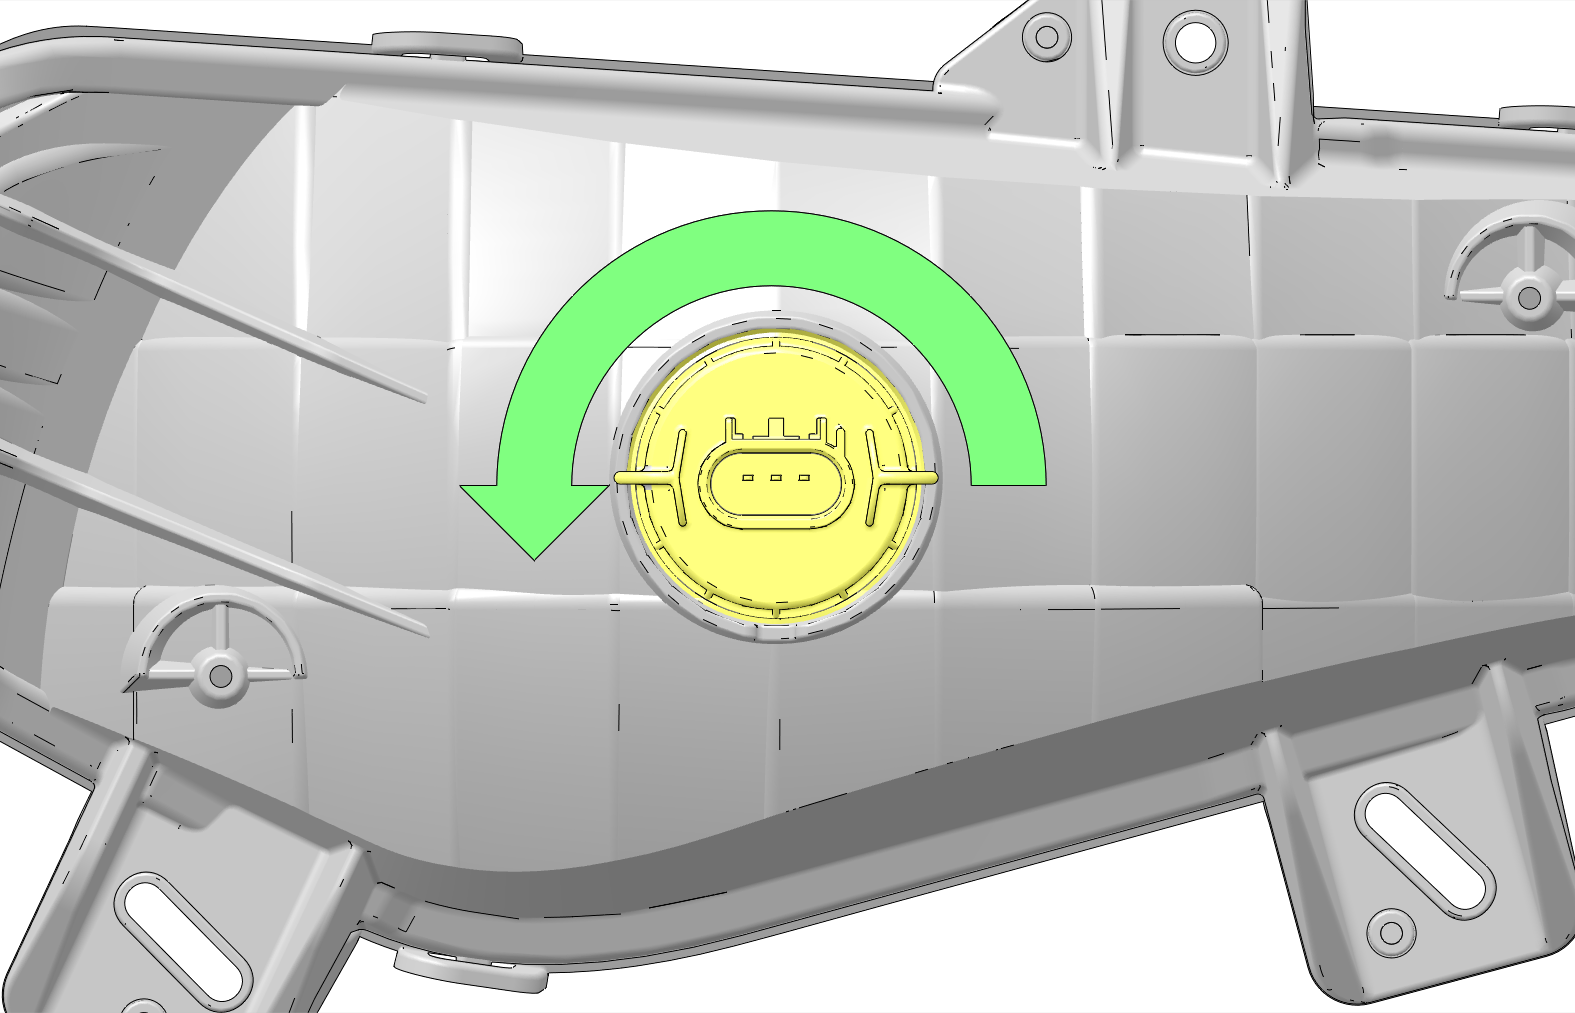
    Make sure the tab on the bulb locates properly in the housing.

  6. Install the harness onto the new headlight bulb and install the hood.

Headlight Beam Adjustment

Image
To adjust the headlight beam, do the following:
  1. Place the vehicle on a level surface with the headlight approximately 7.6 m ( 25 ft) from a wall.
  2. Measure the distance from the floor to the center of the headlight and make a mark on the wall at the same height.
  3. Apply the brakes. Start the engine. Turn on the headlights.
  4. Observe the headlight aim. The most intense part of the headlight beam should be aimed 20 cm (8") below the mark placed on the wall. Include the weight of a rider on the seat while performing this step.
  5. If a headlight needs adjustment, locate the adjustment screw at the back of the headlight.
  6. Loosen the screw, adjust the headlight, and tighten the screw.
  7. Repeat steps 4-6 until the lamp is properly adjusted.

Brake Lights

When the brake pedal is depressed, the brake light comes on. Check the brake light before each ride.
To check the brake lights, do the following:
  1. Turn the key to the ON position.
  2. Depress the brake pedal. The brake light should come on after about 10mm (0.4 in.) of pedal travel. If the light doesn't come on, check the bulb.

© Copyright Polaris Industries Inc. All rights reserved.