Content Source: 2020 RZR XP Turbo S Velocity / XP Turbo S4 Velocity Owner’s Manual (9929978 R02) > Maintenance Chapter

IMPORTANT

The Owner's Manual for this vehicle contains warnings, instructions and other information you must read and fully understand before safely riding or performing maintenance on this vehicle.Always follow the warnings and instructions in Owner's Manual.

Click the CONTENTS link above for the Table Of Contents, or download a full PDF of the Owner Manual in the Owner Support area of Polaris.com

Engine Oil

Oil Recommendations

WARNING
Vehicle operation with insufficient, deteriorated, or contaminated engine oil will cause accelerated wear and may result in engine seizure, accident, and injury. Always perform the maintenance procedures as outlined in the Periodic Maintenance Chart.
Ambient Temperature Range Recommended Oil

-35° F to +100° F

(-37° C to +38° C)

PS-4 5W-50 4-Cycle Oil

0° F to 120° F

(-18° C to +49° C)

PS-4 Extreme Duty

10W-50 4-Cycle Oil

Oil may need to be changed more frequently if POLARIS oil is not used. Do not use automotive oil. Follow the manufacturer's recommendations for ambient temperature operation. Part numbers can be found in the POLARIS Products chapter.
NOTICE
Mixing brands or using a non-recommended oil may cause serious engine damage. Always use the recommended oil. Never substitute or mix oil brands.
Always check and change the oil at the intervals outlined in the Periodic Maintenance Chart. Always use the recommended engine oil.

Oil Check

Always check the oil when the engine is cold. If the engine is hot when the oil is checked, the level will appear to be overfull.
Access the oil check dipstick through the right rear wheel well. Access the oil fill cap through the service access panel on the floor of the cargo box.

Image

Image
  1. Position the vehicle on a level surface.
  2. Place the transmission in PARK.
  3. Start the engine. Allow the engine to idle for 30 seconds.
  4. Stop the engine. Wait two (2) minutes to allow oil to drain back to the sump.
  5. Remove the dipstick. Wipe it dry with a clean cloth.
  6. Reinstall the dipstick completely. Remove the dipstick and check the oil level.
  7. Remove the oil fill cap to add the recommended oil as needed. Maintain the oil level between the minimum and maximum marks on the dipstick. Do not overfill.
  8. Reinstall the fill cap. Reinstall the dipstick.

Oil and Filter Change

WARNING
Spilled oil left on engine components or in the engine area may pose a fire hazard. Use shop rags to clean any spilled oil. If needed, use a non- flammable solvent on the rag to aid the cleaning process. Do not use any device such as pressurized water or air as this may disperse the oil onto engine components and could pose a fire hazard.
Always change the oil and filter at the intervals outlined in the Periodic Maintenance Chart beginning on Maintenance Chart Tables.
  1. Position the vehicle on a level surface. Place the transmission in PARK.
  2. Allow engine to cool down before draining oil.
  3. Place a drain pan under the engine crankcase and remove the drain plug .Image
  4. Access the oil filter through the driver’s side rear wheel well.
    NOTE
    The engine should be off for at least 2 minutes prior to removing the oil filter.
  5. Place the shop rags under filter to catch any spilled oil during removal. Using the Oil Filter Wrench, turn the oil filter counterclockwise to remove it. Tip the open end of the oil filter up to minimize oil spill.
  6. Clean the filter sealing surface on the engine crankcase with a clean rag and ensure the original oil filter o-ring is not stuck to the crankcase.
    WARNING
    Do not use a hose/pressure washer to clean up spilled oil on a vehicle. This may spread oil into surfaces that may get hot which may lead to a fire.
  7. Lubricate the o-ring on the new oil filter with a film of clean engine oil. Check to make sure the o-ring is in good condition. Tighten to specification (Turn by hand until filter O-ring contacts sealing surface, then turn an additional 3/4 turn.)
  8. Inspect the sealing washer on the drain plug for burrs or nicks. Replace the washer if it is damaged.
  9. Reinstall the engine crankcase drain plug. Torque drain plug to specification [12 ft-lbs (16 Nm)].
  10. Remove the cargo box access panel. Add engine oil through the oil fill cap located on top of the engine valve cover.Image
  11. Fill the engine to the recommended specification.
  12. Start engine and allow it to idle for 30 seconds.
  13. Stop the engine and inspect for leaks. Wait at least 15 seconds before removing the oil dipstick.
  14. Unlock the dipstick lever . Remove the dipstick and wipe it dry with a clean rag.Image
  15. Reinstall the dipstick to fully seat it. Do not lock the dipstick.
    NOTE
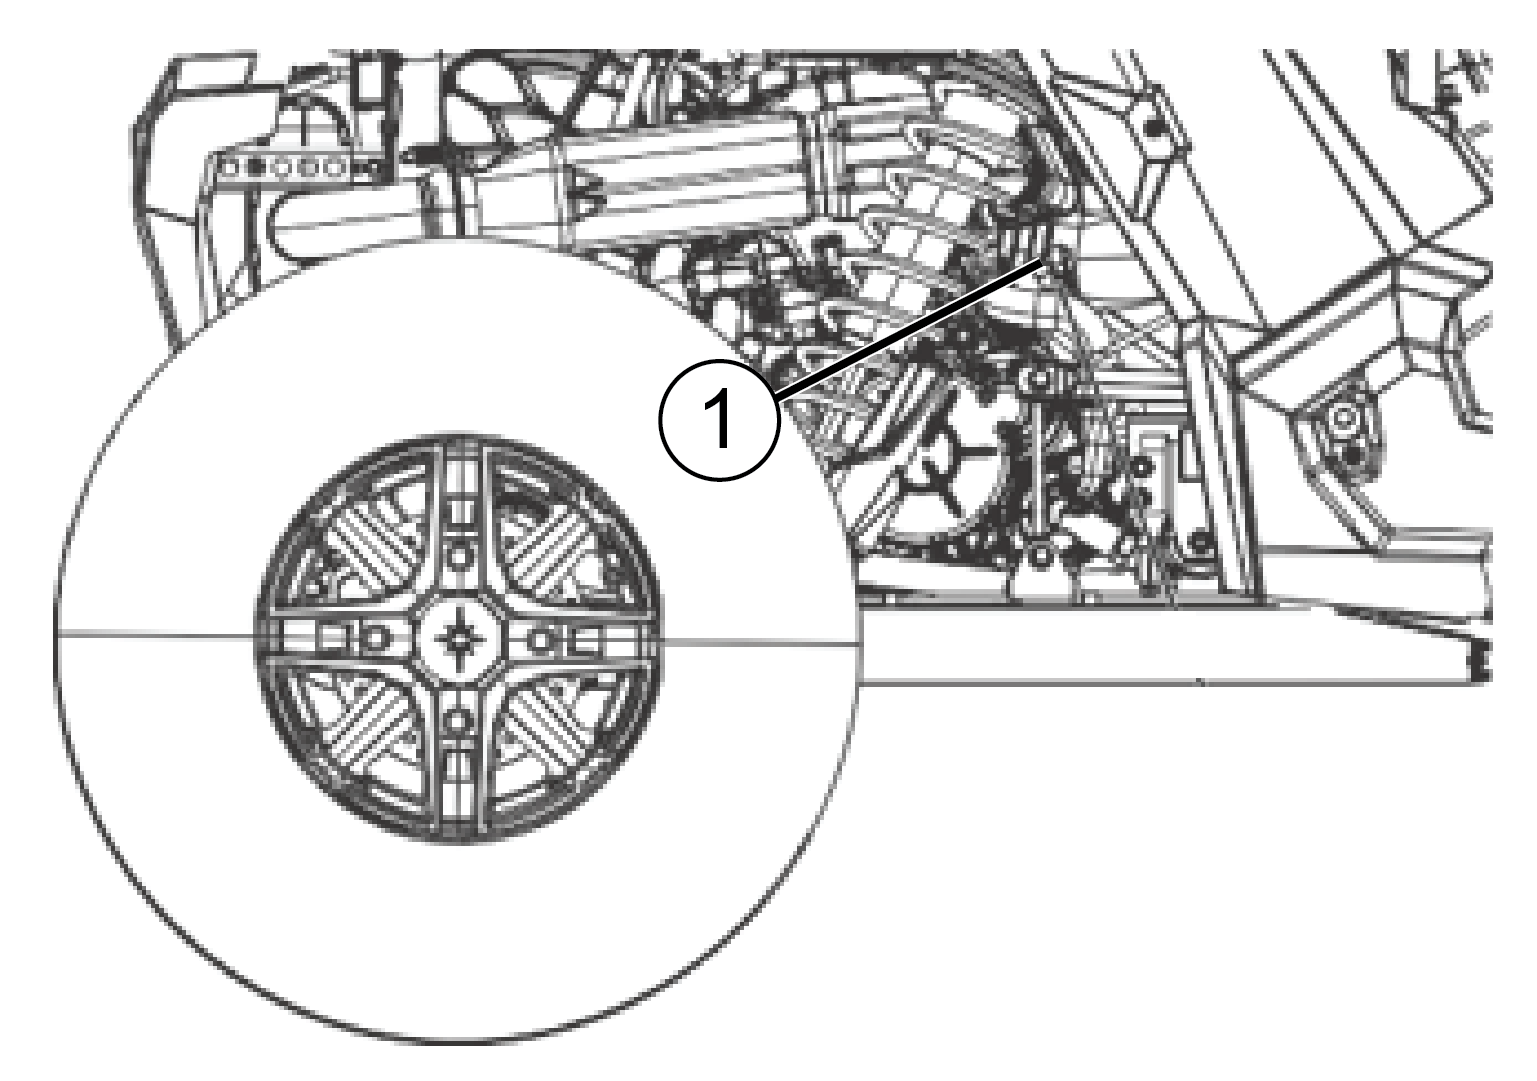
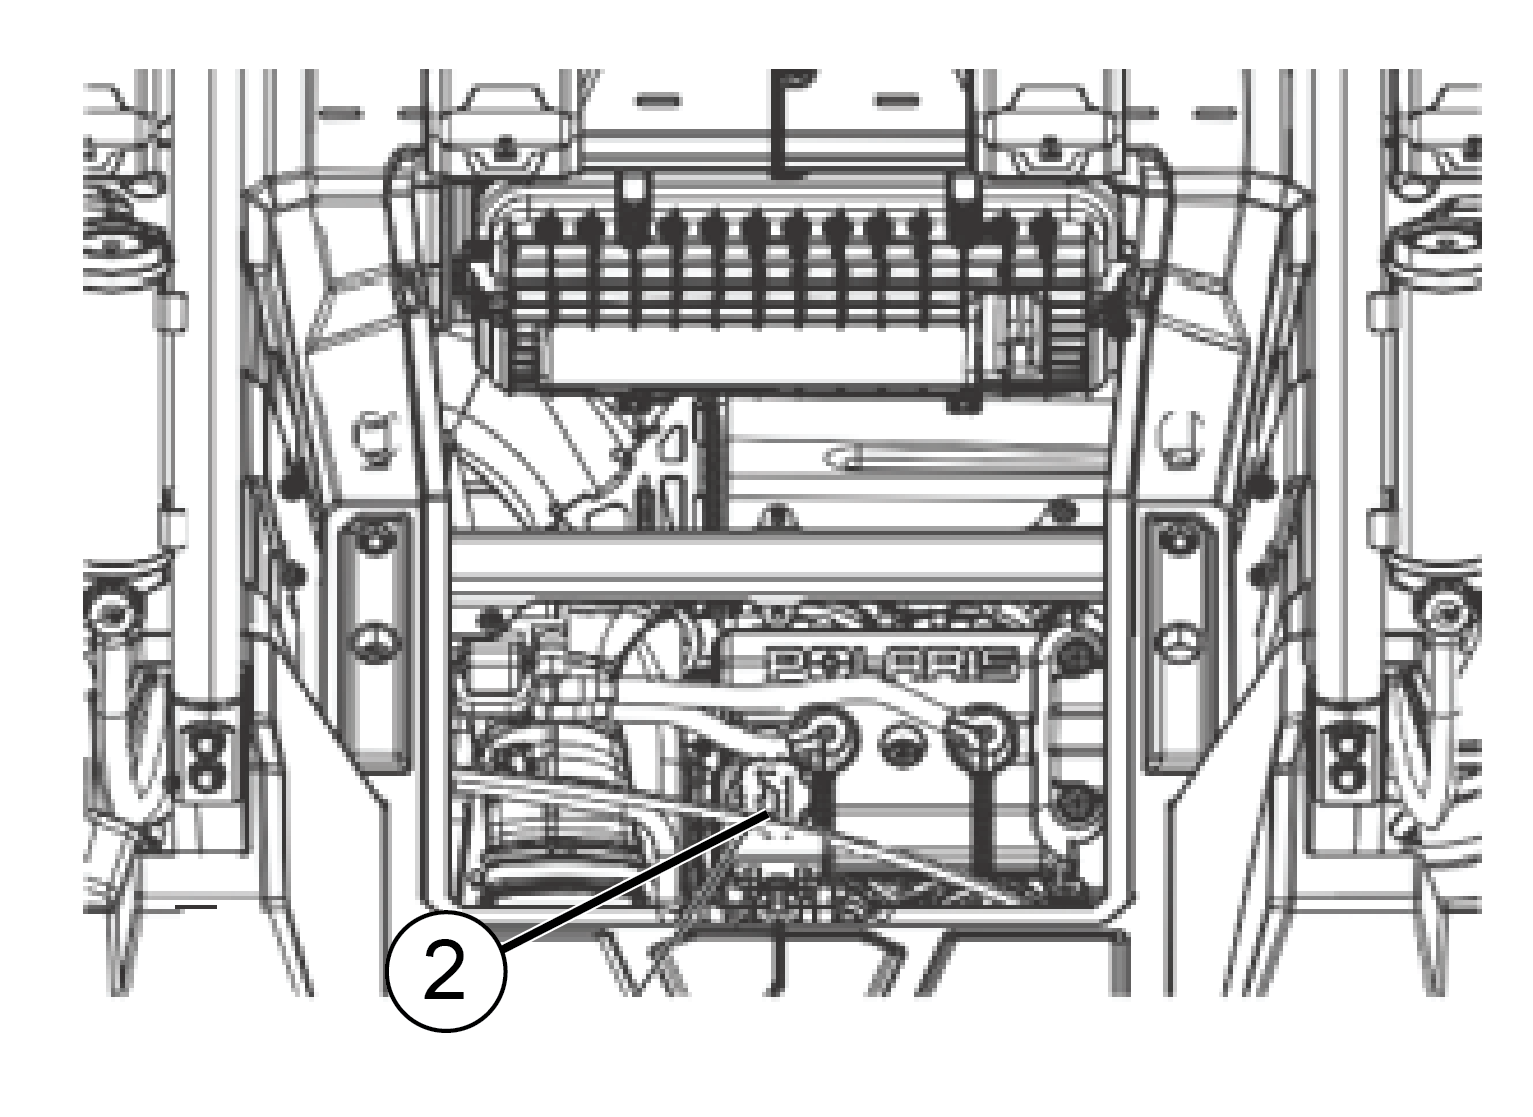
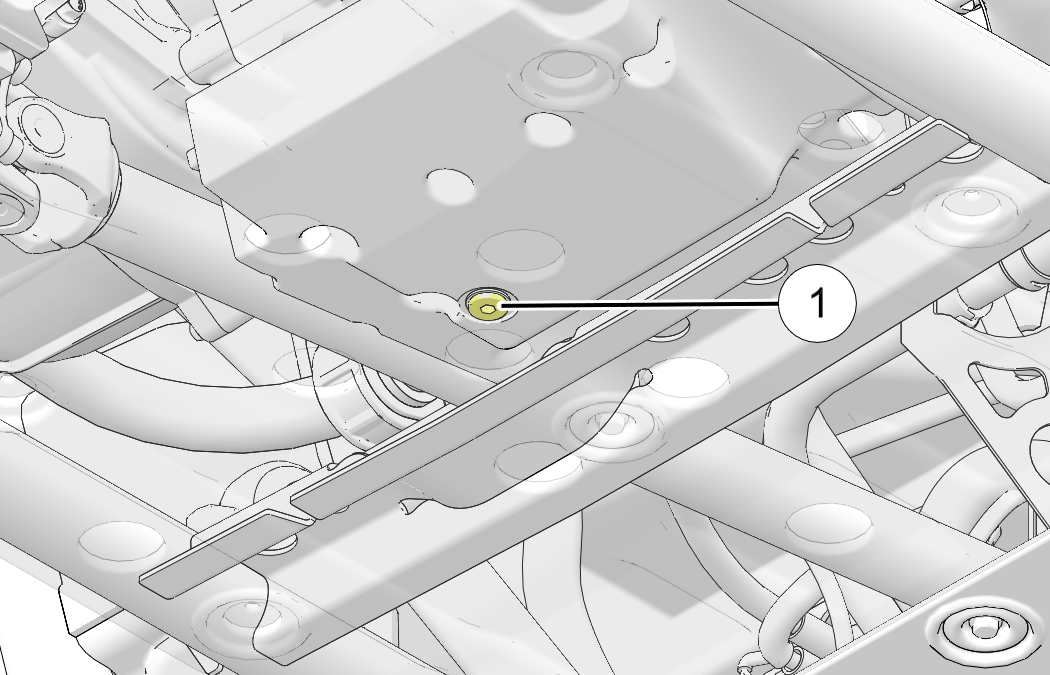
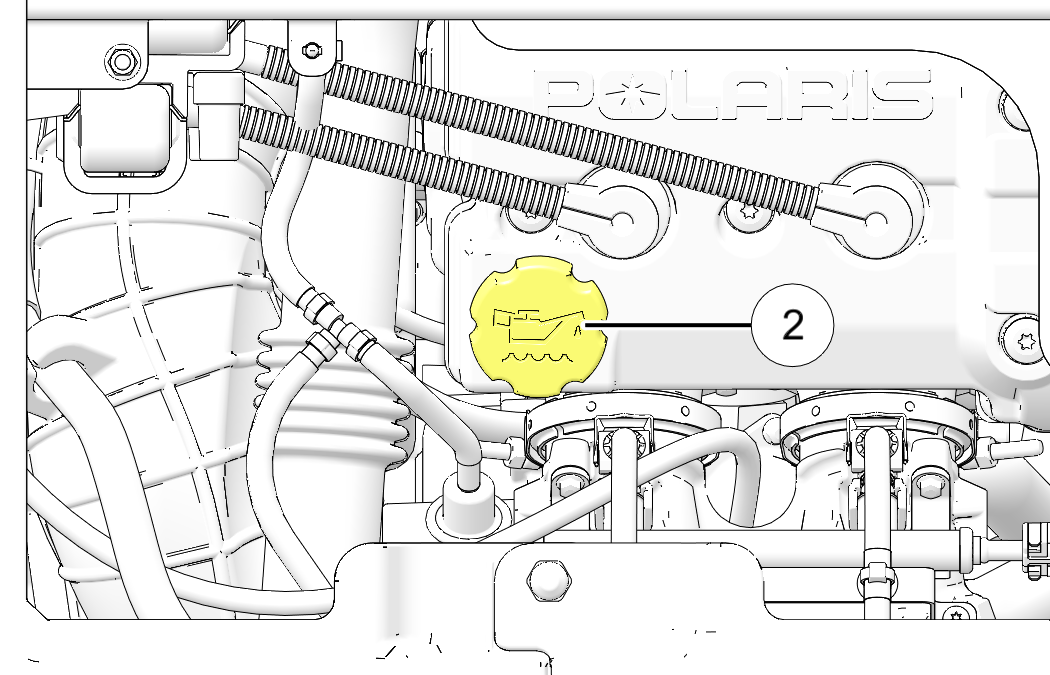
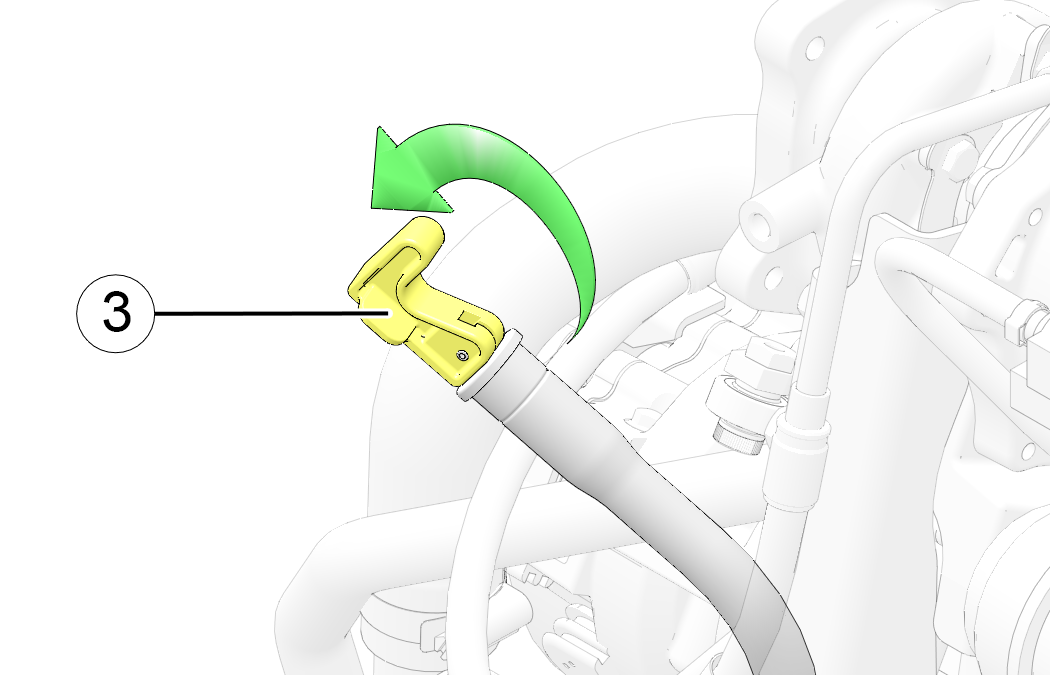
    Make certain the dipstick is inserted all the way down to ensure an accurate reading.
  16. Remove the dipstick and check the oil level.
  17. Add the recommended oil as necessary to bring the oil level within the SAFE range (between the holes) on the dipstick. Do NOT overfill.
    NOTE
    A rising oil level between checks during cold weather operation can indicate contaminants such as gas or moisture collecting in the crankcase. If the oil level is over the upper mark, change the oil immediately.
  18. When finished, reinstall dipstick and lock the lever.
  19. Reinstall the cargo box access panel, engine service panel, and seats.
  20. Dispose of used oil, filter, and rags properly.

© Copyright Polaris Industries Inc. All rights reserved.