Always check and change
the oil at the intervals outlined in the Periodic Maintenance Chart.
Always use the recommended engine
oil. Always change the oil filter whenever changing
oil.
Pay special attention
to the oil level. A rise in oil level during cold weather can indicate
contaminants collecting in the
oil sump or crankcase. Change oil immediately if the
oil level begins to rise. Monitor the oil level, and if it continues
to rise, discontinue use and determine the cause. Your
dealer can assist.
 WARNING WARNING |
|
Vehicle operation with insufficient, deteriorated, or
contaminated engine oil will cause accelerated wear and may result
in
engine seizure, accident
and injury. Always perform the maintenance procedures as outlined
in the Periodic Maintenance Chart.
|
Oil Recommendations
POLARIS recommends
the use of POLARIS PS-4 5W-50 4-Cycle Oil or a similar oil. Refer
to the Specifications section for capacities.
Oil may need to
be changed more frequently if POLARIS PS-4 engine oil is not used.
Follow the manufacturer's recommendations
for ambient temperature operation. See the Polaris
Products section for part numbers.
| NOTICE |
|
Mixing brands or using a non-recommended oil may cause
serious engine damage. Always use the recommended oil. Never substitute
or mix oil brands.
|
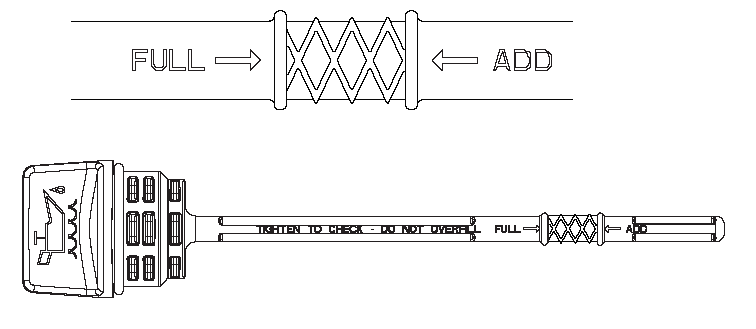
Oil Check
Always check the
oil when the engine is cold. If the engine is hot when the oil is
checked, the level will appear to be overfull.
| caution |
| Always remove all cargo from the cargo box before lifting the box
to access engine components. |
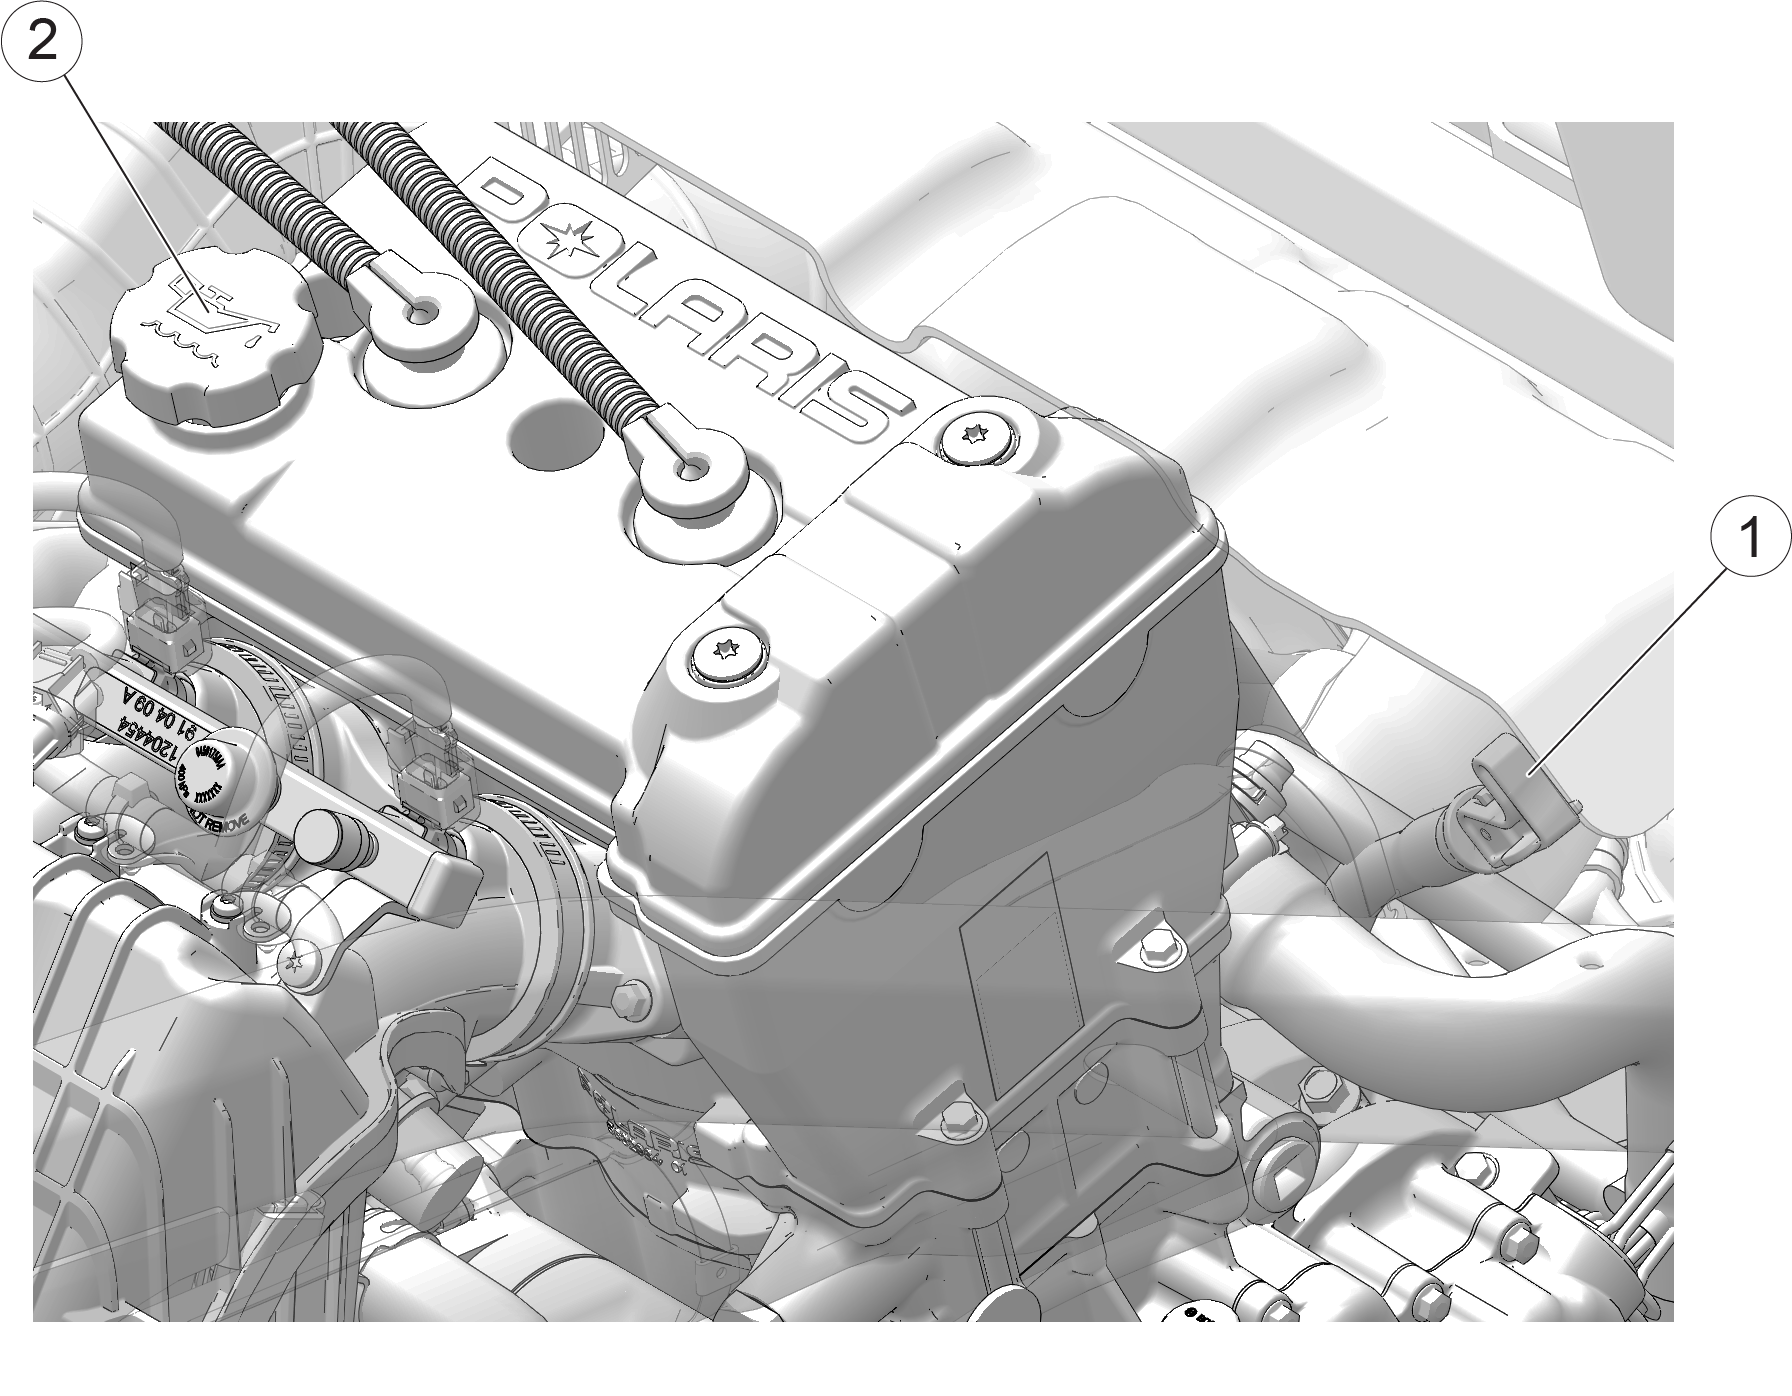
Access the oil
fill cap, dipstick and filter under the cargo box.
- Remove all cargo
from the cargo box. See Dumping
the Cargo Box.
- Position the vehicle
on a level surface.
- Place the transmission
in PARK.
- Stop the engine.
- Stand clear and pull
up on the cargo box release lever. Lift the front of the cargo box.
- Remove the dipstick.
Wipe it dry with a clean cloth.
- Reinstall the dipstick
completely. Remove the dipstick
 and check the oil
level.
and check the oil
level.
- Remove the oil fill
cap
 to add the recommended oil as needed. Maintain the
oil level between the minimum and maximum marks on the dipstick. Do
not
overfill.
to add the recommended oil as needed. Maintain the
oil level between the minimum and maximum marks on the dipstick. Do
not
overfill.
- Reinstall the fill
cap . Reinstall the dipstick.
- Lower the cargo box
and push down securely to latch.
Oil and Filter Change
Always change the
oil and filters at the intervals outlined in the Periodic Maintenance
Chart section. Always change the oil
filter whenever changing oil.
The crankcase drain
plug is located on the bottom of the crankcase. Access the drain plug
through the access hole in the skid
plate under the crankcase (see next page).
| caution |
| Always remove all cargo from the cargo box before lifting the box
to access engine components. |
Access the oil
fill cap, dipstick and filter under the cargo box.
- Remove all cargo
from the cargo box. See Dumping
the Cargo Box.
- Position the vehicle
on a level surface.
- Place the transmission
in PARK.
- Stand clear and pull
up on the cargo box release lever. Lift the front of the cargo box.
- For maximum clearance
in the engine compartment, detach the cargo box shock from the base
of the box.
- Carefully detach
the fuel line and spark plug wires from their retaining clips on the
outlet hose, then loosen the outlet
hose clamp and remove the hose from the
clutch cover.
| caution |
| Do not allow debris or other objects to enter the clutch cover. |
- Locate the crankcase
drain plug access hole in the skid plate.
- Clean the area around
the crankcase drain plug.
| caution |
| Hot oil can cause burns to skin. Do not allow hot oil to contact
skin. |
- Place a drain pan
under the engine crankcase and remove the drain plug. Allow the oil
to drain completely.
- Using an oil filter
wrench, turn the filter counter-clockwise to remove it.
- Using a clean dry
cloth, clean the filter sealing surface on the crankcase.
- Lubricate the o-ring
on the new filter with a film of fresh engine oil. Check to make sure
the o-ring is in good condition.
- Install the new filter
and turn by hand until the filter gasket contacts the sealing surface,
then turn an additional 3/4
turn.
- Reinstall the drain
plug. Torque the drain plug to 12 ft-lbs (16 Nm).
- Remove the oil fill
cap and add 2.5 quarts (2.4 l) of recommended oil. Reinstall the fill
cap.
- Start the engine
and check for leaks.
- Stop the engine and
wait 15 seconds before removing the dipstick.
- Remove the dipstick.
Wipe it dry with a clean cloth.
- Reinstall the dipstick
completely. Remove the dipstick and check the oil level.
- Remove the oil fill
cap and add oil as needed to bring the level to the upper mark on
the dipstick. Do not overfill.
- Reinstall the fill
cap. Reinstall the dipstick.
- Reinstall the outlet
hose to the clutch box, routing the hose under the fuel line and spark
plug wires. Make sure the clutch
cover rib aligns in the notch at the end
of the outlet hose. Tighten the clamp.
- Reinstall the fuel
line and spark plug wires to the retaining clips on the outlet hose.
- Lower the cargo box
and push down securely to latch.
- Dispose of used filter
and oil properly.