Content Source: 2020 600/800 HO/850 AXYS Conventional Tunnel Owner’s Manual (9929775 R02) > Maintenance Chapter

IMPORTANT

The Owner's Manual for this vehicle contains warnings, instructions and other information you must read and fully understand before safely riding or performing maintenance on this vehicle.Always follow the warnings and instructions in Owner's Manual.

Click the CONTENTS link above for the Table Of Contents, or download a full PDF of the Owner Manual in the Owner Support area of Polaris.com

Battery Maintenance

Keep battery terminals and connections free of corrosion. If cleaning is necessary, remove the corrosion with a stiff wire brush. Wash with a solution of one tablespoon baking soda and one cup water. Rinse well with tap water and dry off with clean shop towels. Coat the terminals with dielectric grease or petroleum jelly.
WARNING
CALIFORNIA PROPOSITION 65 WARNING:
Batteries, battery posts, terminals and related accessories can expose you to chemicals including lead, which is known to the State of California to cause birth defects or other reproductive harm. For more information go to www.P65Warnings.ca.gov.
WARNING
Battery electrolyte is poisonous. It contains sulfuric acid. Serious burns can result from contact with skin, eyes or clothing. Antidote:
  • External: Flush with water.
  • Internal: Drink large quantities of water or milk. Follow with milk of magnesia, beaten egg, or vegetable oil. Call physician immediately.
  • Eyes: Flush with water for 15 minutes and get prompt medical attention.
Batteries produce explosive gases.
Keep sparks, flame, cigarettes, etc. away. Ventilate when charging or using in an enclosed space. Always shield eyes when working near batteries.
KEEP OUT OF REACH OF CHILDREN.

Battery Removal

WARNING
Improperly connecting or disconnecting battery cables can result in an explosion and cause serious injury or death. When removing the battery, always disconnect the negative (black) cable first. When reinstalling the battery, always connect the negative (black) cable last.
  1. Remove the right side panel to access the battery.
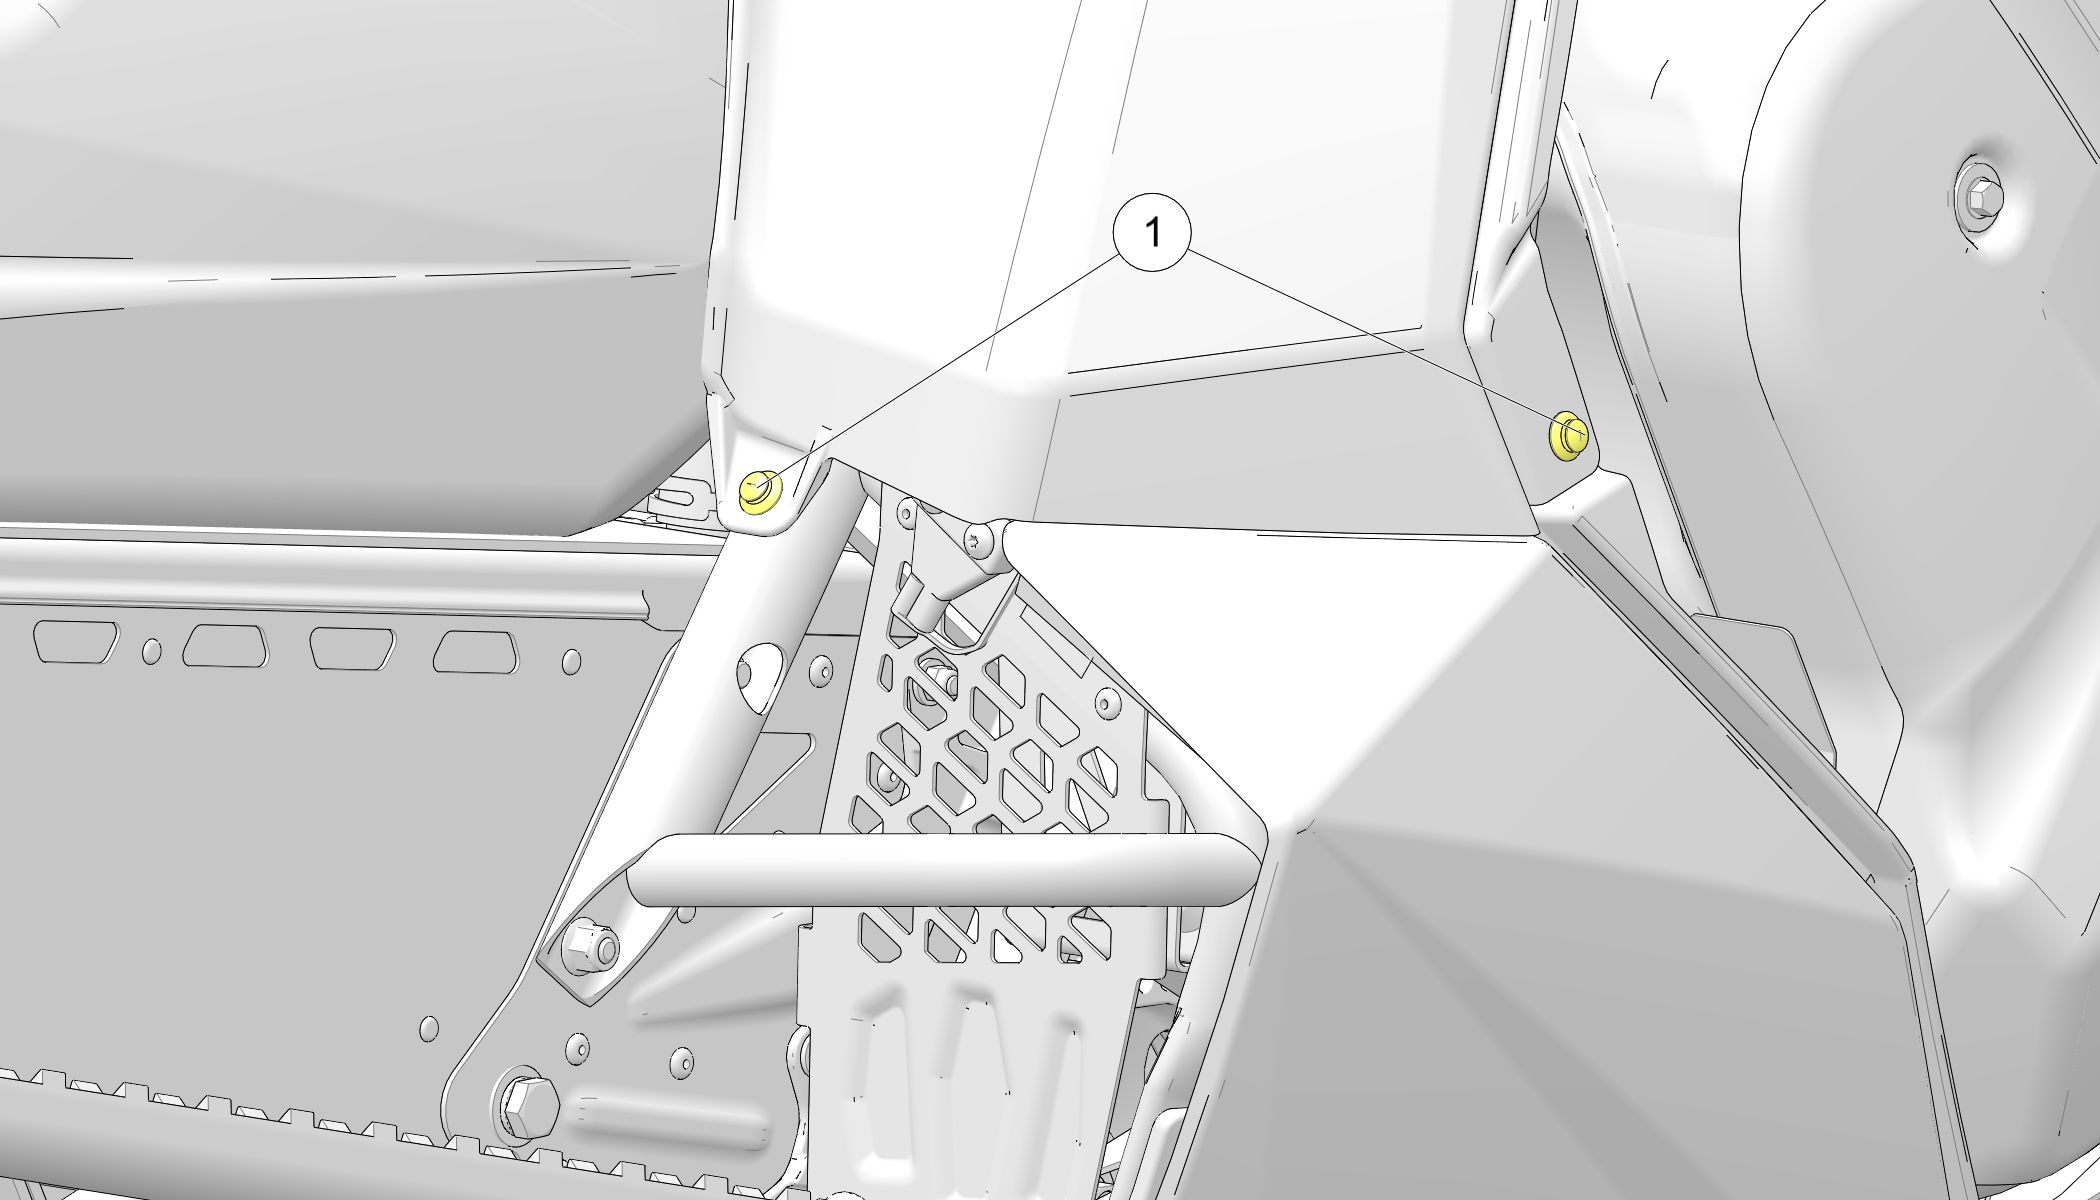
  2. Remove the two plastic rivets securing the console panel to the chassis.

    Image

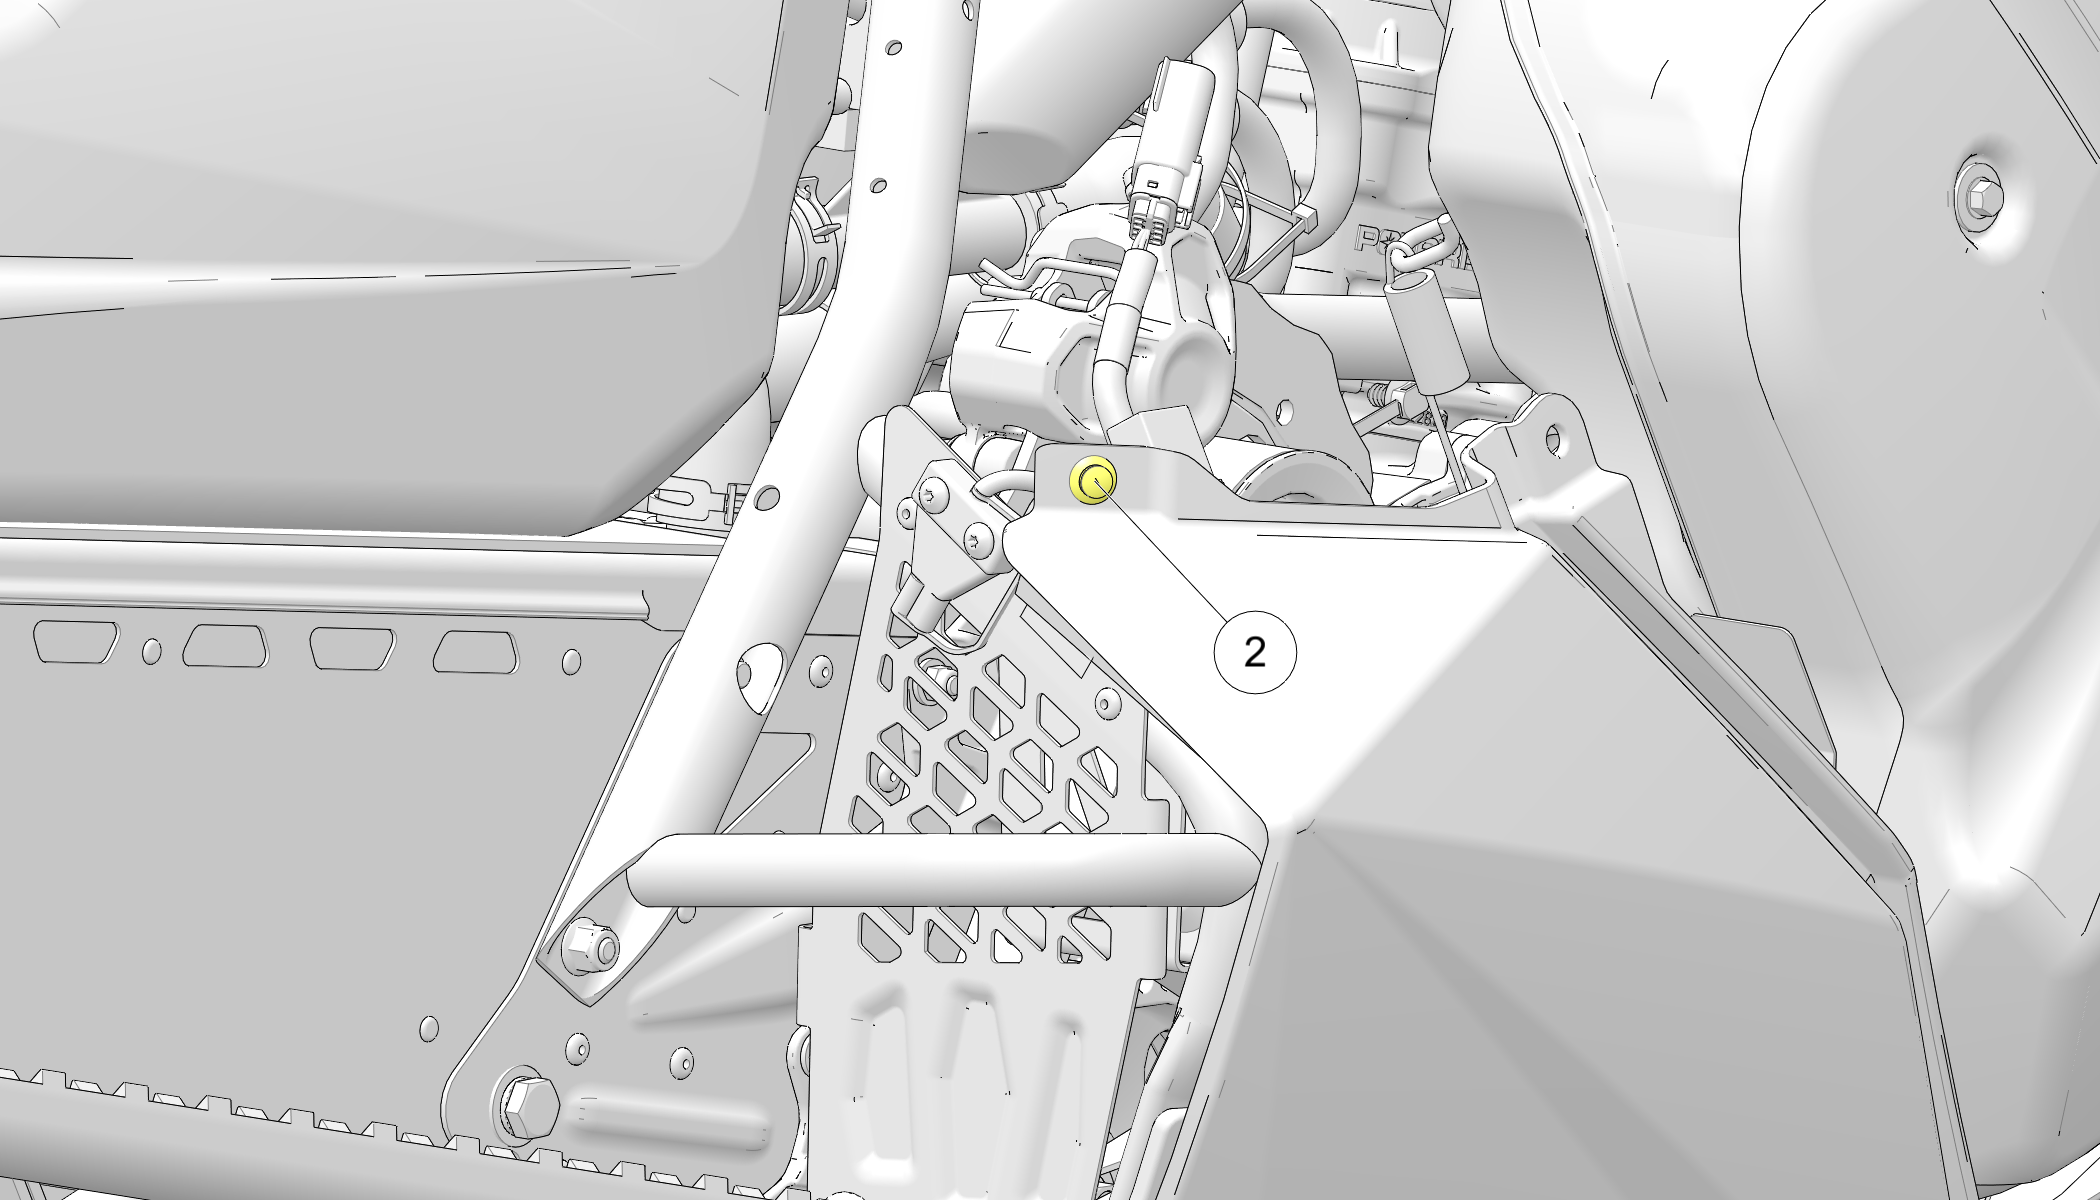
  3. Remove the plastic rivet securing the fender to the chassis.

    Image

  4. Disconnect the black (negative) battery cable first.
  5. Disconnect the red (positive) battery cable last.
  6. Remove the battery hold-down strap.
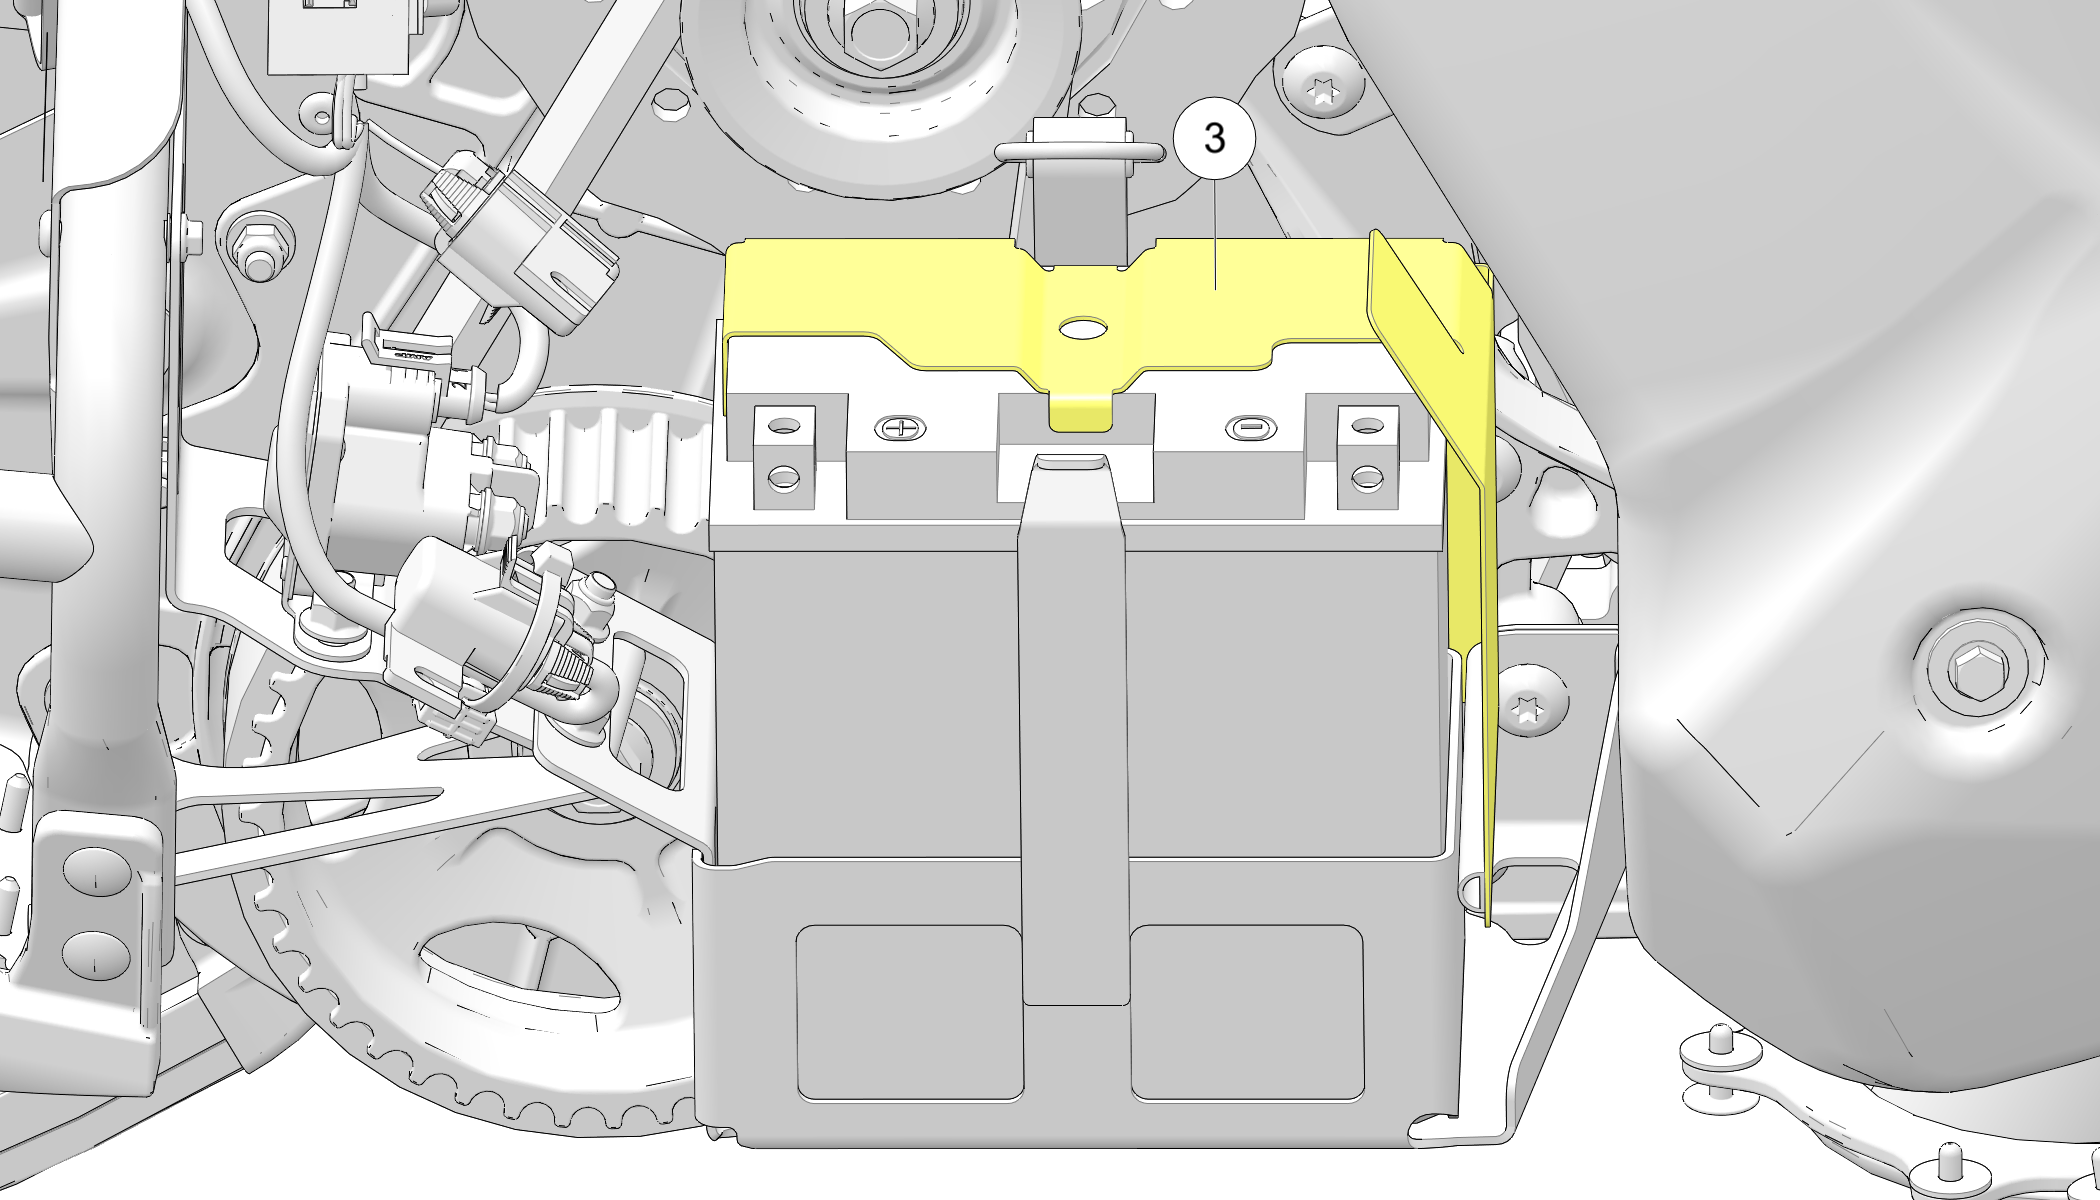
  7. Remove the battery shield .

    Image

  8. Remove the battery from the battery bracket.

Battery Installation (600/800 Models)

When installing a new battery, make sure it's fully charged prior to its initial use. Using a new battery that has not been fully charged can damage the battery and result in a shorter life. It can also hinder vehicle performance. Follow the battery charging instructions before installing the battery.
  1. Ensure that the battery is fully charged.
  2. Set the battery in the battery holder.
  3. Place the battery shield on the battery bracket. Install the screw to secure the shield.
    TORQUE
    7 ft-lbs (10 Nm)
  4. Install the battery hold-down strap.
  5. Connect and tighten the red (positive) cable first.
  6. Connect and tighten the black (negative) cable last.
    caution
    Verify the battery cables and wiring harness do not come into contact with the brake disc. Move the wiring harness/cables behind the chassis tube and away from the brake disc.
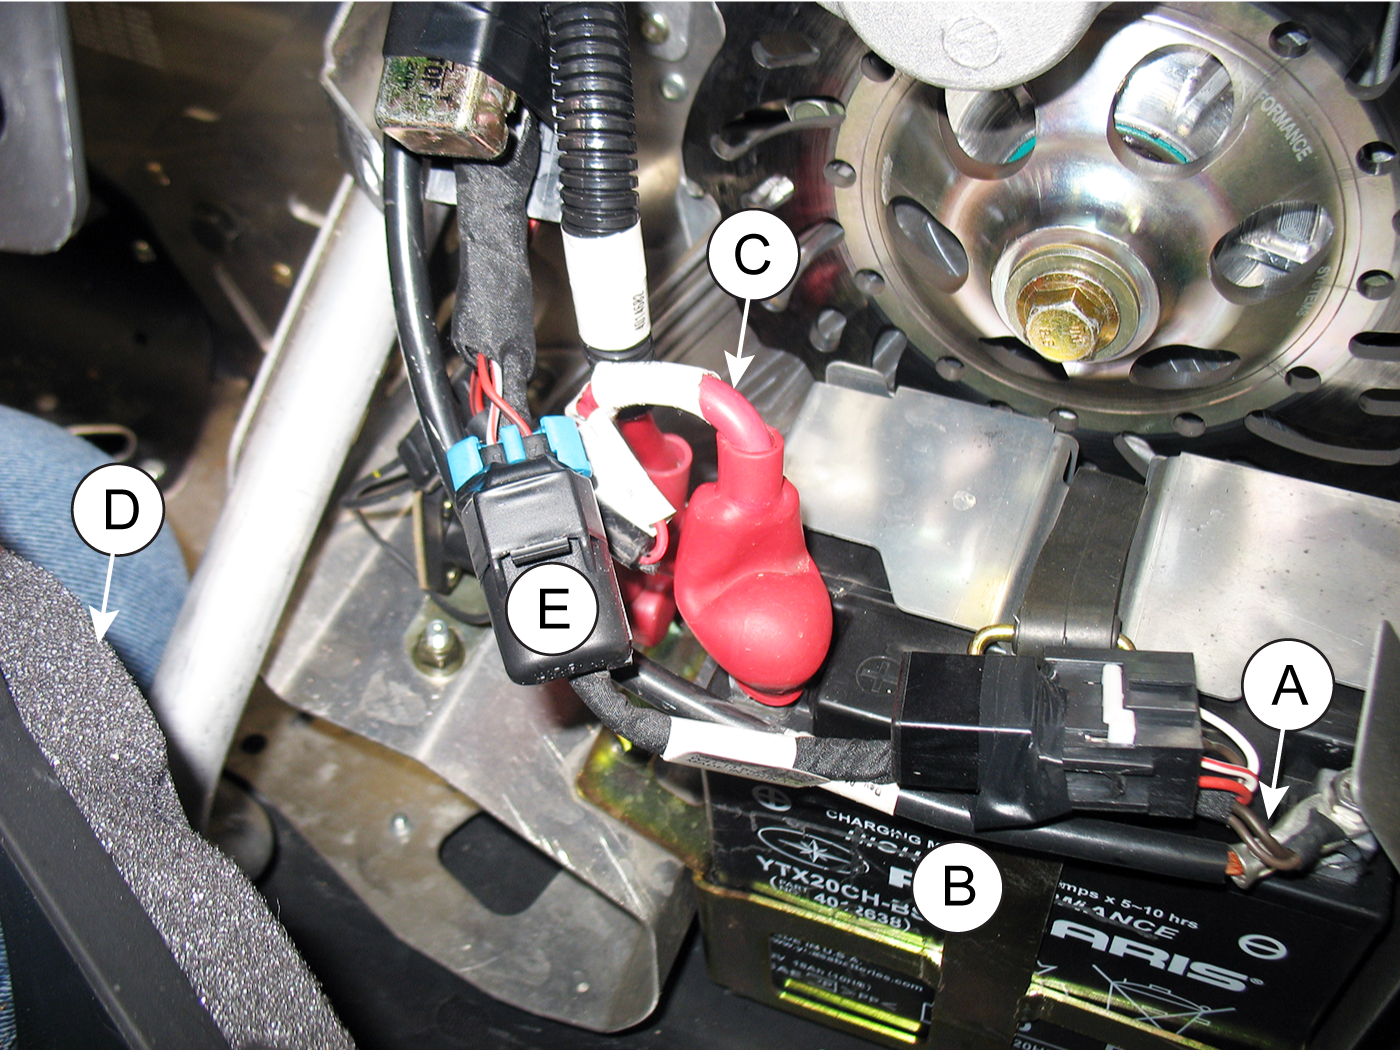
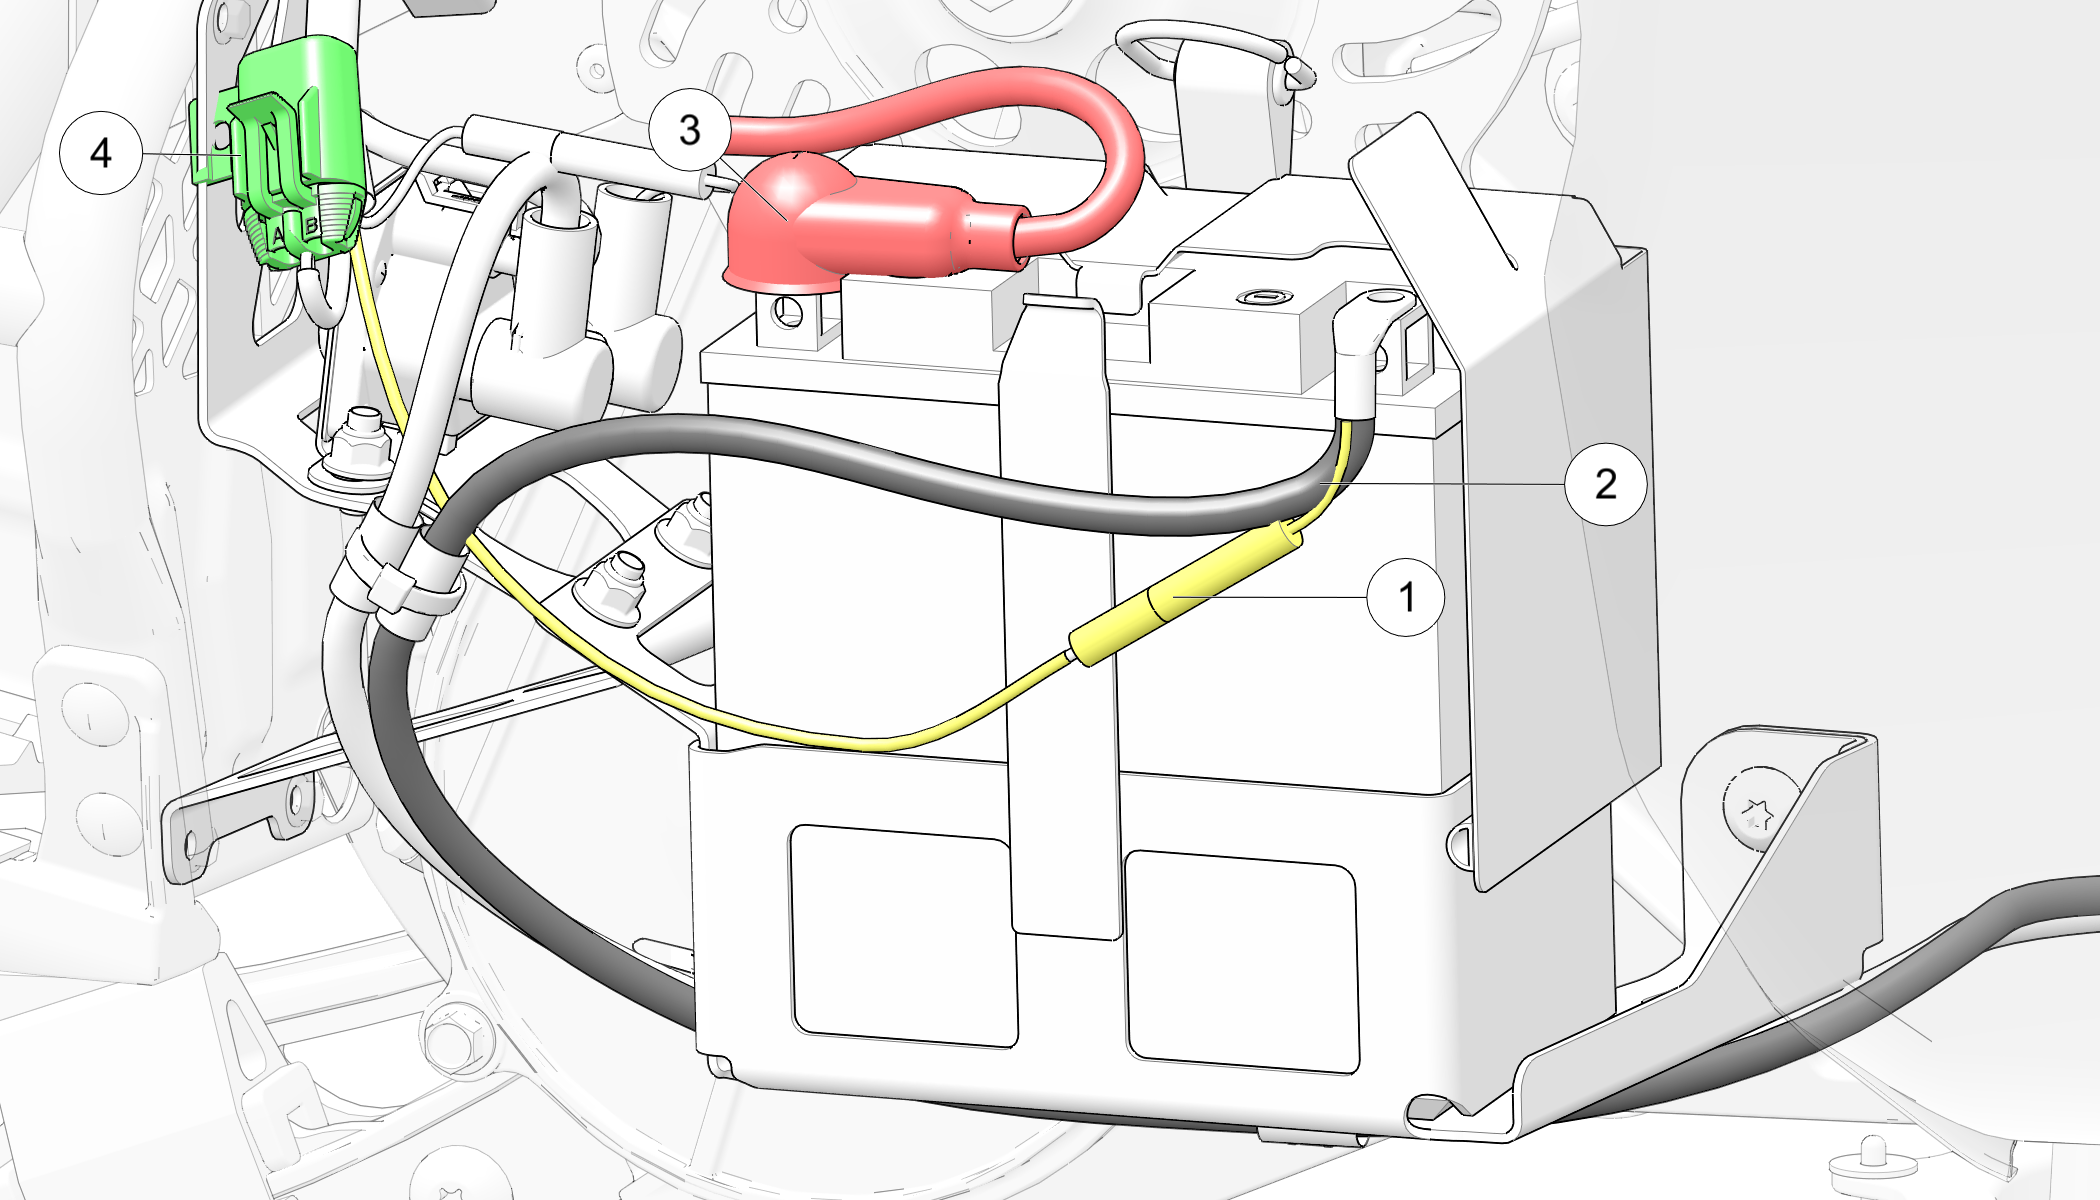
  7. Route the BROWN harness ground wires and BLACK main battery ground cable as shown in the image. Both are routed up and over the rubber strap. If the ground wires/cable are routed down the side of the battery, they may interfere with the rear side panel tab. Note the routing of the RED (positive) battery cable and that the right fender is pulled away from the chassis. Item is the constant power fuse connector.Image
  8. Verify that cables are properly routed.
    NOTICE
    Ensure that the battery wires are routed in such a way that they cannot come into contact with the brake disc.
  9. Secure the right fender using the plastic rivet.
  10. Reinstall the console using the two plastic rivets.
  11. Reinstall the side panel.

Battery Installation (850 Models)

When installing a new battery, make sure it's fully charged prior to its initial use. Using a new battery that has not been fully charged can damage the battery and result in a shorter life. It can also hinder vehicle performance. Follow the battery charging instructions before installing the battery.
  1. Ensure that the battery is fully charged.
  2. Set the battery in the battery holder.
  3. Place the battery shield on the battery bracket.
  4. Install the battery hold-down strap.
  5. Connect and tighten the red (positive) cable first.
  6. Connect and tighten the black (negative) cable last.
    caution
    Verify the battery cables and wiring harness do not come into contact with the brake disc. Move the wiring harness/cables behind the chassis tube and away from the brake disc.
  7. Route the BROWN harness ground wires and BLACK main battery ground cable as shown in the image. Both are routed up and over the rubber strap. If the ground wires/cable are routed down the side of the battery, they may interfere with the rear side panel tab. Note the routing of the RED (positive) battery cable and that the right fender is pulled away from the chassis. Item is the constant power fuse connector.
    Image
  8. Verify that cables are properly routed.
    NOTICE
    Ensure that the battery wires are routed in such a way that they cannot come into contact with the brake disc.
  9. Secure the right fender using the plastic rivet.
  10. Reinstall the console using the two plastic rivets. Reinstall the side panel.

Battery Identification

IMPORTANT
It is important to identify what type of battery is installed in the vehicle. Different types of batteries require different service procedures. Proper servicing and upkeep of the battery is very important for maintaining long battery life.
The types of batteries are:
  • Lead Acid Conventional
  • Dry Shipped Absorbed Glass Mat (AGM)
  • Lead Acid Low Maintenance
  • AGM Low Maintenance
Refer to the examples below to identify the type of battery in your vehicle.

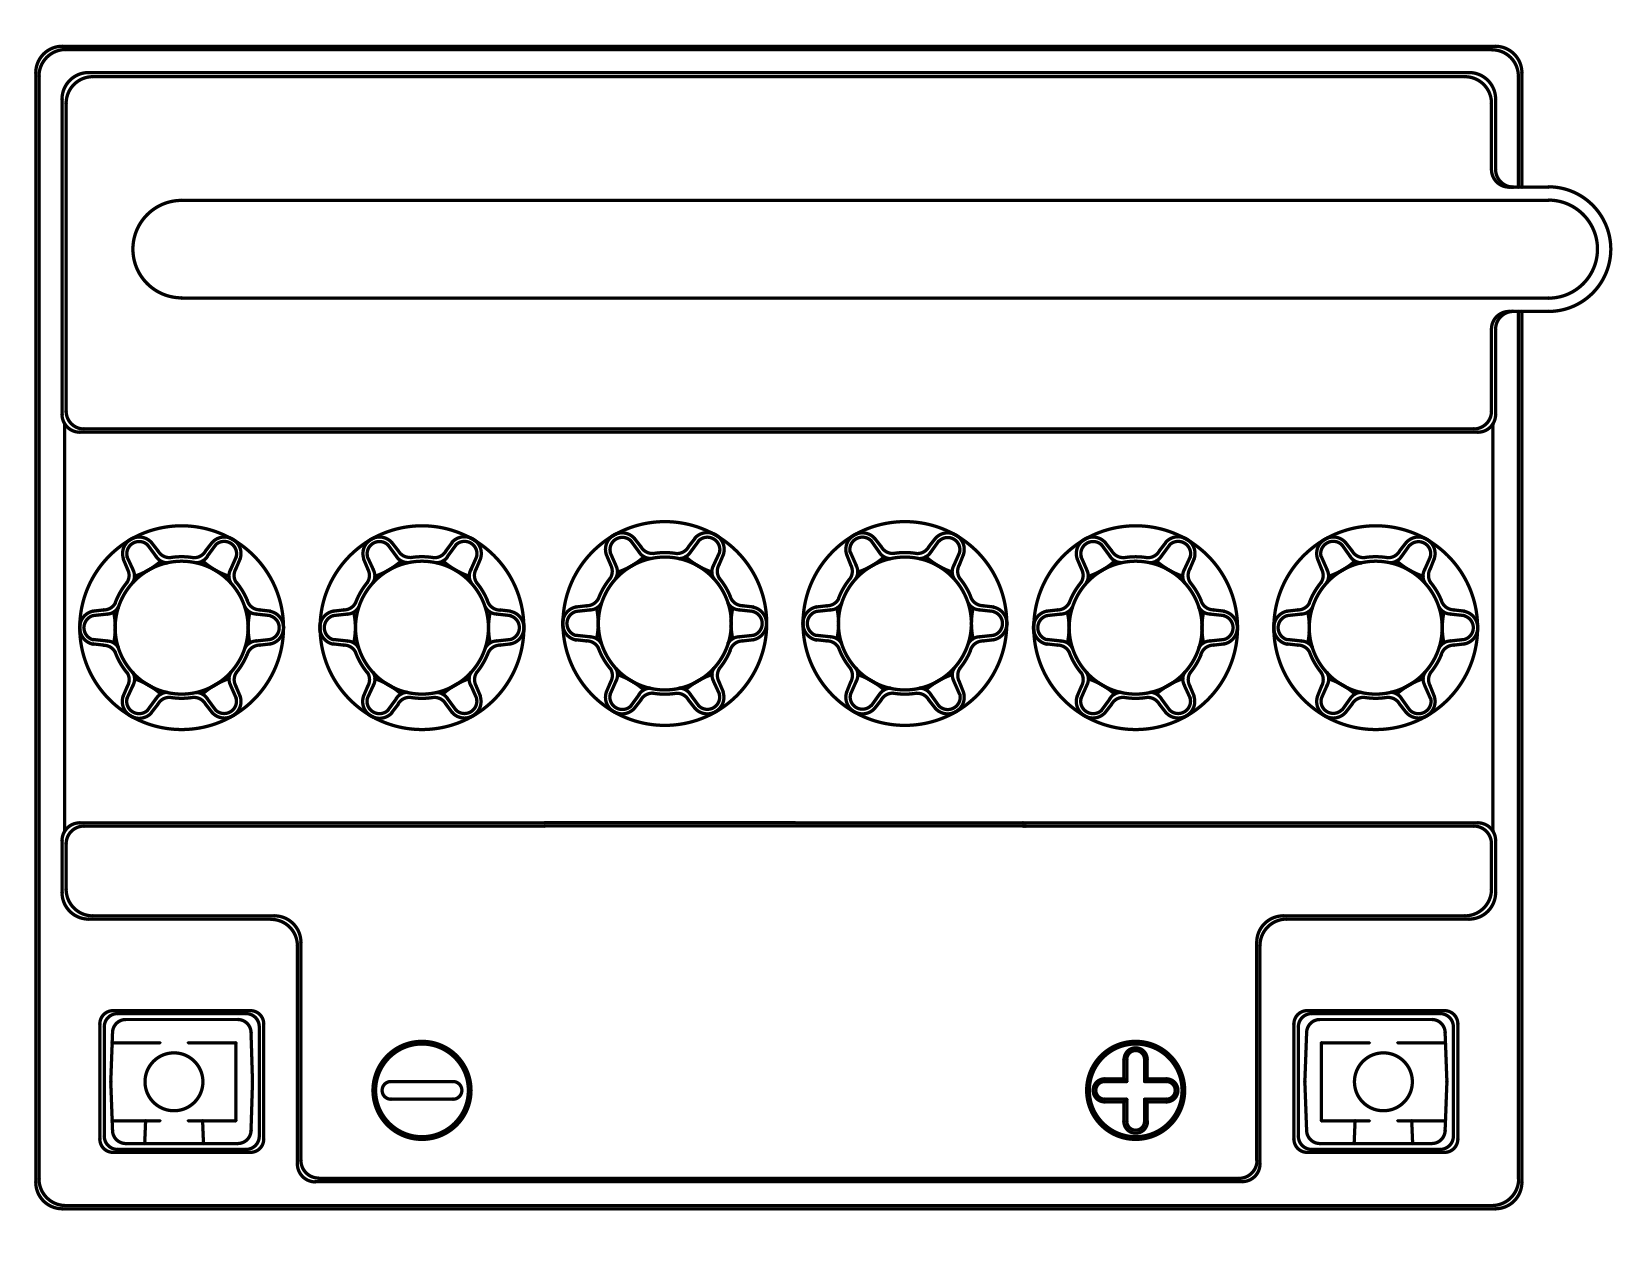
LEAD ACID CONVENTIONAL / DRY SHIPPED AGM BATTERY

  • The battery is NOT activated when packaged
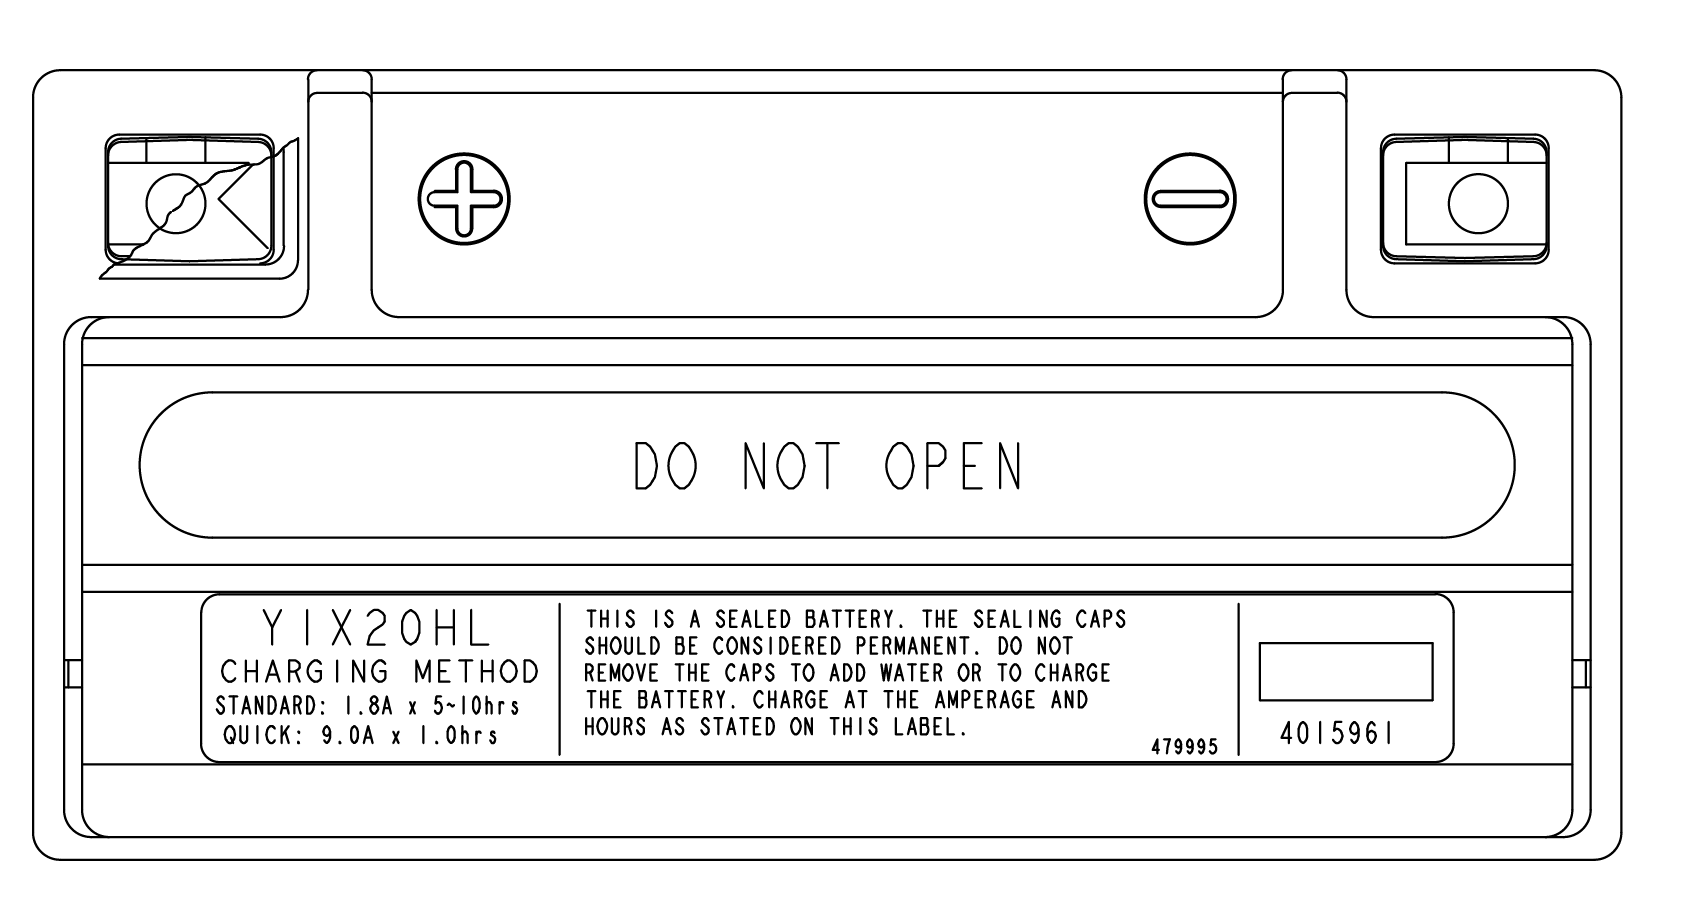
  • A removable cap plugs / strip is located on top of the battery
  • Distilled water is added as required (Lead Acid only)
  • A vent tube is located on the side of battery (Lead Acid only)

Image

Image

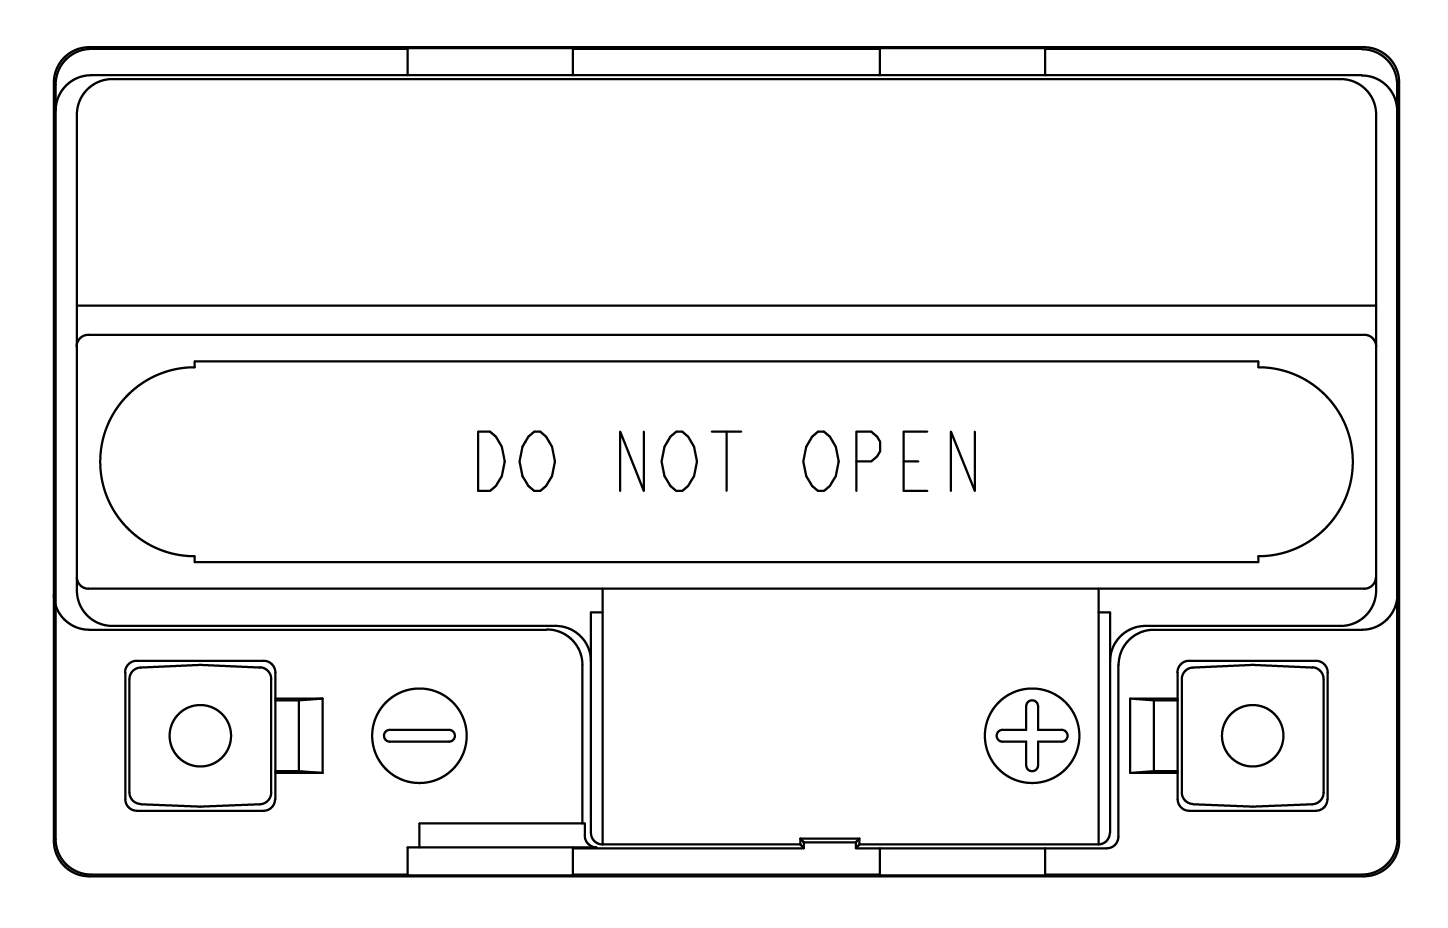
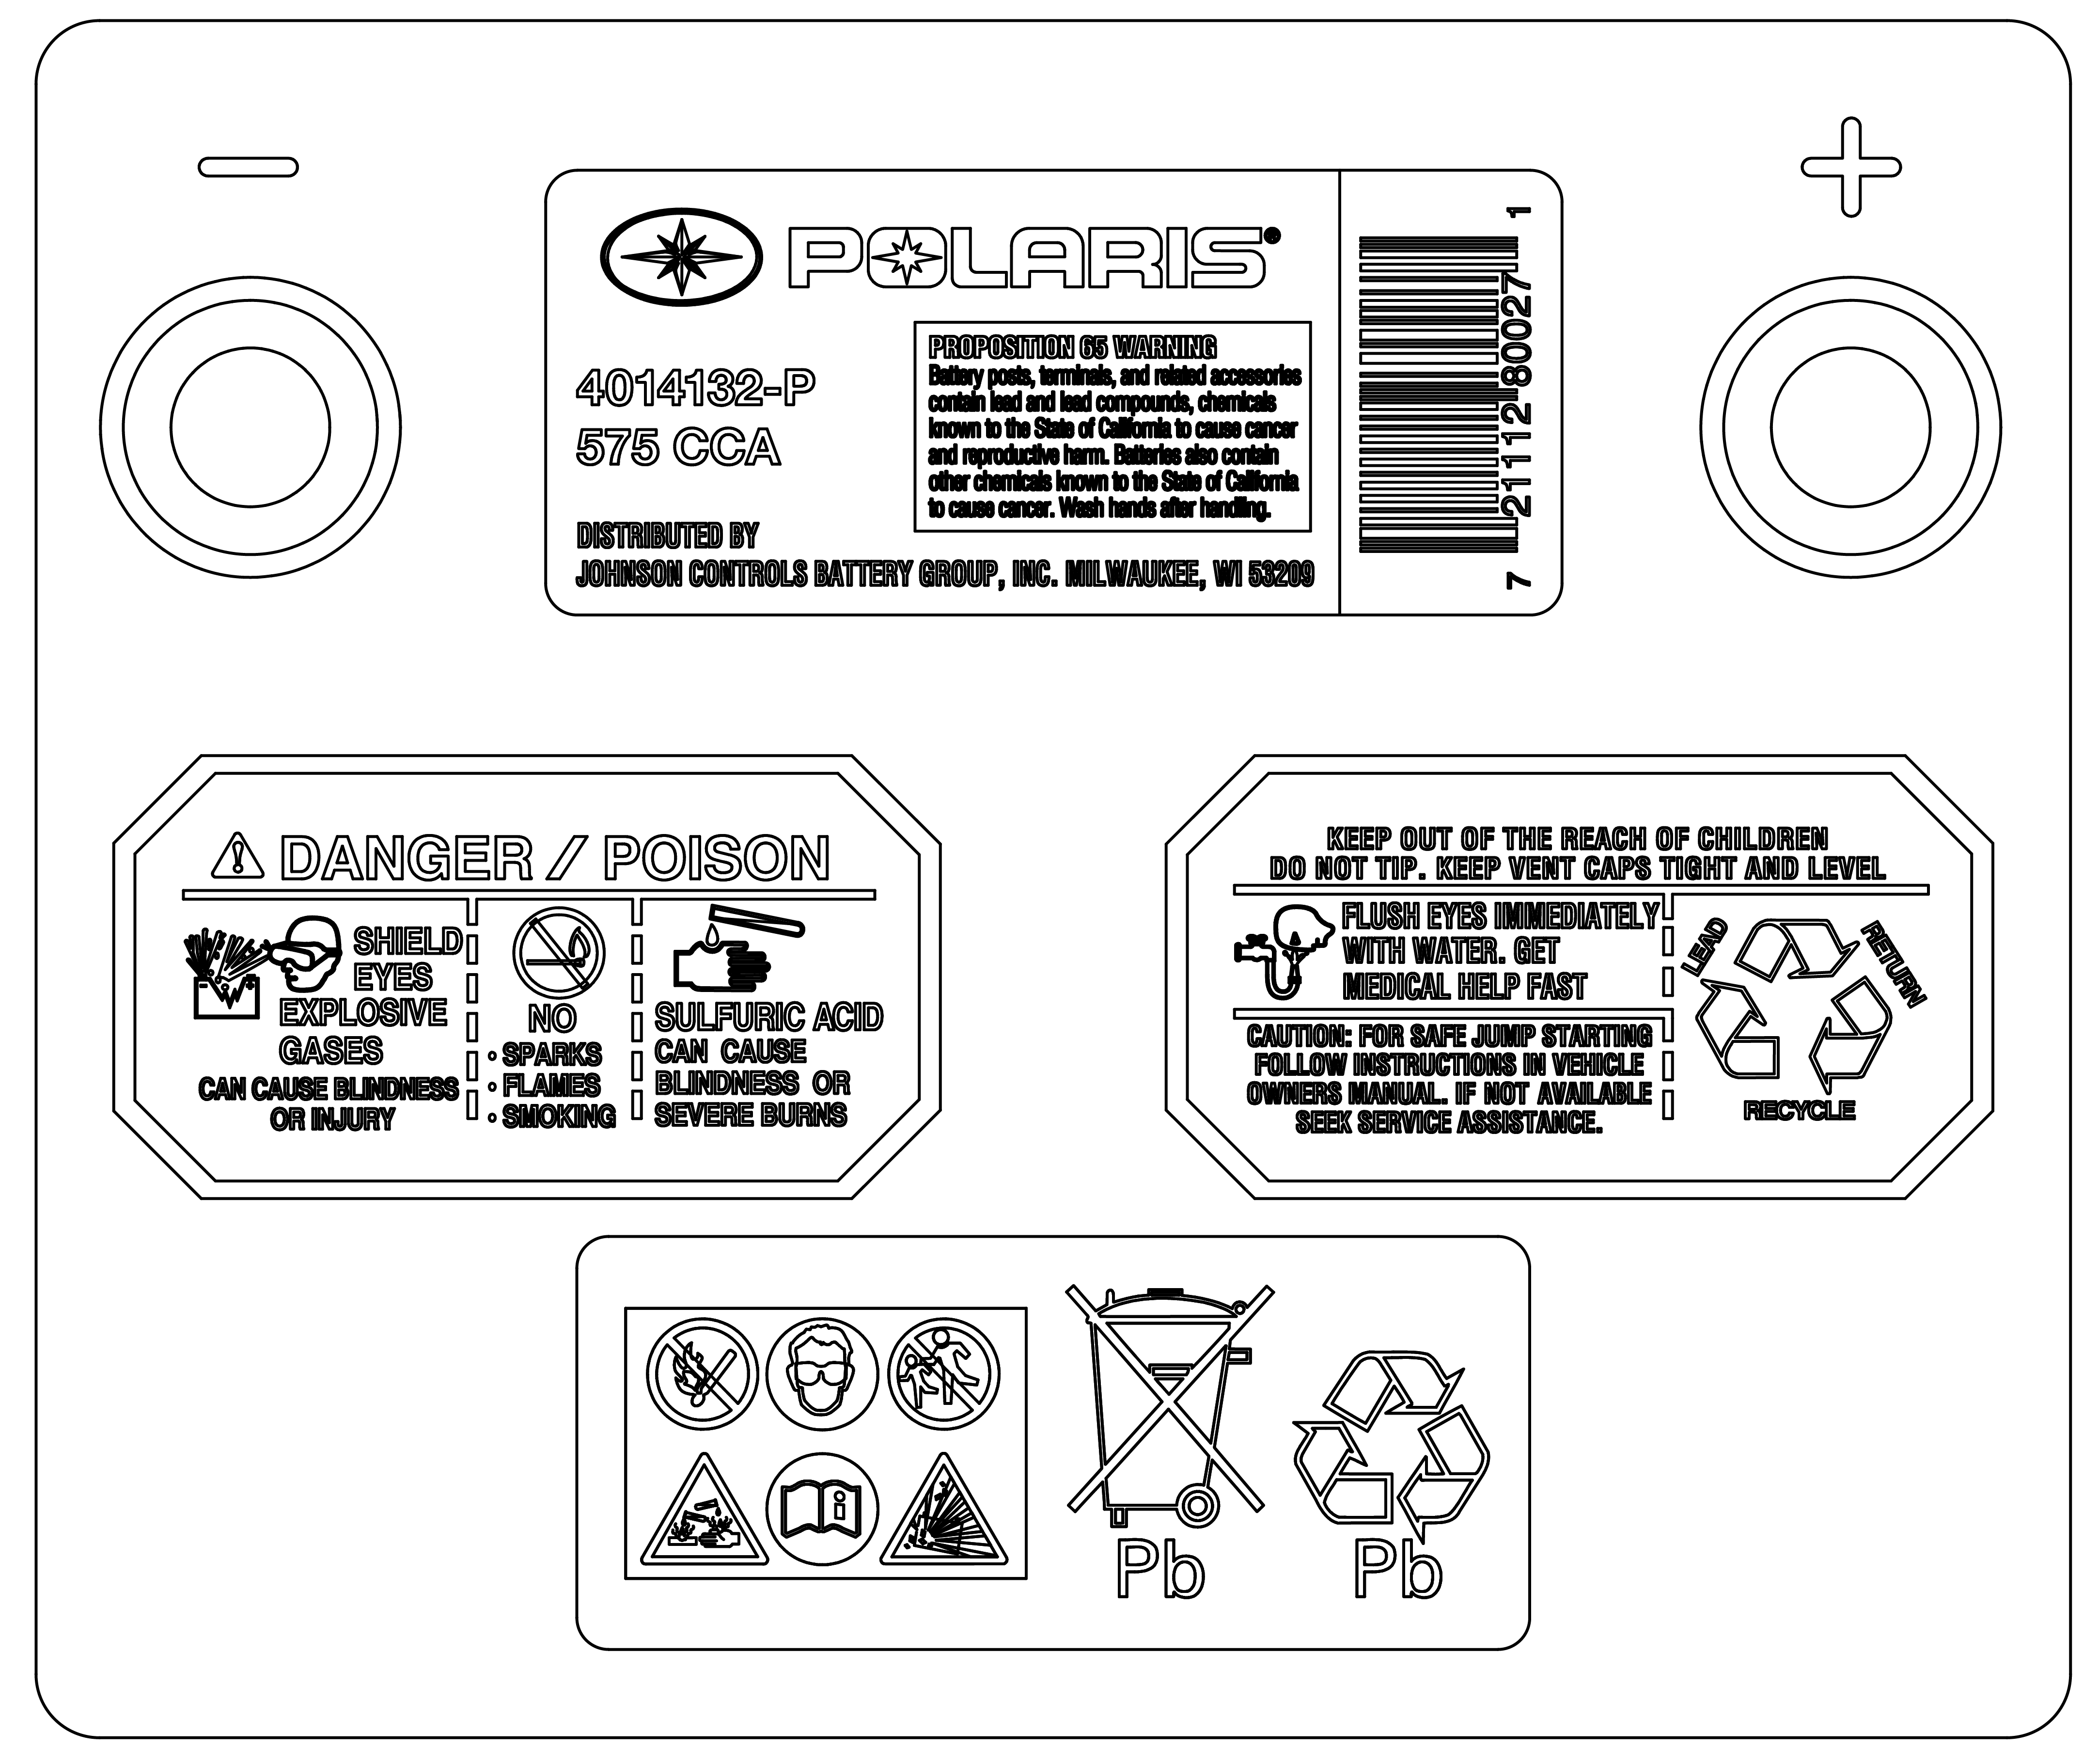
LOW MAINTENANCE BATTERY

  • The battery is activated when packaged
  • Non removable cap(s) is / are located on top of the battery
  • Distilled water or electrolyte is NEVER added

Image

Image

Battery Charging

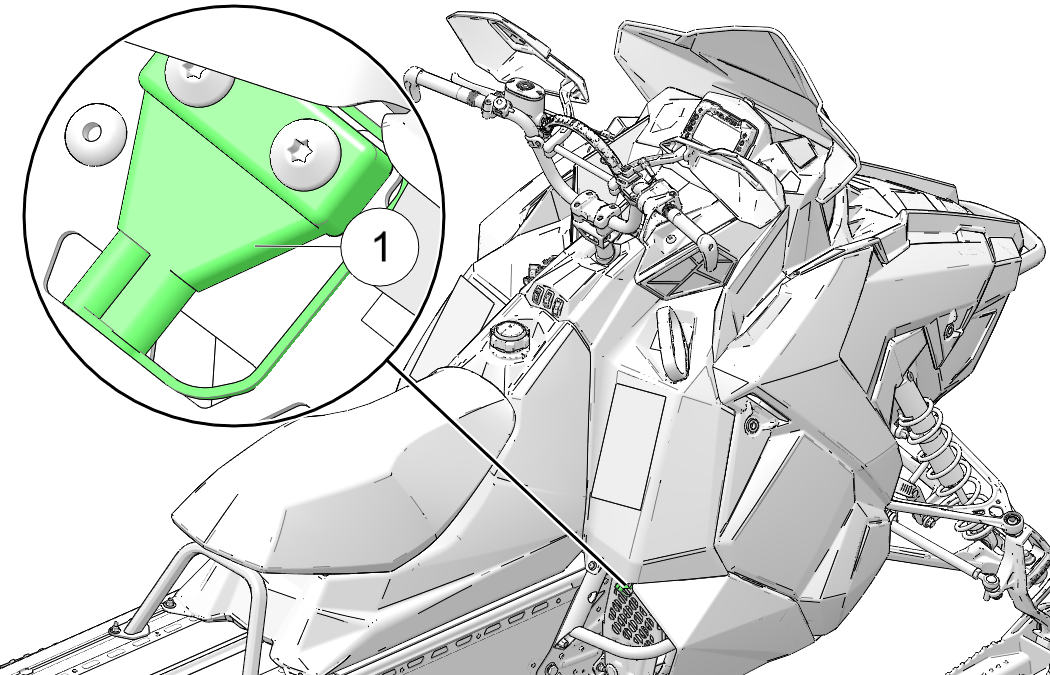
To ensure your battery maintains its level of charge, the battery should be connected to a battery tender/trickle charger using the battery tender port .

  1. Check the battery voltage with a voltmeter or multimeter. A fully charged battery will register 12.8 V or higher.
  2. If the voltage is less than 12.8 volts, recharge the battery at 1.2 amps or less until the battery voltage is 12.8 or greater using the battery tender port .

Image
RESTRICTION
When using an automatic charger, refer to the charger manufacturer's instructions for recharging. When using a constant current charger, use the following guidelines for recharging.
WARNING
An overheated battery may explode, causing severe injury or death. Always watch charging times carefully. Stop charging if the battery becomes very warm to the touch. Allow it to cool before resuming charging.
TIP
Always verify battery condition before and 1-2 hours after the end of charging.

State of Charge

Voltage

Action

Charge Time*

100%

12.8-13.0 volts

None, check at 3 mos. from date of manufacture

None required

75%-100%

12.5-12.8 volts

May need slight charge, if no charge given, check in 3 months

3-6 hours

50%-75%

12.0-12.5 volts

Needs charge

5-11 hours

25%-50%

11.5-12.0 volts

Needs charge

At least 13 hours, verify state of charge

0%-25%

11.5 volts or less

Needs charge with desulfating charger

At least 20 hours

*Using constant current charge @ standard amps specified on top of battery.


Battery Charge Relay Control

Some models are equipped with a battery. The battery provides power for only two purposes:
  • Engaging the electric starter motor to start the engine
  • Powering the Polaris Interactive Digital Display (PIDD) with the ignition key when the engine is off
The engine management system turns on the battery charge relay and charges the battery only when the following conditions are met:
  • The load shed relay is turned on by the engine management system
  • Engine speed exceeds 2500 RPM
  • Chassis DC voltage exceeds 13 volts

Off Season Storage

NOTICE
If the battery is stored during the winter months, electrolyte will freeze at higher temperatures as the battery discharges. The chart below indicates freezing points by specific gravity.
Specific Gravity of Electrolyte Freezing Point
1.265 -75° F
1.225 -35° F
1.200 -17° F
1.150 +5° F
1.100 +18° F
1.050 +27° F

Lead Acid Conventional Battery Maintenance

Recharge the battery to its full capacity every 30 to 60 days.
If the battery is stored or used in a partially charged condition, hard crystal sulfation will form on the plates, reducing the efficiency and service life of the battery.
caution
NEVER add electrolyte to the battery once the battery is in service.
If necessary, only add distilled water to the battery .
Store the battery in the vehicle with the cables disconnected, or store the battery in a cool / dry location. Batteries will self discharge more rapidly when stored in extreme temperatures.

Dry Shipped AGM Battery Maintenance

caution
NEVER add electrolyte or distilled water to the battery once the battery is in service.
If you do not drive the vehicle for more than TWO weeks, maintain the Absorbent Glass Mat (AGM) battery with the BatteryMINDer® 2012 AGM - 2 AMP charger (or a similar charger).
BatteryMINDer® 2012 AGM - 2 AMP battery charger
2830438
If you plan to store the vehicle for ONE month or longer, remove the battery from the vehicle and store the battery in a cool / dry location. Continue to maintain the battery with the 2 AMP charger and inspect the battery every 60 days.

Lead Acid Low Maintenance Battery Maintenance

Recharge the battery to its full capacity every 30 to 60 days.
If the battery is stored or used in a partially charged condition, hard crystal sulfation will form on the plates, reducing the efficiency and service life of the battery.
caution
NEVER add electrolyte or distilled water to the battery. Doing so will damage the case and shorten the life of the battery.
Store the battery in the vehicle with the cables disconnected, or store the battery in a cool / dry location. Batteries will self discharge more rapidly when stored in extreme temperatures.

AGM Low Maintenance Battery Maintenance

caution
NEVER add electrolyte or distilled water to the battery. Doing so will damage the case and shorten the life of the battery.
If you do not drive the vehicle for more than TWO weeks, maintain the Absorbent Glass Mat (AGM) battery with the BatteryMINDer® 2012 AGM - 2 AMP charger (or a similar charger).
BatteryMINDer® 2012 AGM - 2 AMP battery charger
2830438
If you plan to store the vehicle for ONE month or longer, remove the battery from the vehicle and store the battery in a cool / dry location. Continue to maintain the battery with the BatteryMINDer® 2012 AGM - 2 AMP charger (or a similar charger) and inspect the battery every 60 days.

© Copyright Polaris Industries Inc. All rights reserved.