Content Source: 2020 600/800 HO/850 AXYS Conventional Tunnel Owner’s Manual (9929775 R02) > The Perfect Fit Chapter
| IMPORTANT |
|
The Owner's Manual for this vehicle contains warnings, instructions and other information you must read and fully understand before safely riding or performing maintenance on this vehicle.Always follow the warnings and instructions in Owner's Manual. Click the CONTENTS link above for the Table Of Contents, or download a full PDF of the Owner Manual in the Owner Support area of Polaris.com |
| NOTE |
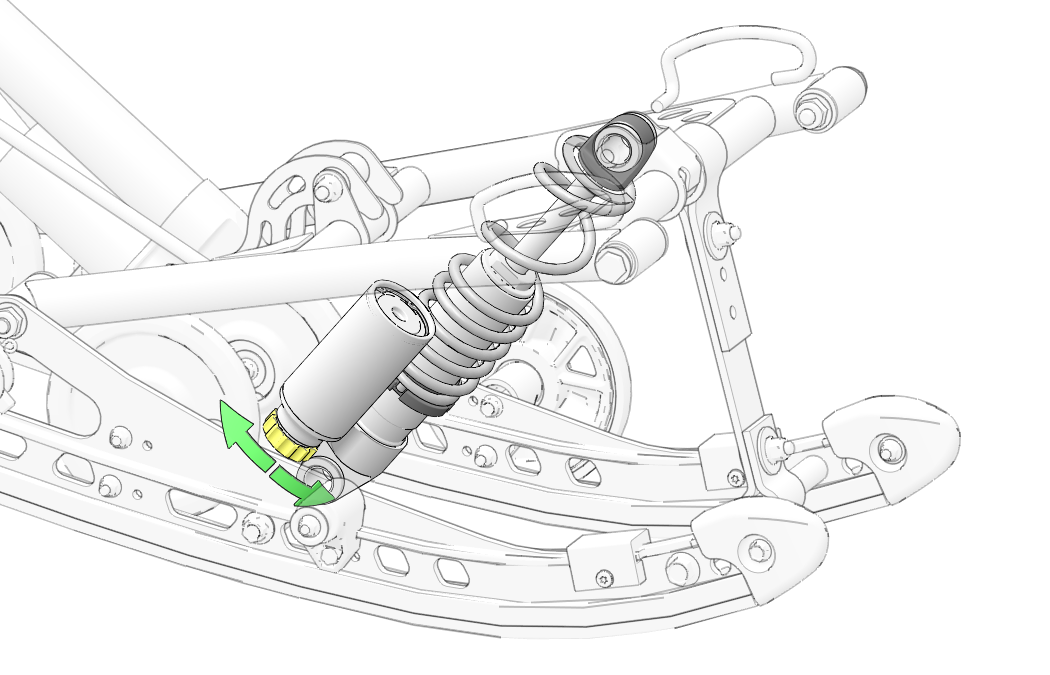
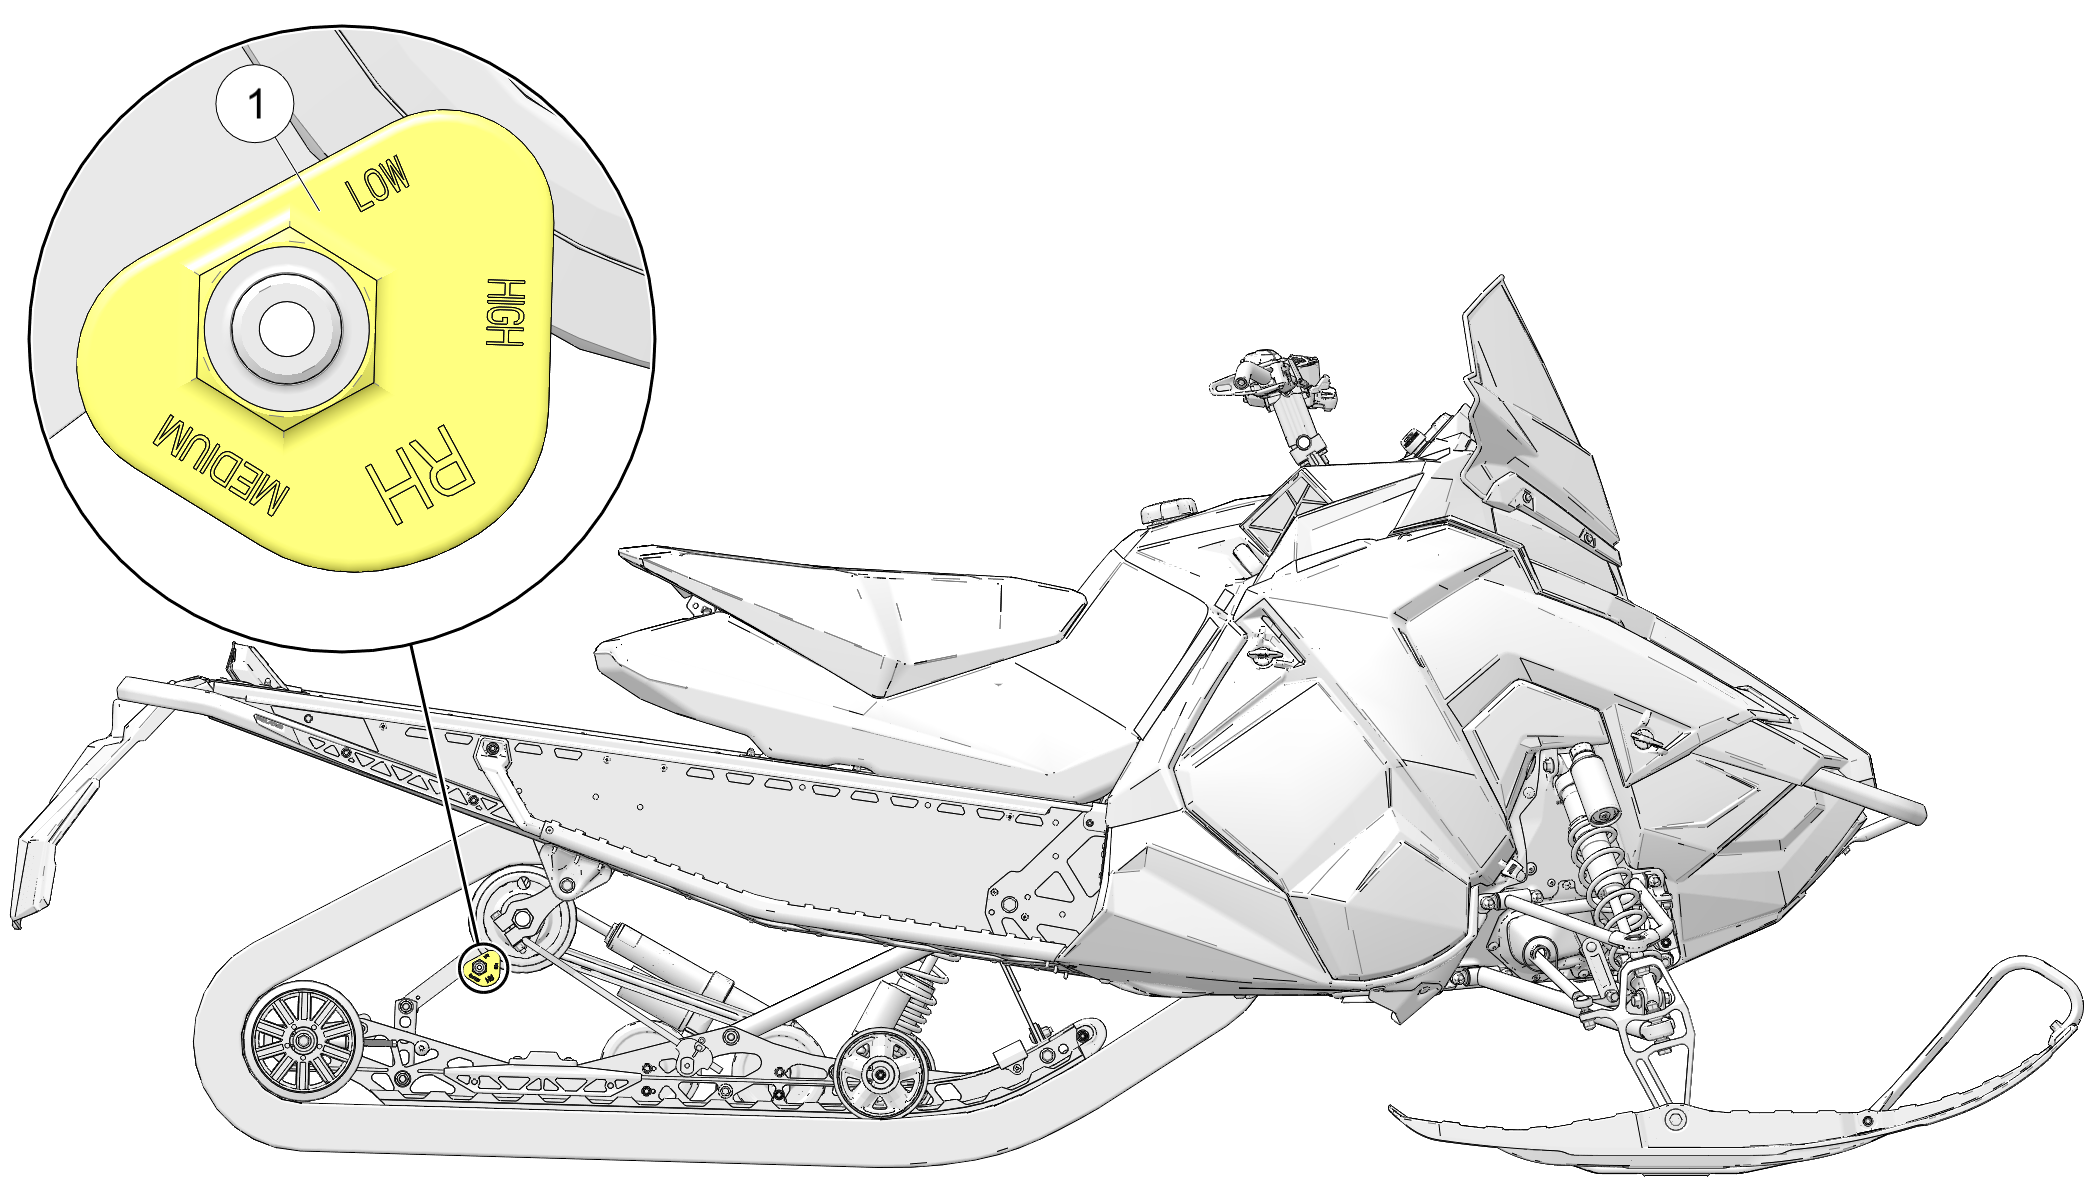
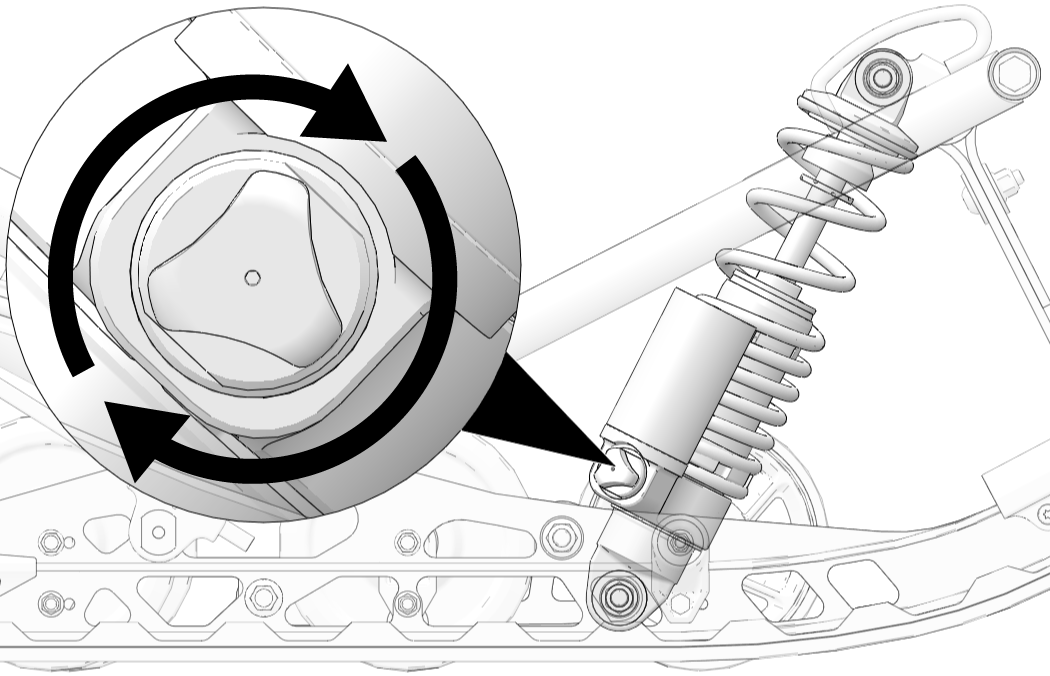
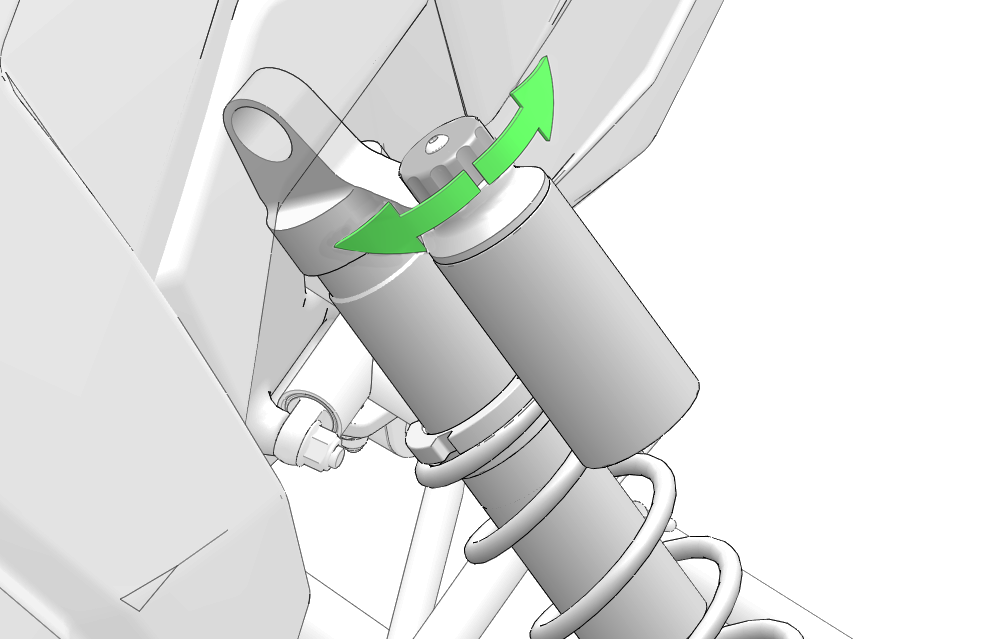
| Always adjust the clicker at least one click below full stiff (full clockwise) or shock damage could occur. |
| NOTE |
| Adding traction components, such as traction studs or additional ski skag carbides, or changing the factory equipped track, could change handling characteristics. Addition setup may be required. |
| NOTE |
| Adding 1+1 seat, or additional cargo may affect handling and require a spring rate change. |
| Torsion Spring Setting | Recommended Usage |
|---|---|
| Low |
Rider(s) and gear =140-180lb If less than 140, use the optional spring chart for softer springs. |
| Medium |
Rider(s) and gear = 180-220lb |
| High |
Rider(s) and gear = 220-260lb If above 260, use the optional spring chart for heaver springs. |
|
Part Number |
Spring Type |
Description |
|---|---|---|
|
7041942–329 |
Spring, Torsion |
.375/77, BLK, LH, HEAVY |
|
7041943–329 |
Spring, Torsion |
.375/77, BLK, RH, HEAVY |
|
7041627–067 |
Spring, Torsion |
.347/77, BLK, LH, LIGHT |
|
7041628–067 |
Spring, Torsion |
.347/77, BLK, RH, LIGHT |
|
Part Number |
Spring Type |
Description |
|---|---|---|
|
7043859–329 |
Spring, Torsion |
LH Light Duty |
|
7043860–329 |
Spring, Torsion |
RH Light Duty |
|
7045207–329 |
Spring, Torsion |
LH Heavy Duty |
|
7045208–329 |
Spring, Torsion |
RH Heavy Duty |
|
7045209–329 |
Spring, Torsion |
LH Extra Heavy Duty |
|
7045210–329 |
Spring, Torsion |
RH Extra Heavy Duty |
| NOTICE |
|
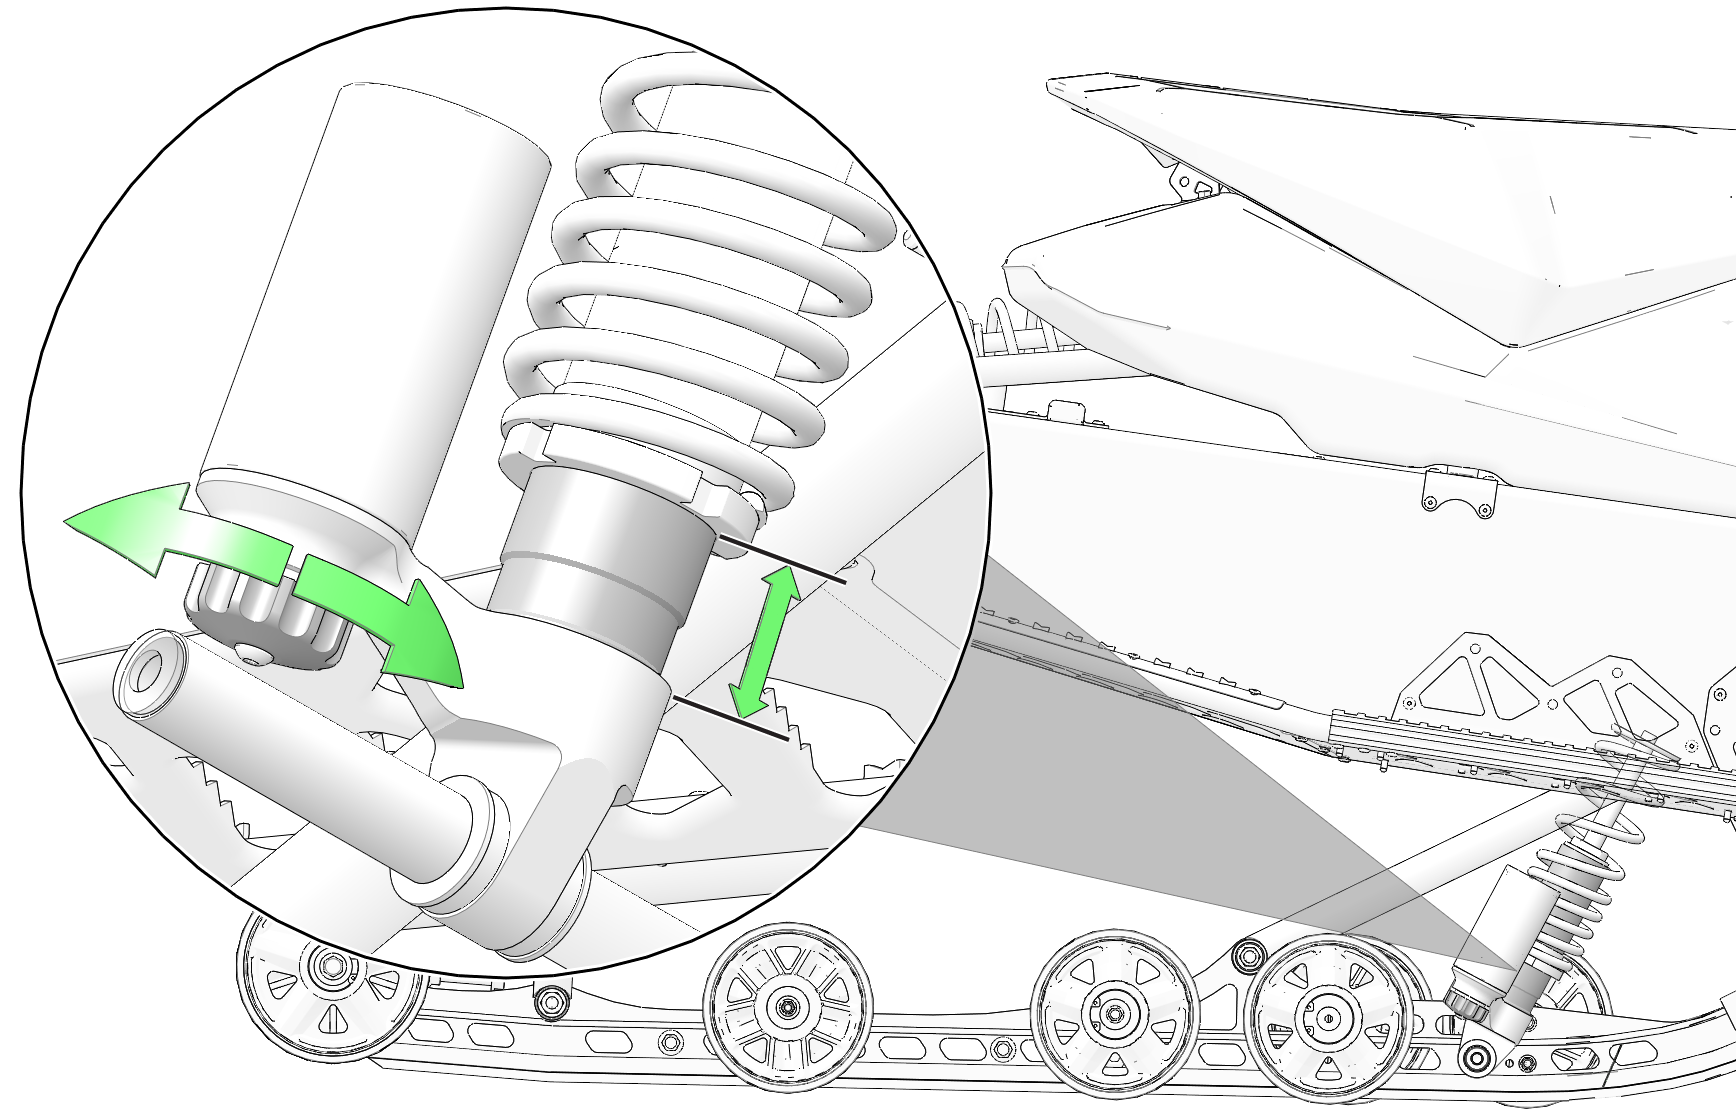
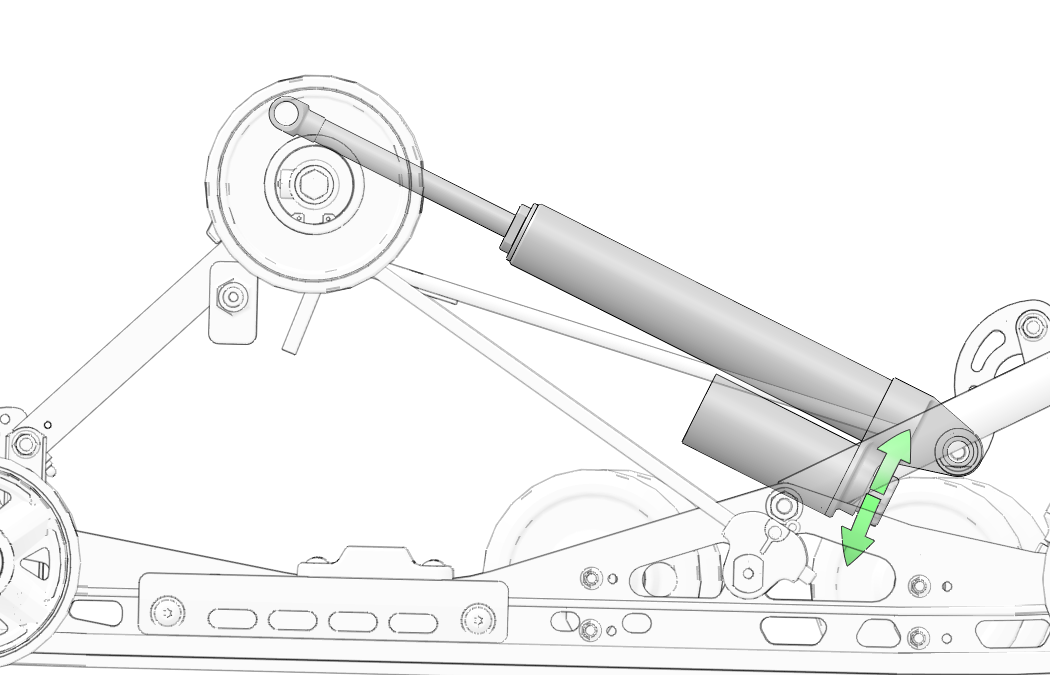
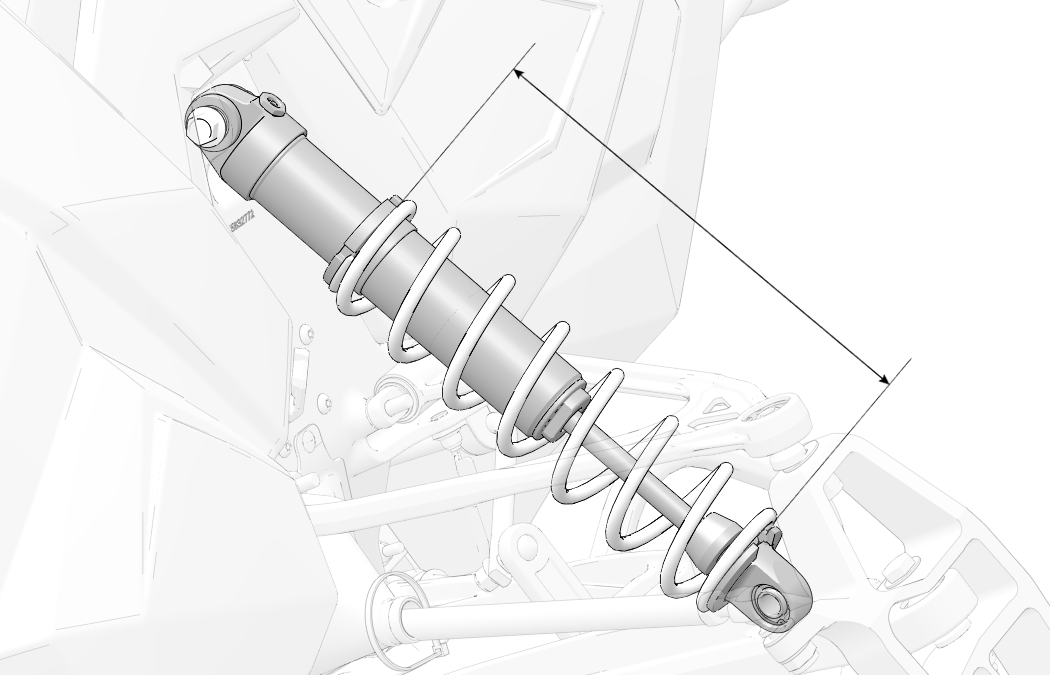
Never adjust spring preload to an installed length longer
than the factory length or shorter than the minimum length as shown
in the following chart.
Damage to the suspension could result. When decreasing preload, make
sure at least two turns of preload
are holding the retainer
against the spring.
|
INDY SP
|
Factory Spring |
Maximum Installed Length |
Minimum Installed Length |
|---|---|---|
|
INDY SP |
1.25" (3.2 cm) |
0.75" (1.9 cm) |
|
INDY XC |
1.88" (4.8 cm) |
1.38" (3.5 cm) |
|
INDY XCR |
2.12" (5.4 cm) |
1.62" (4.1 cm) |
|
Model |
Clicker Setting (from full hard) |
|---|---|
|
INDY SP |
N/A |
|
INDY XC |
5 |
|
INDY XCR |
Low: 6 High: 5 |
| NOTICE |
|
Never adjust spring preload to an installed length longer
than the factory length or shorter than the minimum length as shown
in the following chart.
Damage to the suspension could result. When decreasing preload, make
sure at least two turns of preload
are holding the retainer
against the spring.
|
|
Factory Spring |
Maximum Installed Length |
Minimum Installed Length |
|---|---|---|
|
Switchback ASSAULT SKS 146 |
1.25" (3.2 cm) |
1" (2.5 cm) |
|
Switchback SP |
2" (5 cm) |
1.75" (4.5 cm) |
|
600 RMK 144 |
Not Adjustable | Not Adjustable |
|
600 Voyageur |
Not Adjustable | Not Adjustable |
|
Model |
Clicker Setting (from full soft) |
|---|---|
|
Switchback ASSAULT |
2 |
|
SKS 146 |
2 |

|
Model |
Factory Clicker Setting (From Full Stiff) |
|---|---|
|
Indy XC |
5 |
|
Model |
Clicker Setting (from full soft) |
|---|---|
|
Switchback Assault |
8 |
|
SKS 146 |
8 |
| TIP |
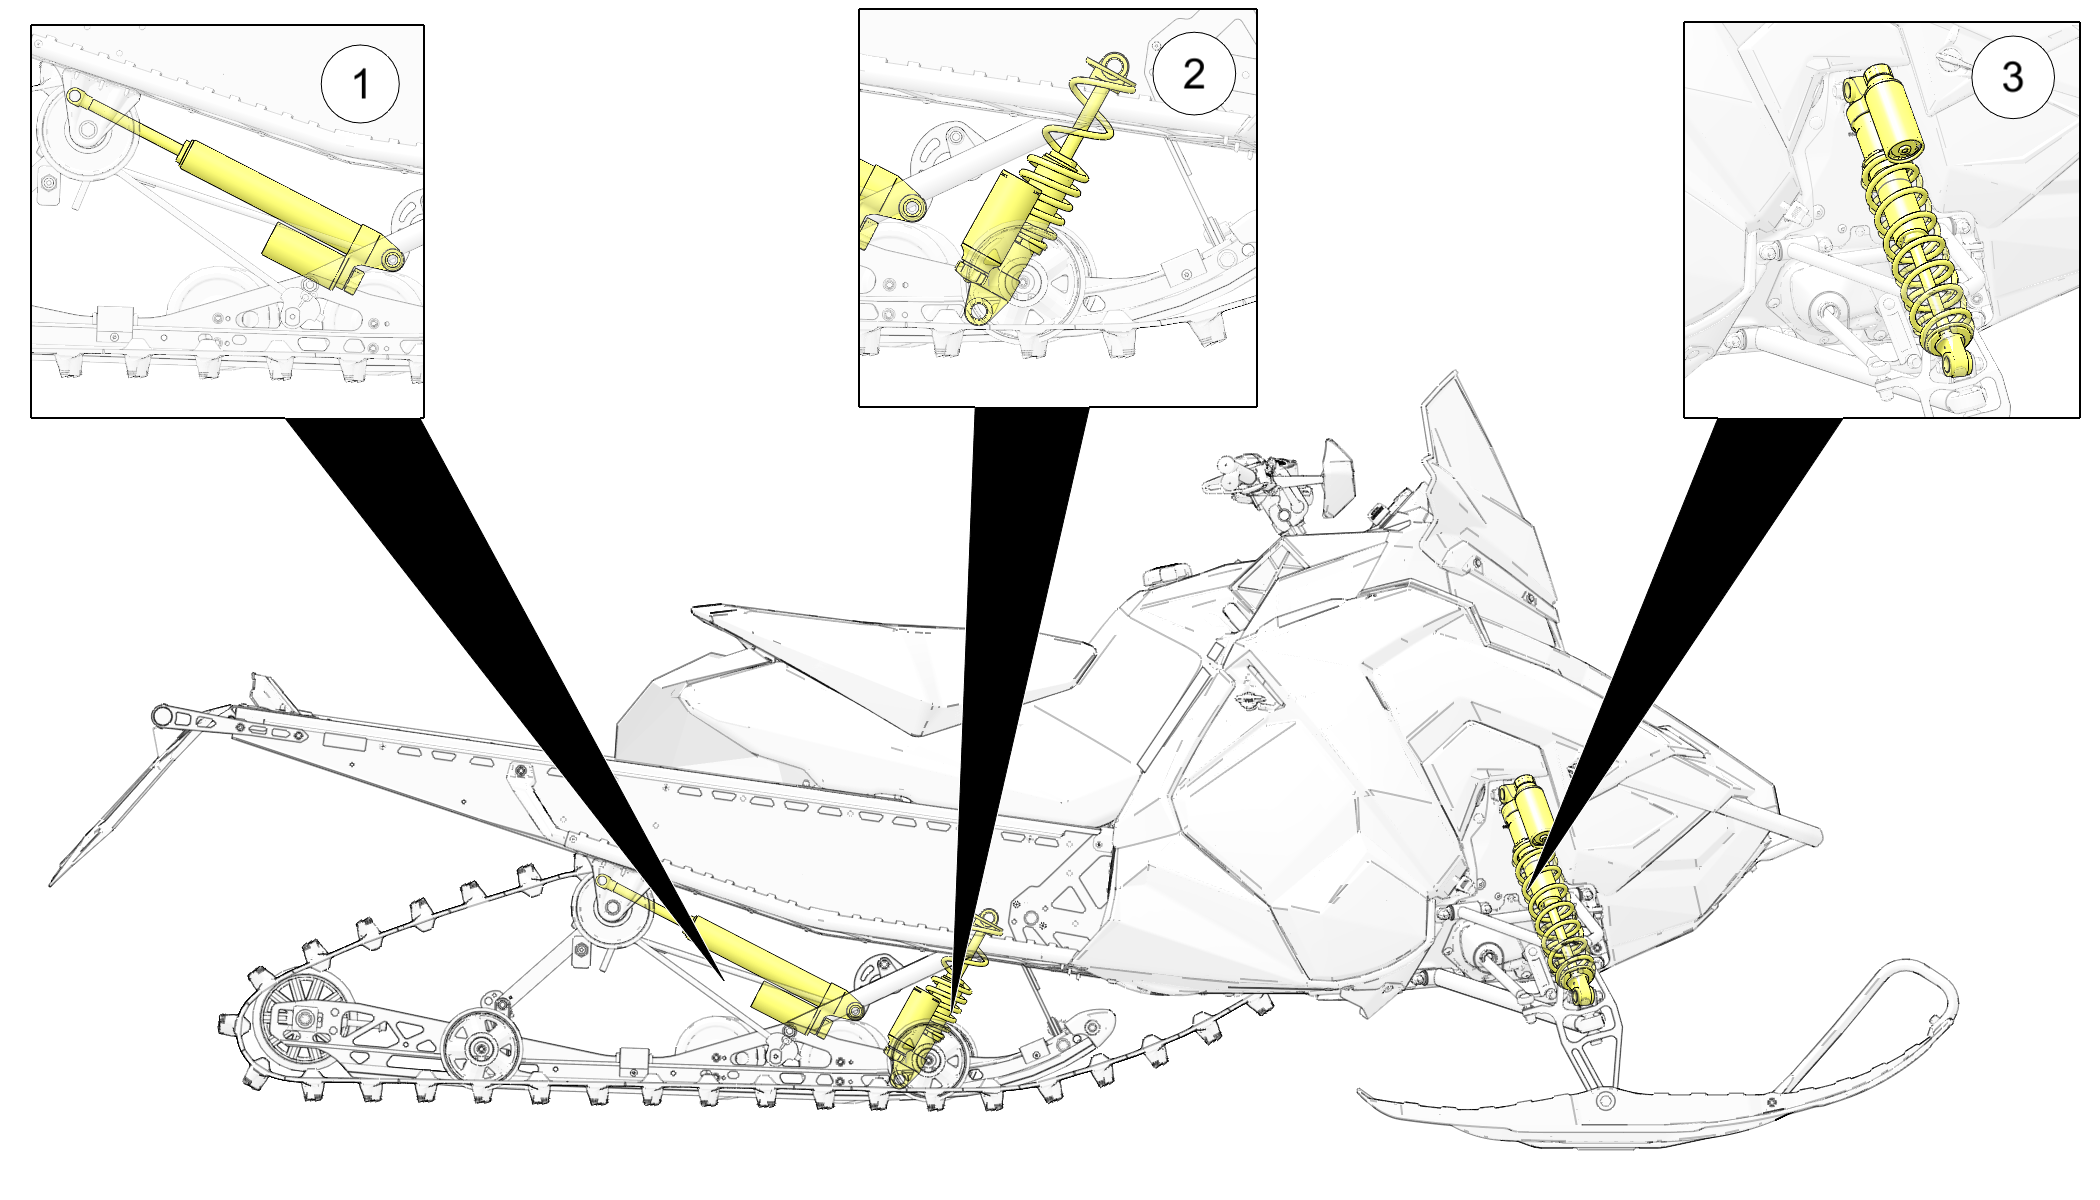
| Your dealer can help you with initial setup and additional setup instructions to help you achieve your optimum ride. A scissor stop tool is also available from your dealer. |
|
FACTORY SPRING |
FACTORY INSTALLED LENGTH |
MINIMUM INSTALLED LENGTH |
|---|---|---|
|
INDY SP |
10.75” (27.3 cm) |
10” (25.4 cm) |
|
INDY XC |
10” (25.4 cm) |
10” (25.4 cm) |
|
INDY XCR |
9.75” (24.8 cm) |
9.25” (23.5 cm) |
|
Switchback ASSAULT |
10” (25.4 cm) |
9.5” (24 cm) |
|
SKS 146 |
10” (25.4 cm) |
9.5” (24 cm) |
|
Switchback SP |
10” (25.4 cm) |
9.5” (24 cm) |
|
600 RMK 144 |
10.5” (26.7 cm) |
10” (25.4) |
|
600 Voyageur |
10.5” (26.7 cm) |
10” (25.4) |
|
Model |
Clicker Setting (from full hard) |
|---|---|
|
INDY SP |
N/A |
|
INDY XC |
12 |
|
INDY XCR |
Low: 6 High: 5 |
|
Switchback ASSAULT |
6 |
|
SKS 146 |
6 |
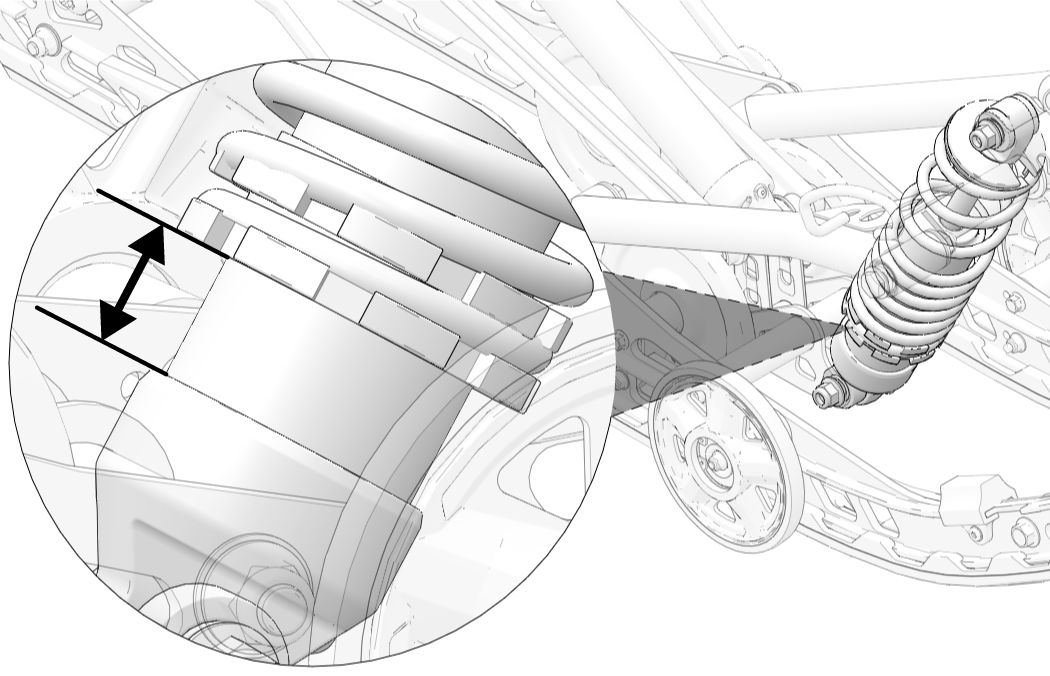
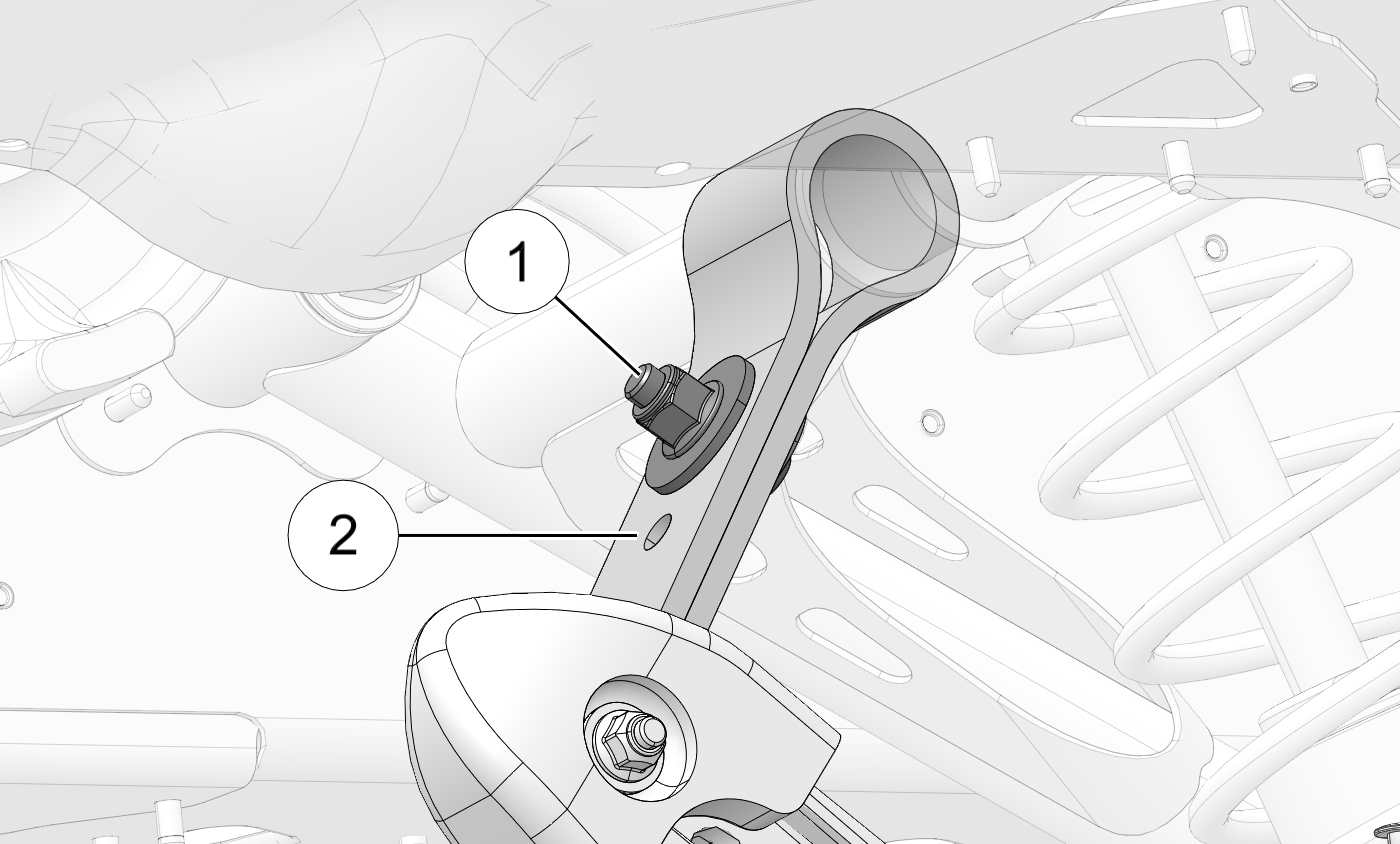
POLARIS recommends
leaving the limiter strap length at position ![]() to maintain the optimum ride characteristics of the
snowmobile. Riders who desire less ski pressure and more weight transfer
toward the rear of the snowmobile can lengthen the
limiter strap by changing to position
to maintain the optimum ride characteristics of the
snowmobile. Riders who desire less ski pressure and more weight transfer
toward the rear of the snowmobile can lengthen the
limiter strap by changing to position ![]() .
.
| TORQUE | |
|
16 ft-lbs (21 Nm). |
© Copyright Polaris Industries Inc. All rights reserved.