Content Source: 2019 Indian Scout/Scout Sixty Owner’s Manual (9929711 R03) > Maintenance Chapter

IMPORTANT

The Owner's Manual for this vehicle contains warnings, instructions and other information you must read and fully understand before safely riding or performing maintenance on this vehicle.Always follow the warnings and instructions in Owner's Manual.

Click the CONTENTS link above for the Table Of Contents, or download a full PDF of the Owner Manual in the Owner Support area of Polaris.com

Fuel Tank Installation

  1. Place the handlebars in the straight ahead position. Cover the front of the fuel tank with a protective cloth to prevent damage.
  2. Make sure the front isolators are installed to the frame. Apply alcohol, soapy water or rubber lubricant to the isolators and to the sides of the air box seal to ease tank installation.
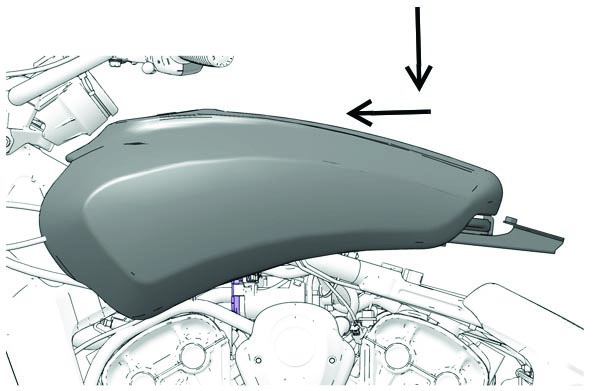
  3. Using care to avoid damage to the fuel tank fitting and special tool, lower the fuel tank onto the frame of the motorcycle. Slide the tank forward to make sure it’s fully seated on the isolators.Image
  4. Pivot the rear of the tank upward to access the tank bottom. Support the rear of the tank in this position.
  5. Remove the plug tool from the fuel pump fitting.
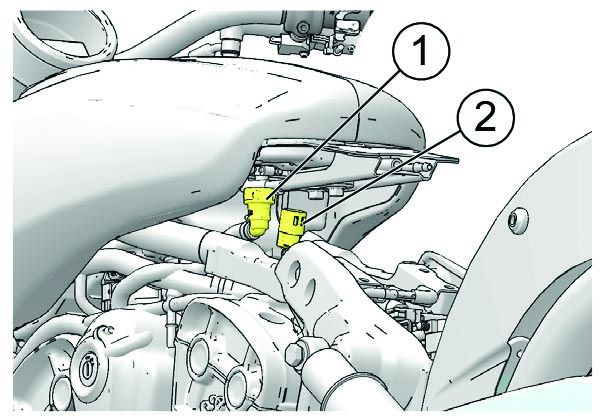
  6. Reconnect the fuel supply line connector to the fuel pump. Make sure you hear a click to indicate proper engagement. Test the connection by pulling the fuel line lightly.

    Image

  7. Connect the fuel pump harness electrical connector . Make sure you hear a click to indicate proper engagement.
  8. Verify that the fuel line is correctly routed and secured.
  9. Slide the tank forward to make sure it’s fully seated on the isolators.
  10. Connect the fuel vent tank line (California and International models ).

    Image
    Image

  11. Connect the fuel cap recess line (California and International models ).
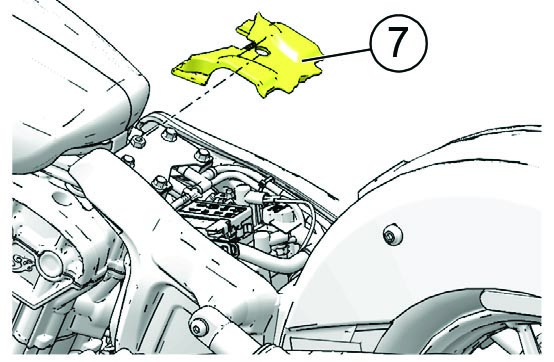
  12. Reinstall the fuel tank filler pad .

    Image

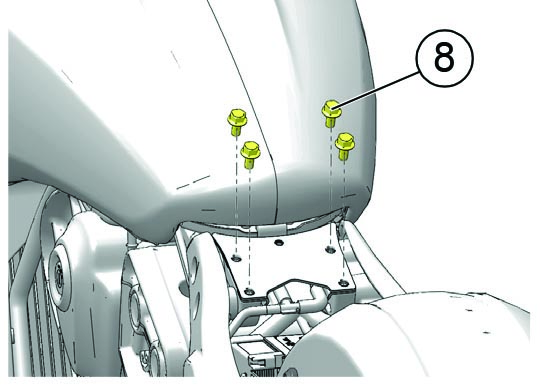
  13. Reinstall the four (4) rear fuel tank bolts .
    TORQUE: 18 ft-lbs (24.4 Nm)
    Image
  14. Prime the fuel pump. See Priming the Fuel System.
  15. Check for leaks.
  16. Reinstall the seat. See the Removing the Seats section for details.

© Copyright Polaris Industries Inc. All rights reserved.