Adjust headlight aim
when there is a change in load (rider, cargo, accessories, etc.) or
after suspension adjustment.
Models equipped with
INCANDESCENT headlights
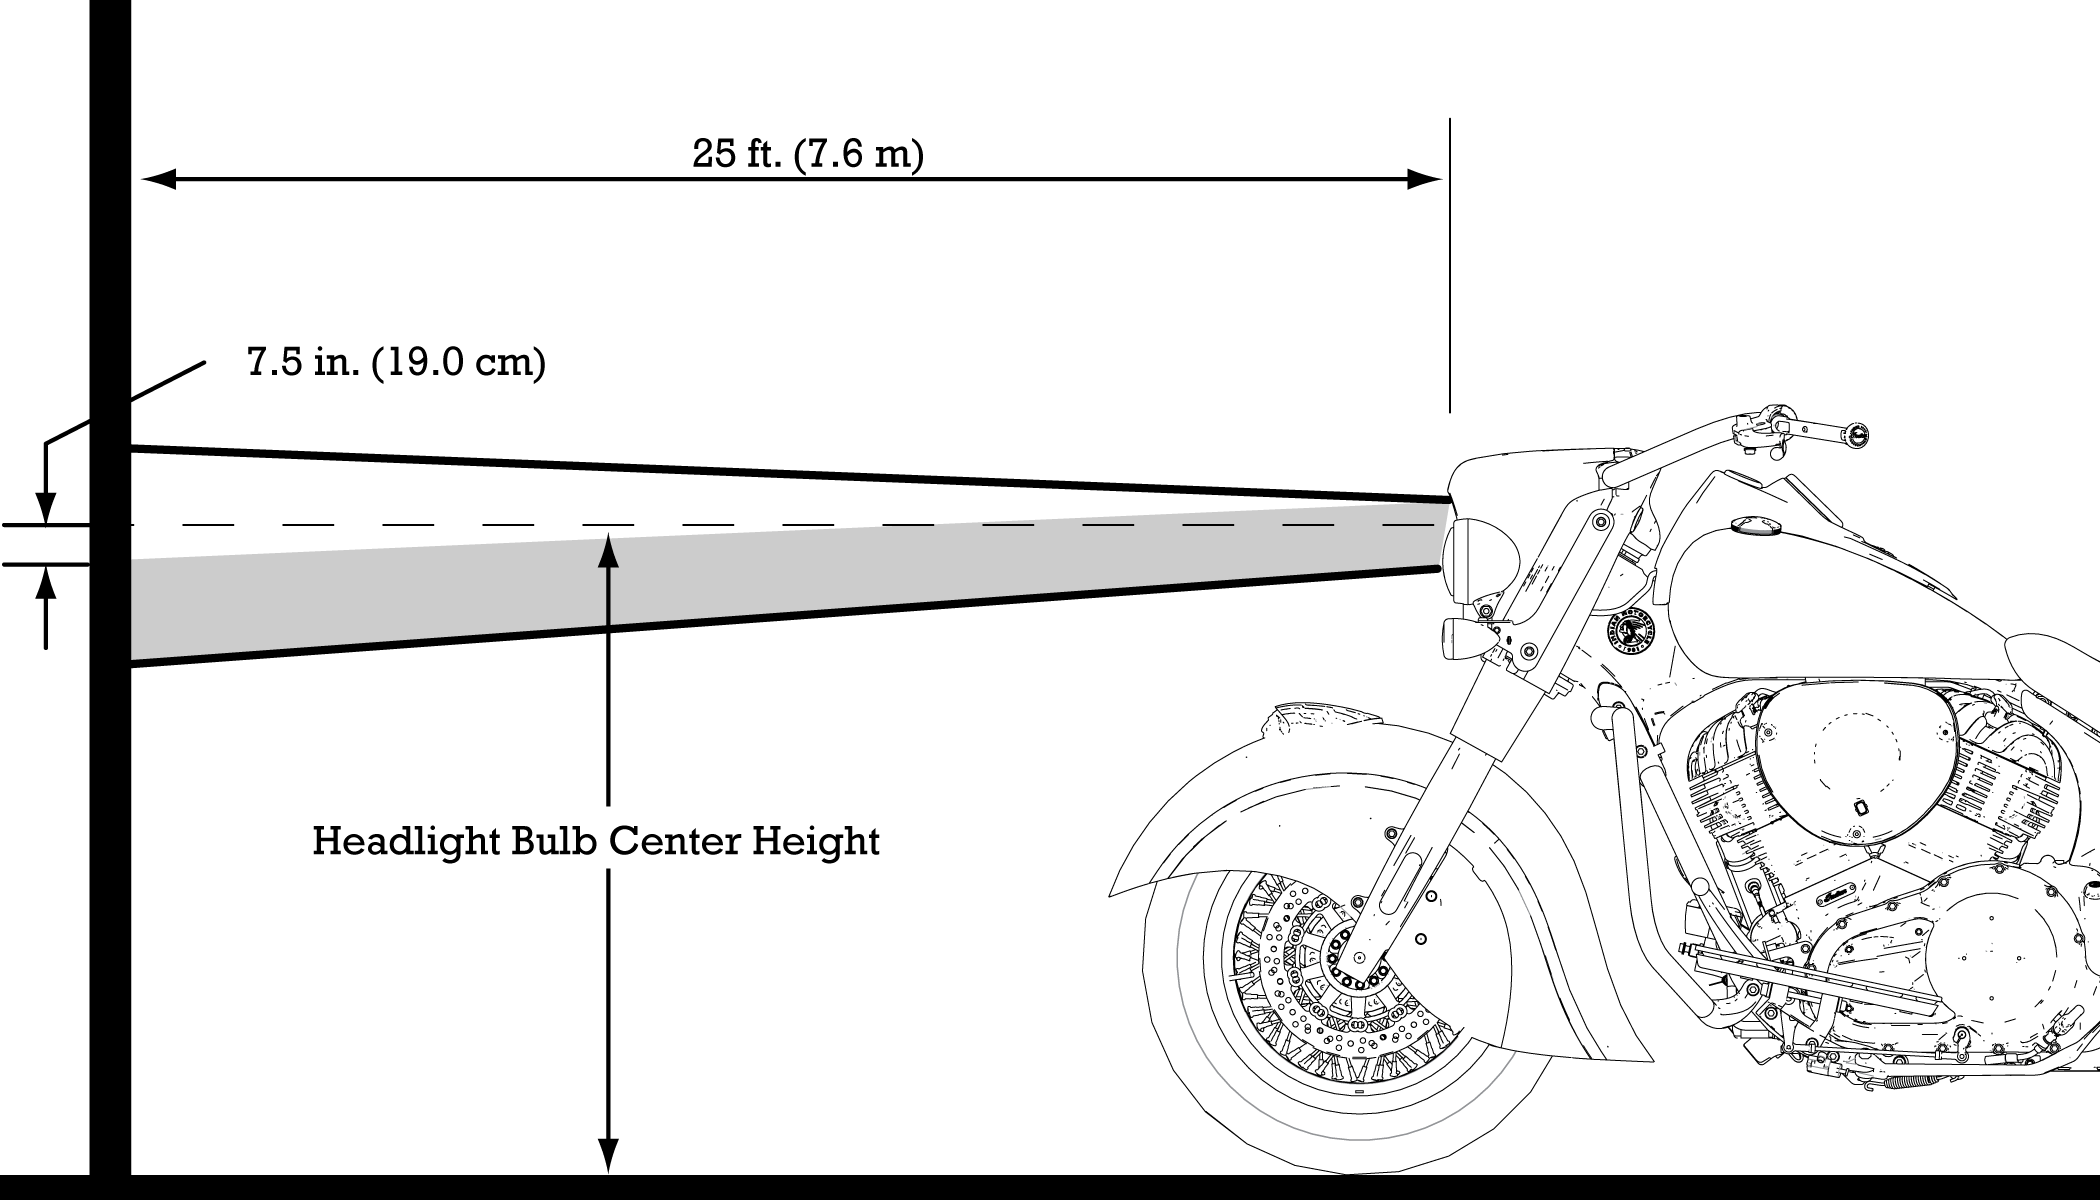
With
the headlight switched to HIGH beam, the center of highest intensity
(appears as a diamond shape) should be 7.5 in (19
cm) below the height of the headlight bulb when
centered straight ahead at 25 feet (7.62 m).
Models equipped with
LED headlights
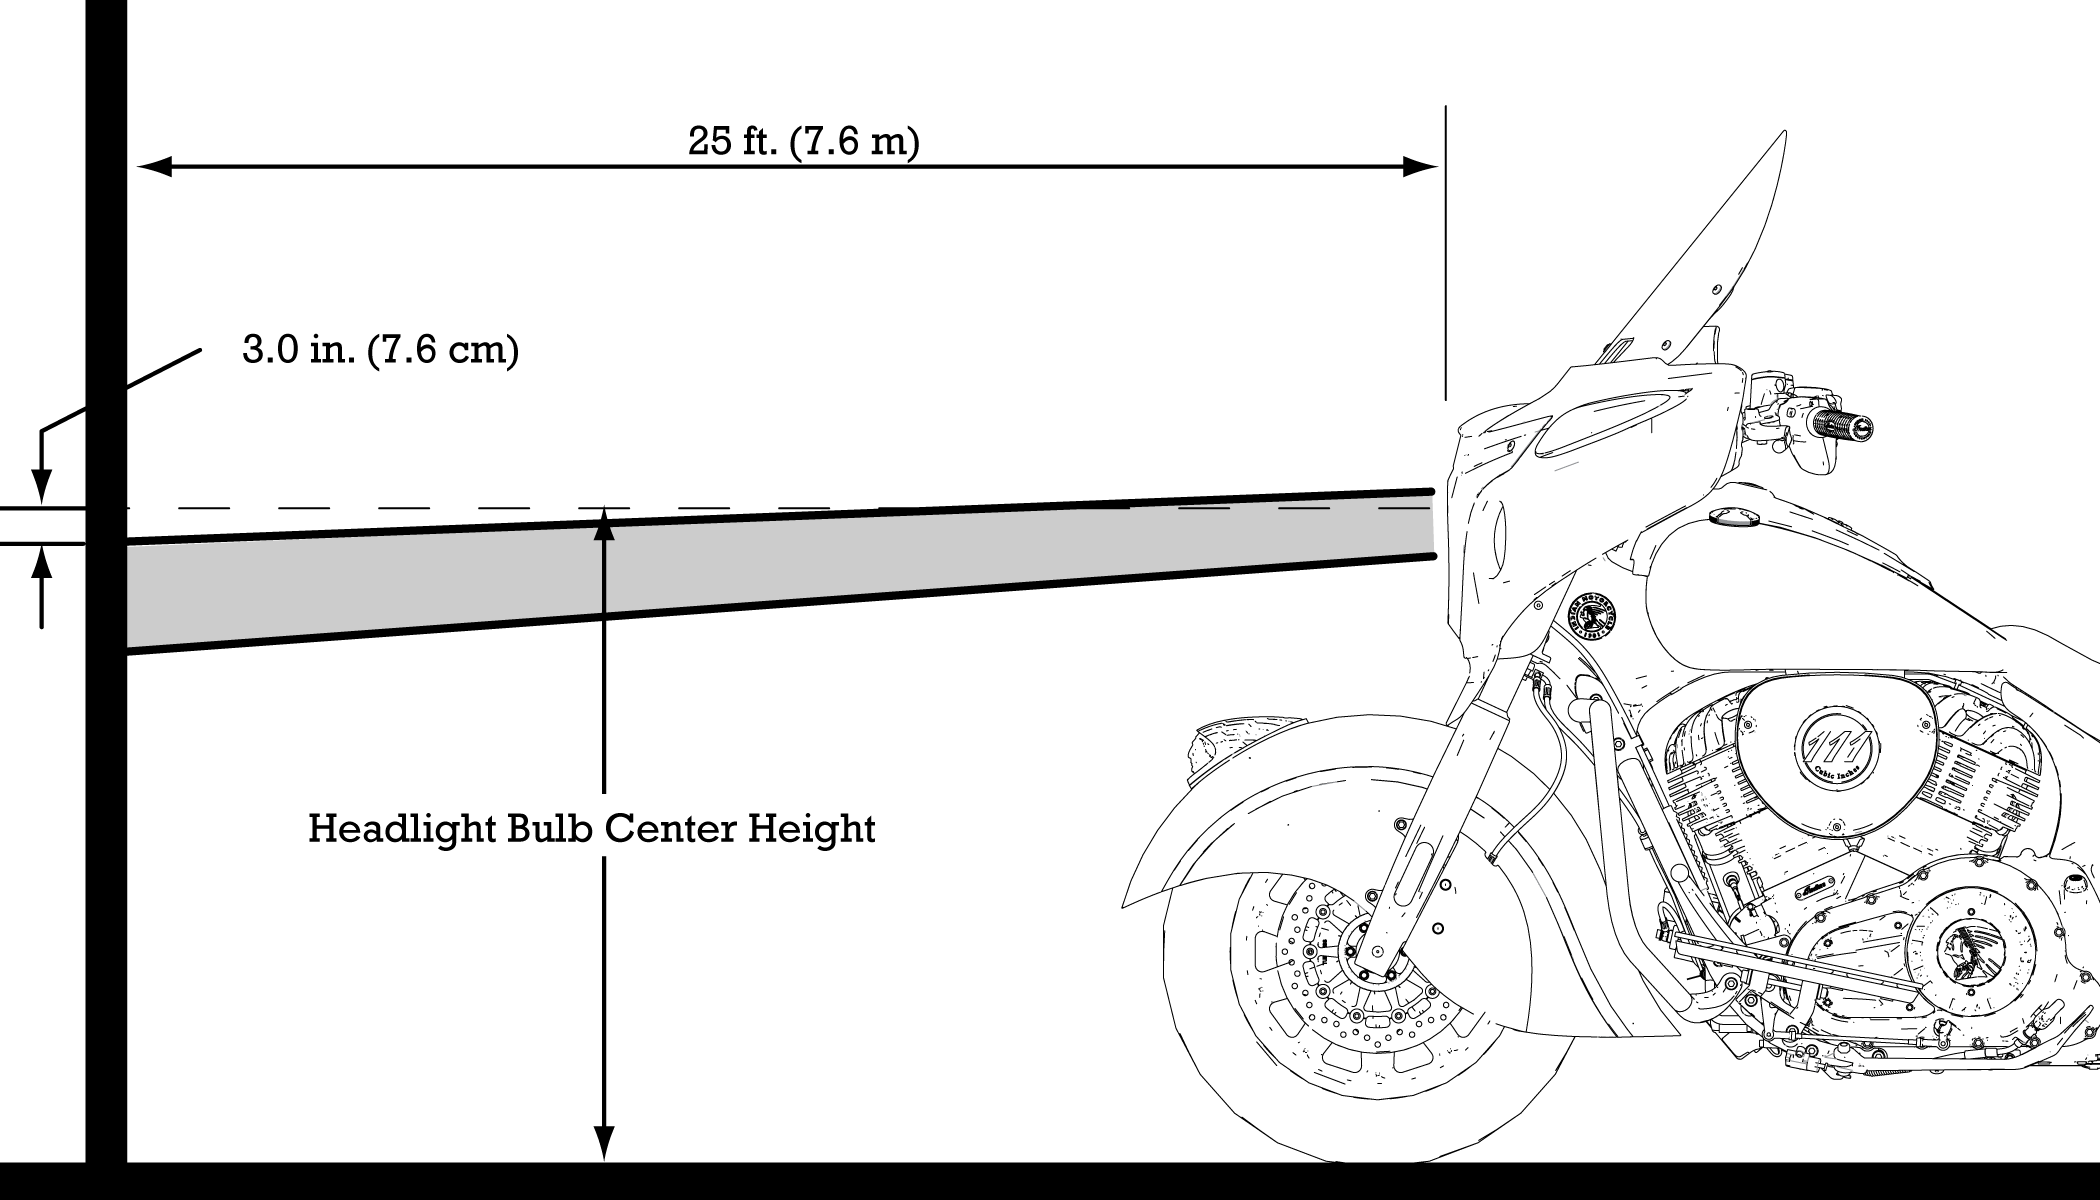
With
the headlight switched to LOW beam, the top of the highest intensity
(appears as a diamond shape) should be 3.0 in (7.6
cm) below the height of the headlight bulb when
centered straight ahead at 25 feet (7.62 m).
Headlight Inspection
Procedure
Follow all steps
below to ensure accurate aim inspection.
- Check and adjust
the tire pressure to specification.
- Verify suspension
ride height (preload) is set to specification.
- Move the motorcycle
to a clear area with a level floor and dim lighting, and place it
so the top front edge of the headlight
housing is 25 ft. (7.6 m) from the wall.
- With the rider and
passenger ( if applicable) on board, bring the motorcycle to a fully
upright position. Center the handlebars
in a straight ahead position.
- Start the engine
and switch the headlight on to the specified mode:
- INCANDESCENT = HIGH
- LED = LOW
- Compare the position
of headlight beam on the wall to the illustration below and adjust
if necessary.
