
Content Source: 2019 Indian Rider’s Manual (9929709 R01) > Maintenance Chapter
| IMPORTANT |
|
The Owner's Manual for this vehicle contains warnings, instructions and other information you must read and fully understand before safely riding or performing maintenance on this vehicle.Always follow the warnings and instructions in Owner's Manual. Click the CONTENTS link above for the Table Of Contents, or download a full PDF of the Owner Manual in the Owner Support area of Polaris.com |
|
Battery electrolyte is poisonous. It contains sulfuric
acid. Serious burns can result from contact with skin, eyes or clothing.
Antidote:
External: Flush with water.
Internal: Drink
large quantities of water or milk. Follow with milk of magnesia, beaten
egg, or vegetable oil. Call physician immediately.
Eyes: Flush
with water for 15 minutes and get prompt medical attention.
Batteries may produce explosive gases. |
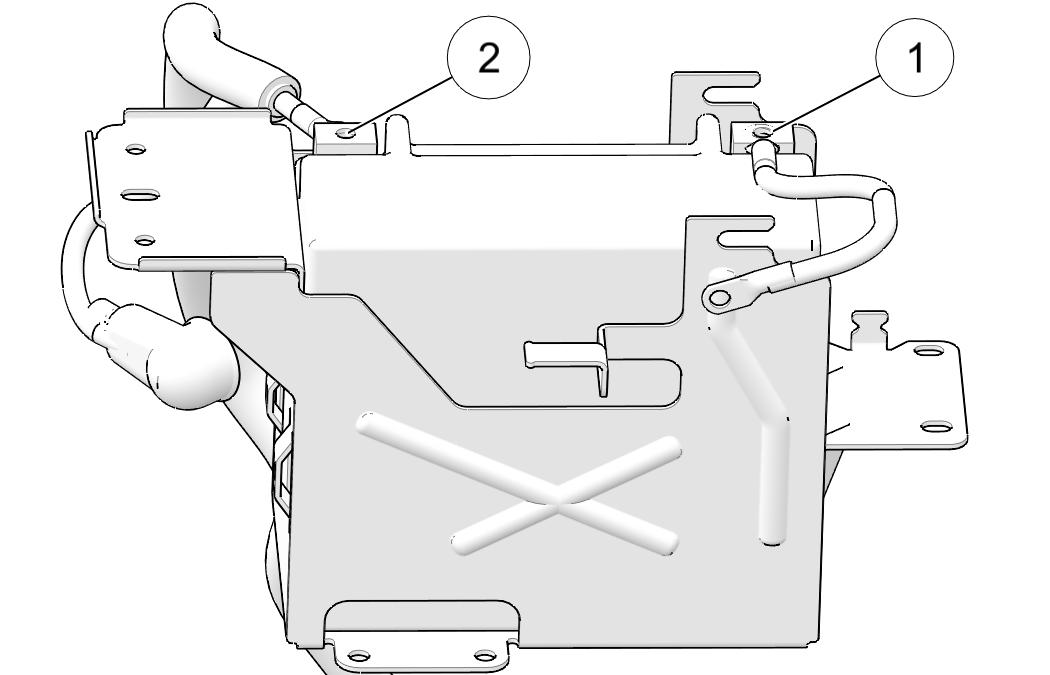
| Improperly connecting or disconnecting battery cables can result in an explosion and cause serious injury or death. When removing the battery, always disconnect the negative (black) cable first. When reinstalling the battery, always connect the negative (black) cable last. |
Tool: 10 mm wrench
Tool: 5 mm hex key wrench
| NOTICE |
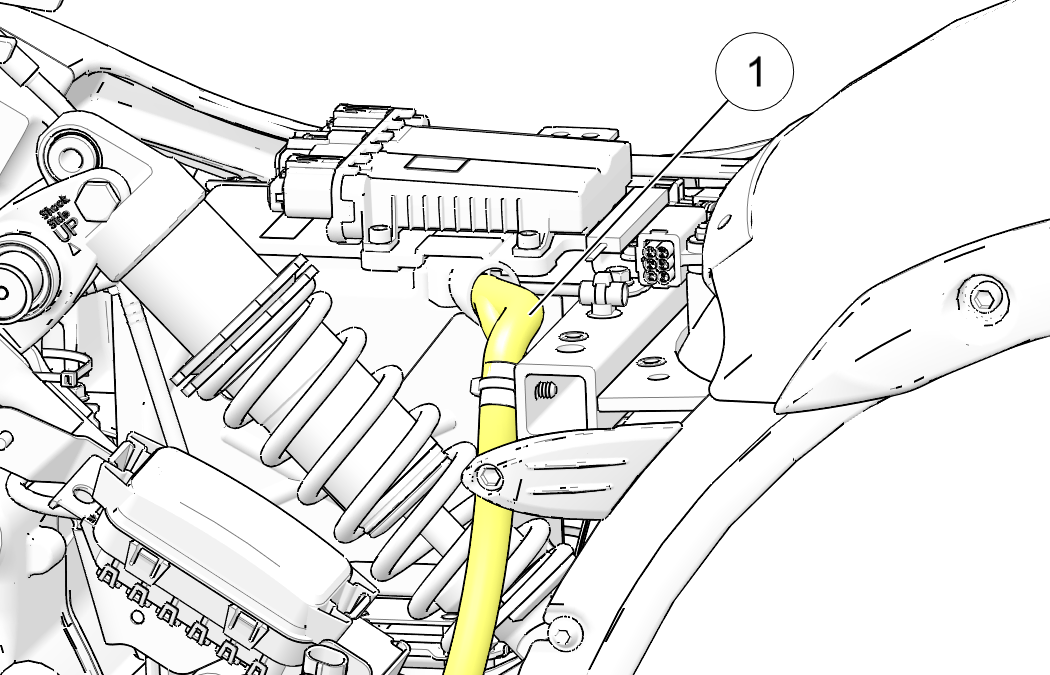
| Do not allow the VCM to touch the battery terminals or it will damage the VCM instantly. |
| If the VCM touches the positive battery post or wire the VCM can short out. |
| Improperly connecting or disconnecting battery cables can result in an explosion and cause serious injury or death. When removing the battery, always disconnect the negative (black) cable first. When reinstalling the battery, always connect the negative (black) cable last. |
| NOTICE |
| Do not remove the battery cables while the engine is running. Doing so may damage the Electronic Control Unit (ECU). Take great care not to reverse the battery leads when installing the battery. Reverse power applied to the ECU will damage it instantly. |
| TORQUE | |
| 45 in-lbs (5 Nm) |
| TORQUE | |
| 45 in-lbs (5 Nm) |
| TORQUE | |
| 84 in-lbs (9.5 Nm) |
© Copyright Polaris Industries Inc. All rights reserved.