n Buttons
 

Content Source: RideCommand™ User’s Guide for 2018-2019 Vehicles (9929371 Rev 02) > Features and Controls Chapter

Buttons

Image
Power Button Audio Button
Gauge Screen Button Volume Decrease Button
Map Button Volume Increase Button
Device Manager Button  

Power Button

Image
The Ride Command® display will automatically turn on upon vehicle start up.

Display Backlight

To switch between the active and quiet logo screen, press and hold the power button for 4 seconds.
NOTE
Audio will remain on when the display is in quiet logo screen.

Display Reboot

To perform a hard reboot of your display, press and hold the power button for 5 seconds. If the display gets into a locked up state a reboot may correct the issue.

Gauge Screen

Image
Press the Gauge Screen button (shown above) to navigate to the main gauge screen. Pressing the gauge button again will toggle through other available gauge screens, such as the camera view, and the Dynamix gauge screen (if equipped).
The Gauge/Home screen displays the following information:
  • Speed
  • RPM
  • Battery level
  • Engine Temperature
  • Gear selector
  • Drive selection
  • Current ride time and distance

Gauge Screen Overview


Image
Settings Tachometer
Drive Mode Status Screen Select Button
Gear Status Digital / Analog Display
Speedometer Fuel Level
Battery/Engine Temperature/Turbo (if equipped) Ride Information

Settings

Image

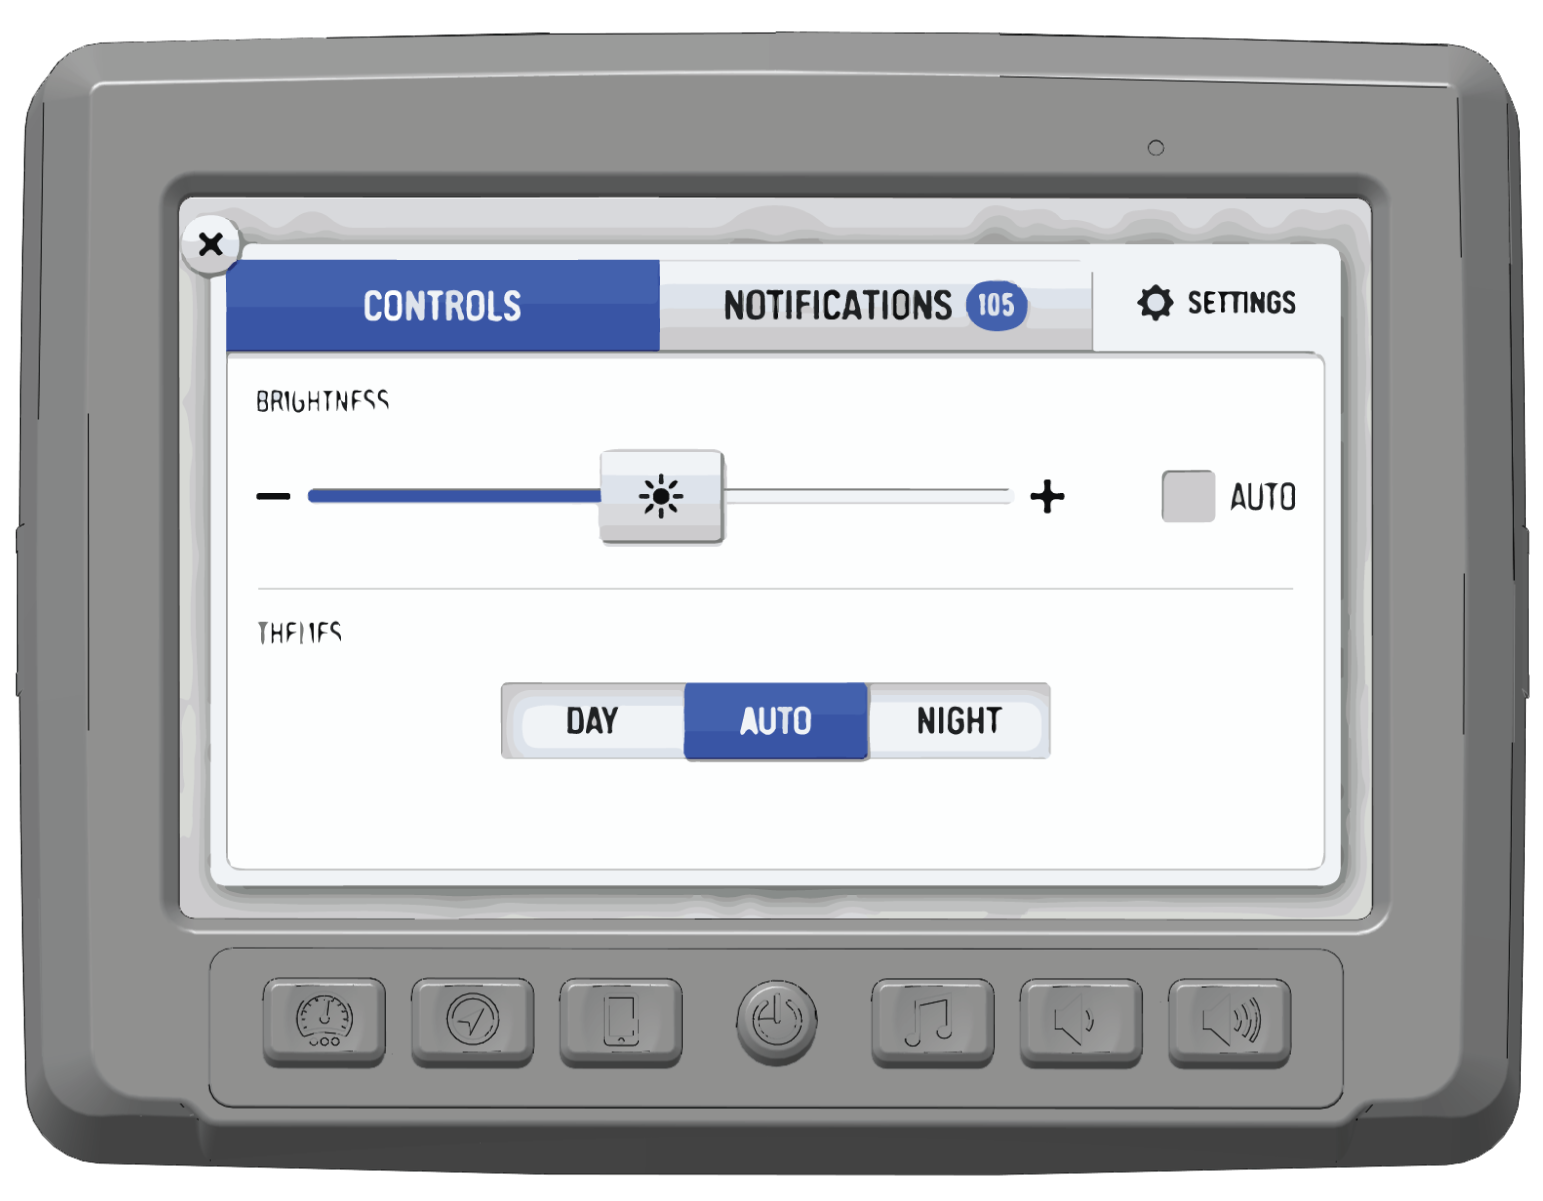
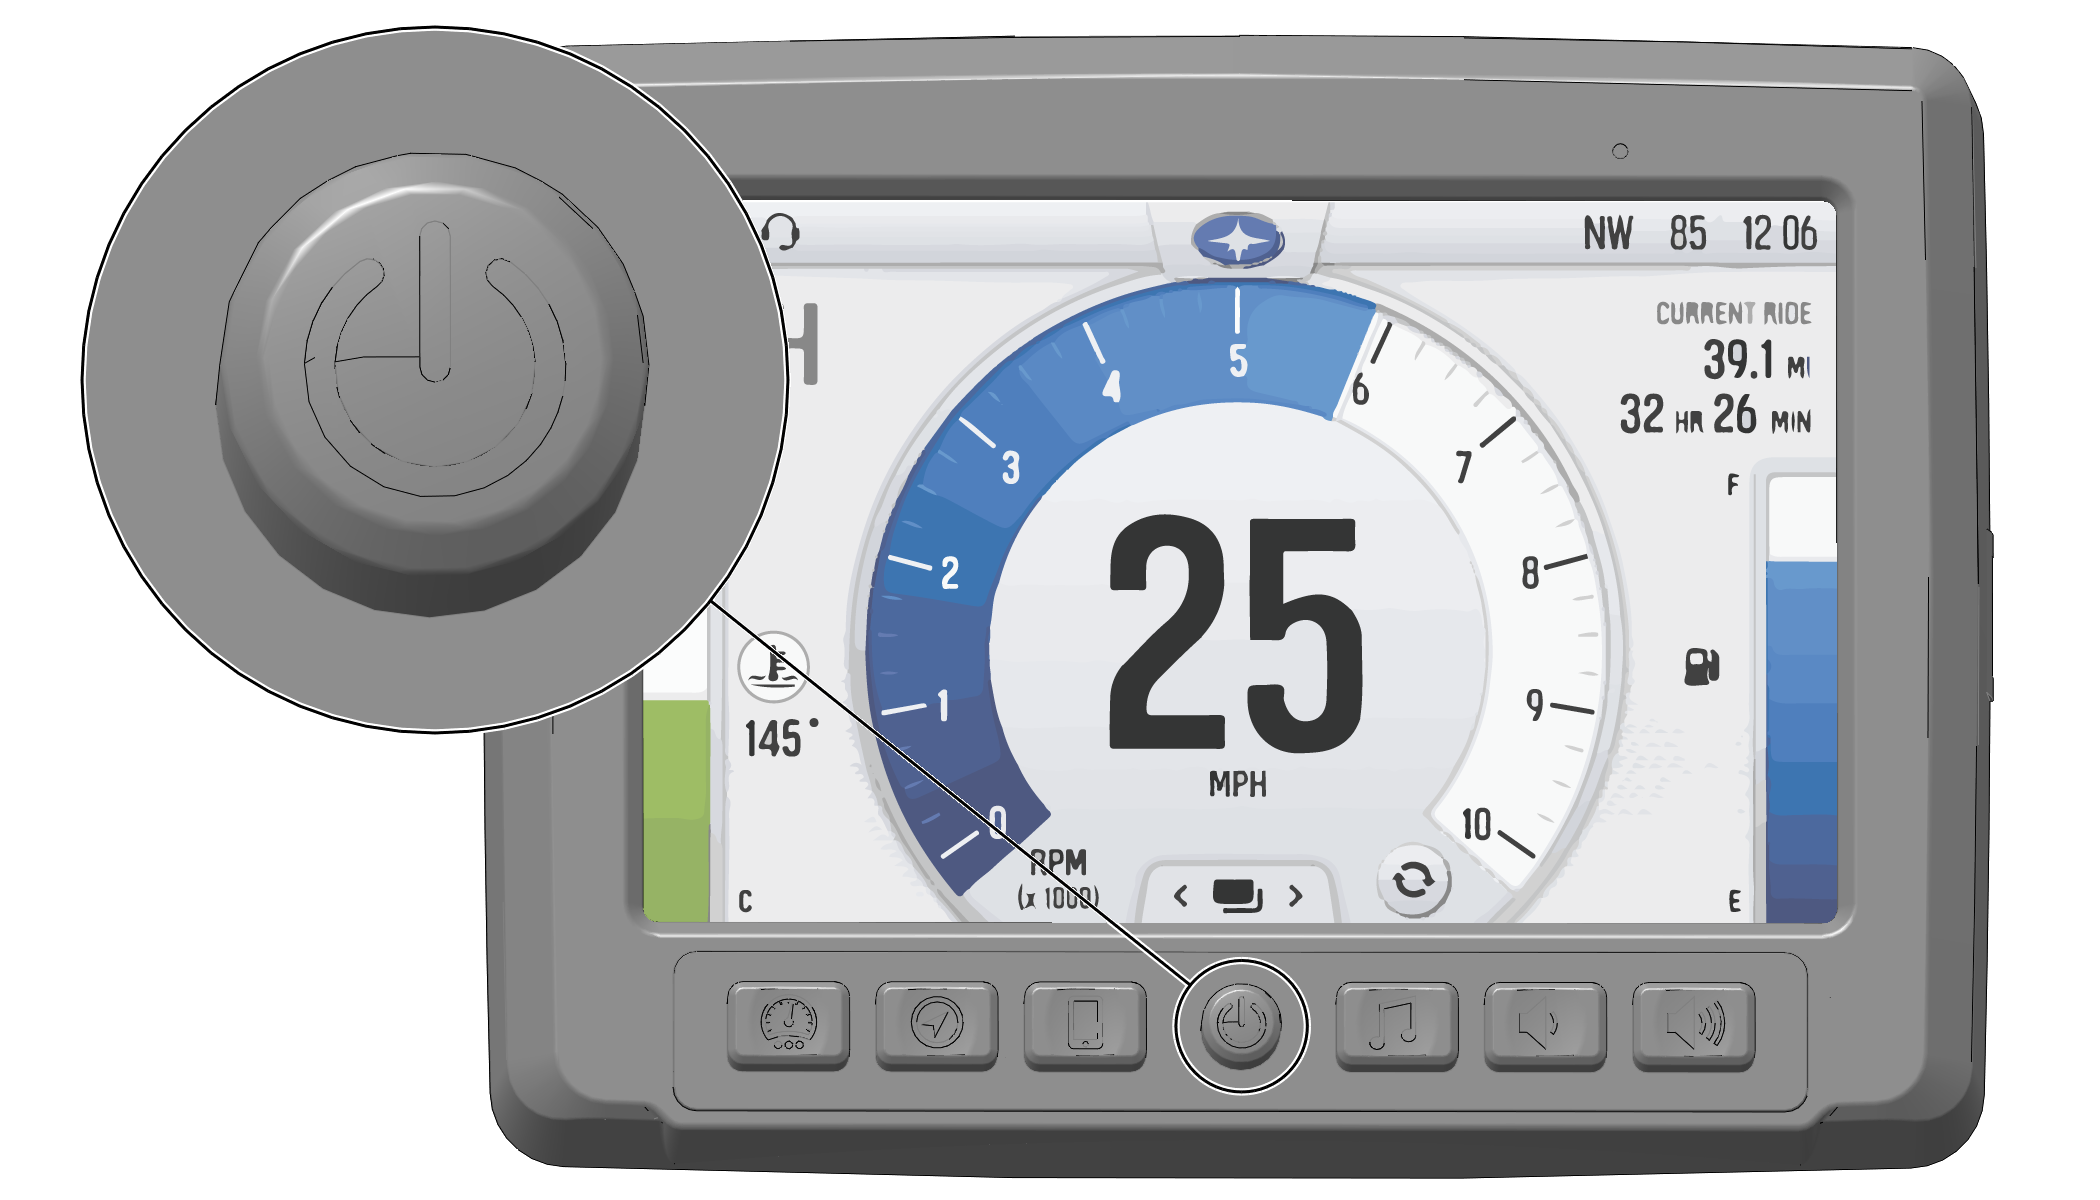
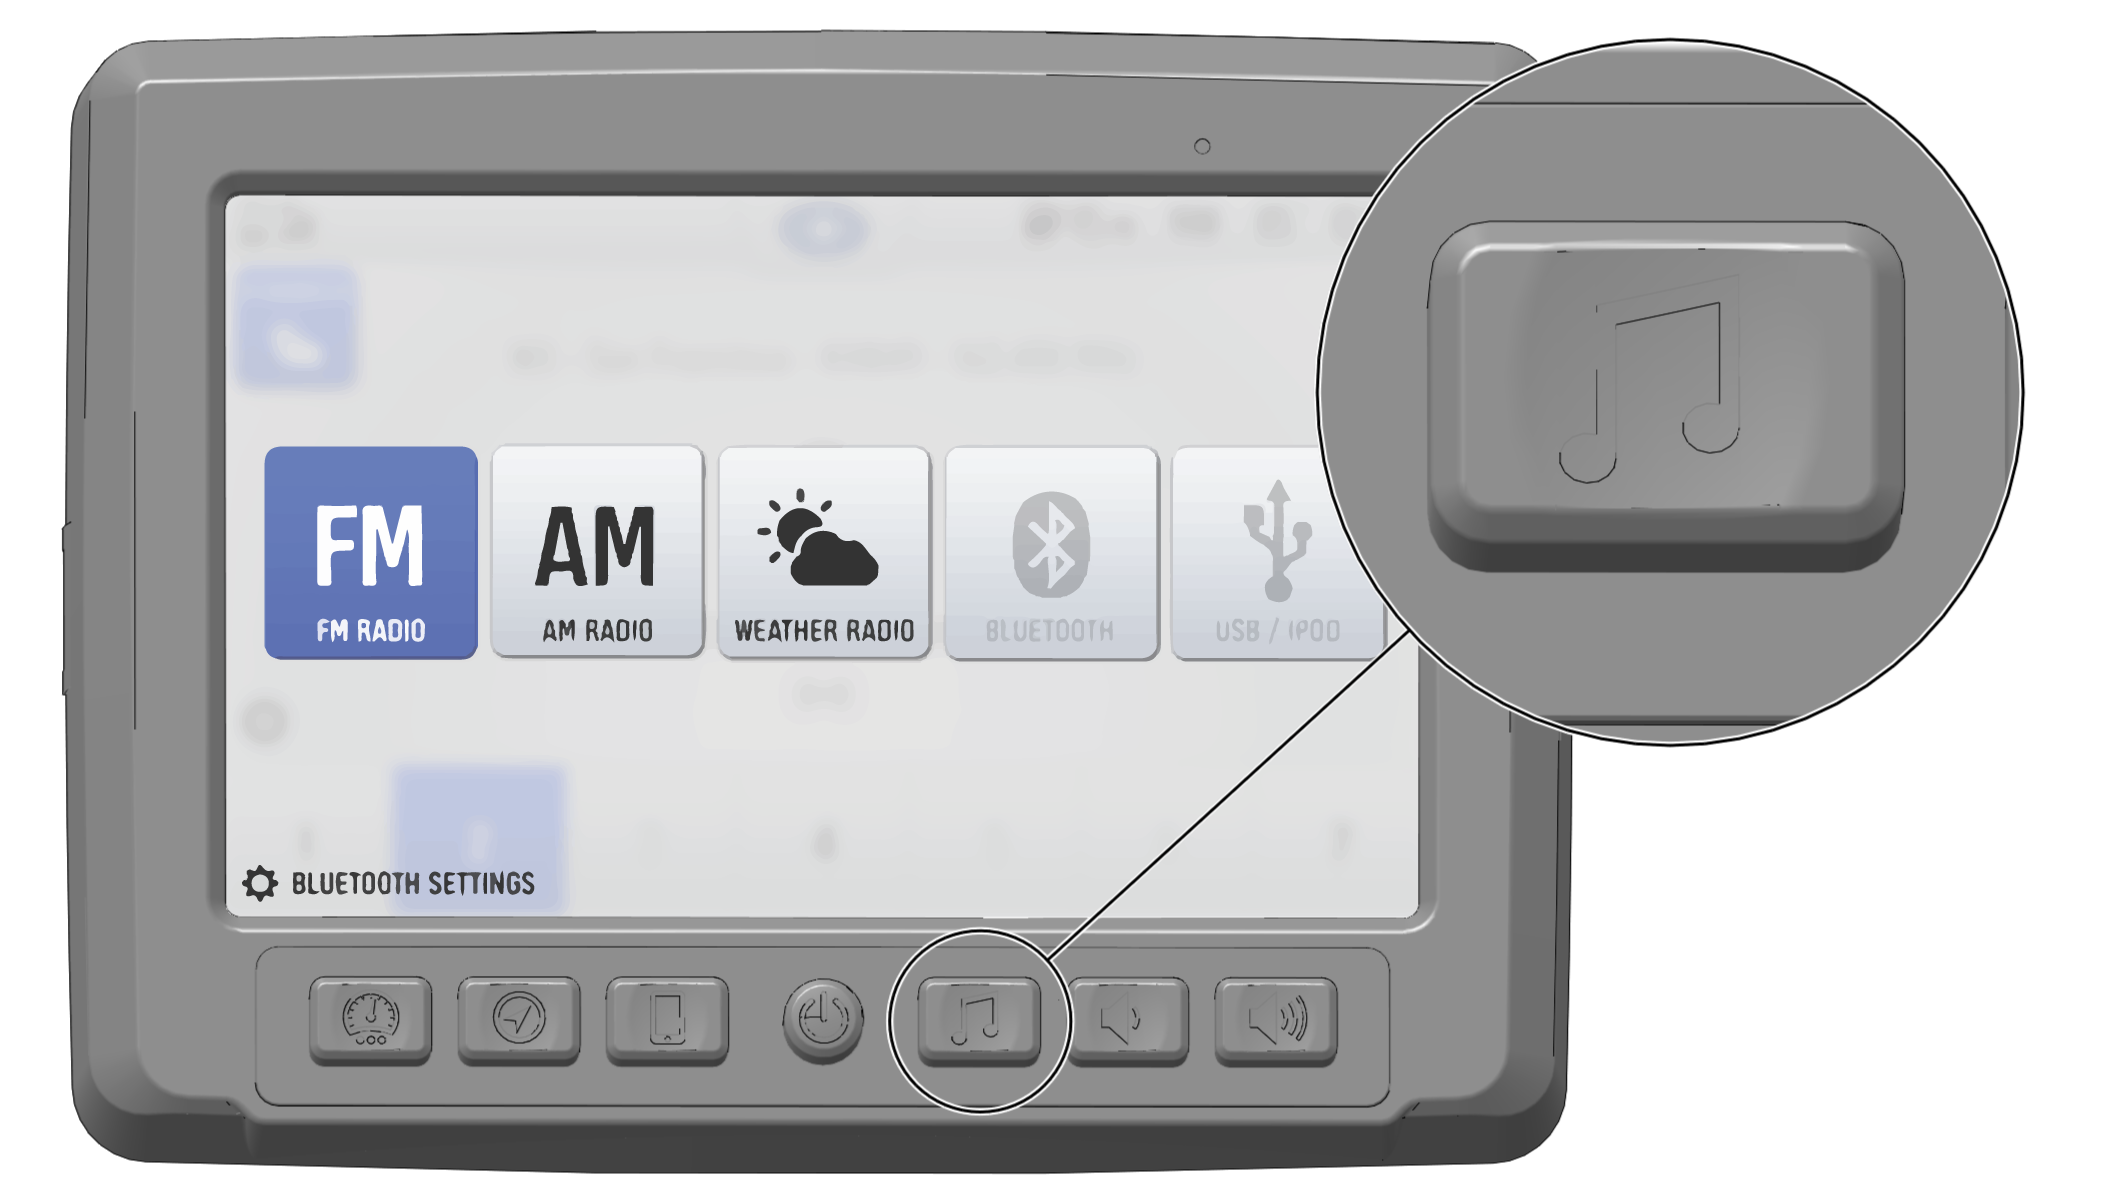
To access the settings menu, do the following:

  1. Press the Polaris logo at the top of the display screen.
  2. Select screen brightness by moving the touchscreen slider left and right, or press the AUTO check box to allow the screen to adjust automatically.
  3. Select the display screen theme from the available options.
  4. Press the Notifications tab to view and manage notifications.
  5. Press the Settings icon to access additional settings options.

Image

Display Themes

The display screen can be set to Day or Night mode. To change the display, tap the Polaris icon at the top of the display screen.
Image
Image
Day Theme Night Theme

Gear Selection

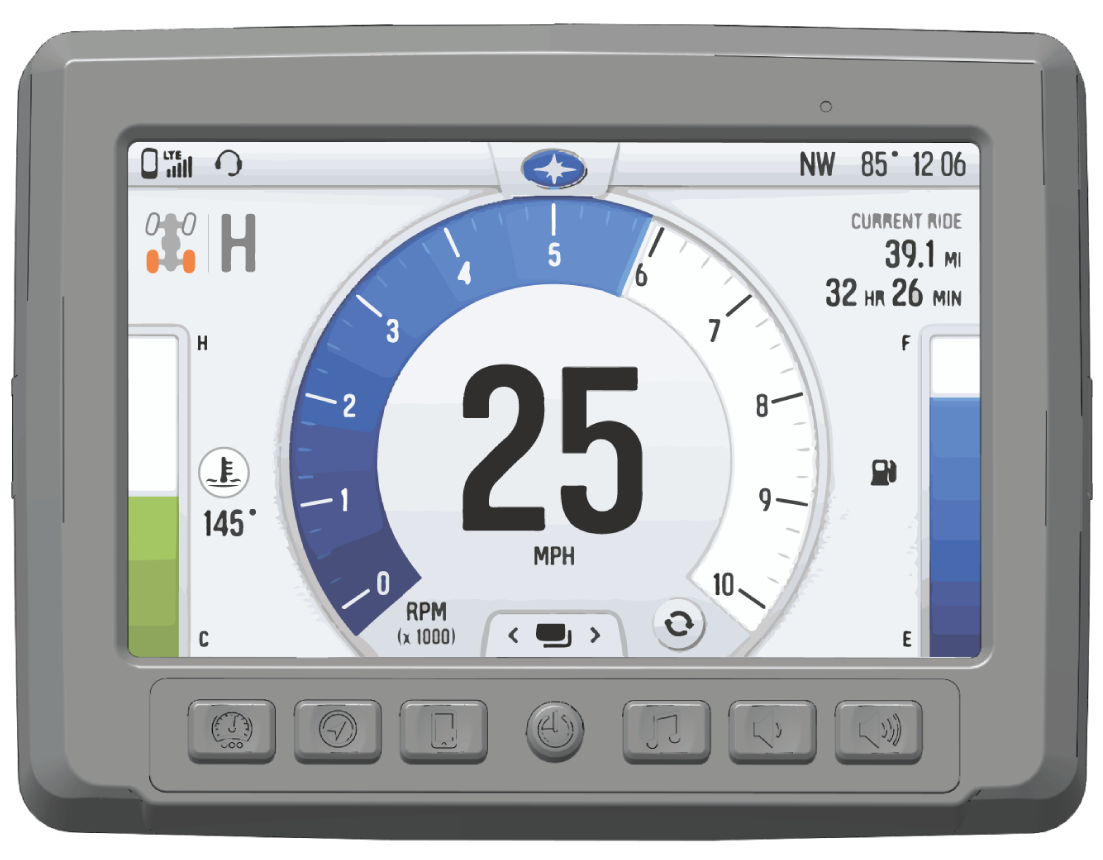
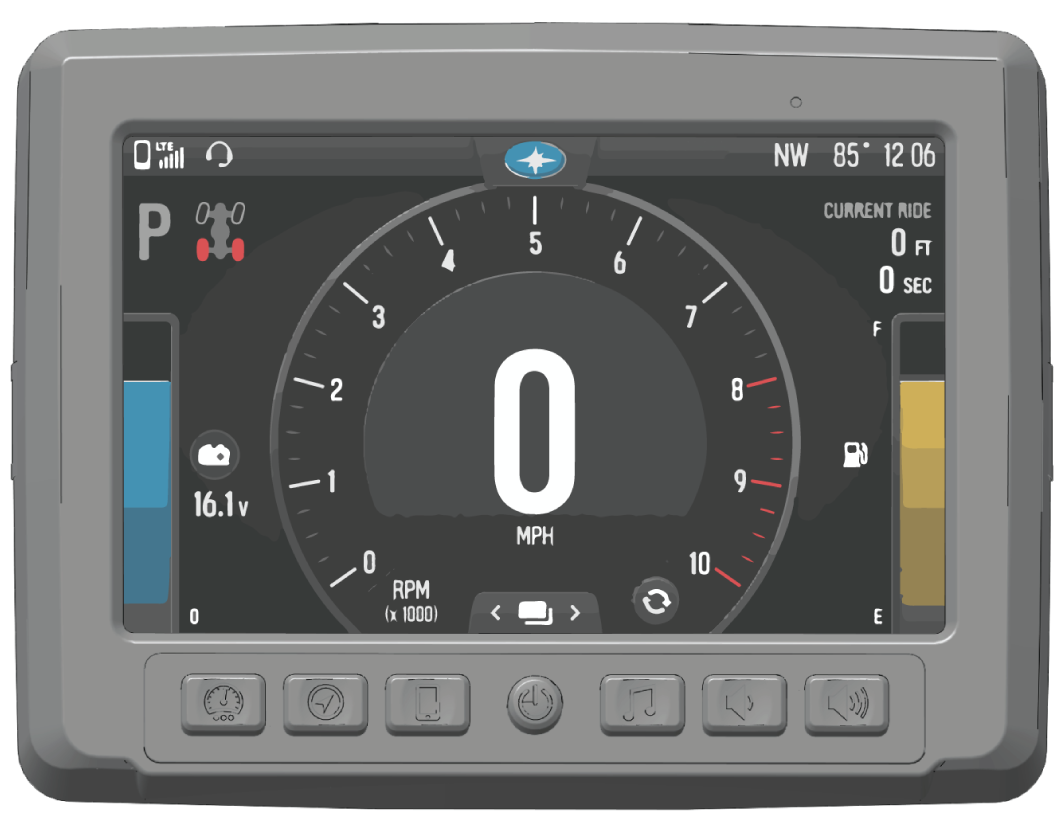
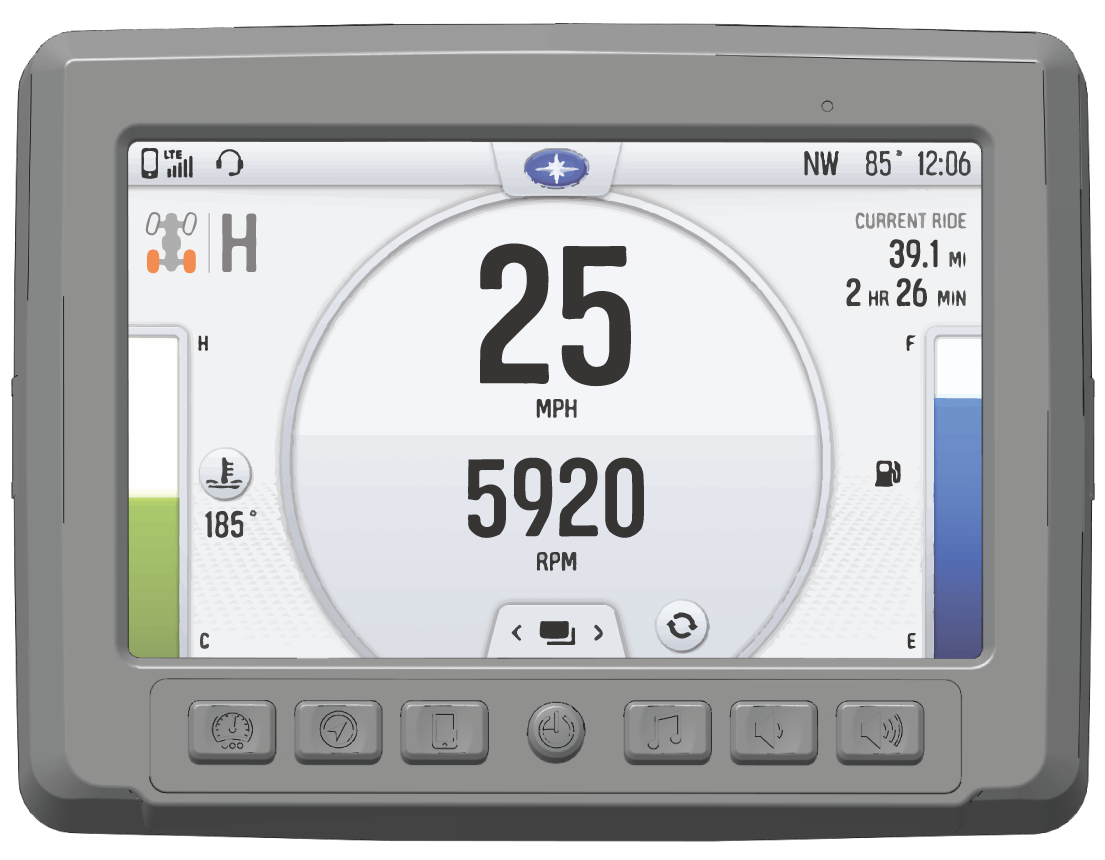
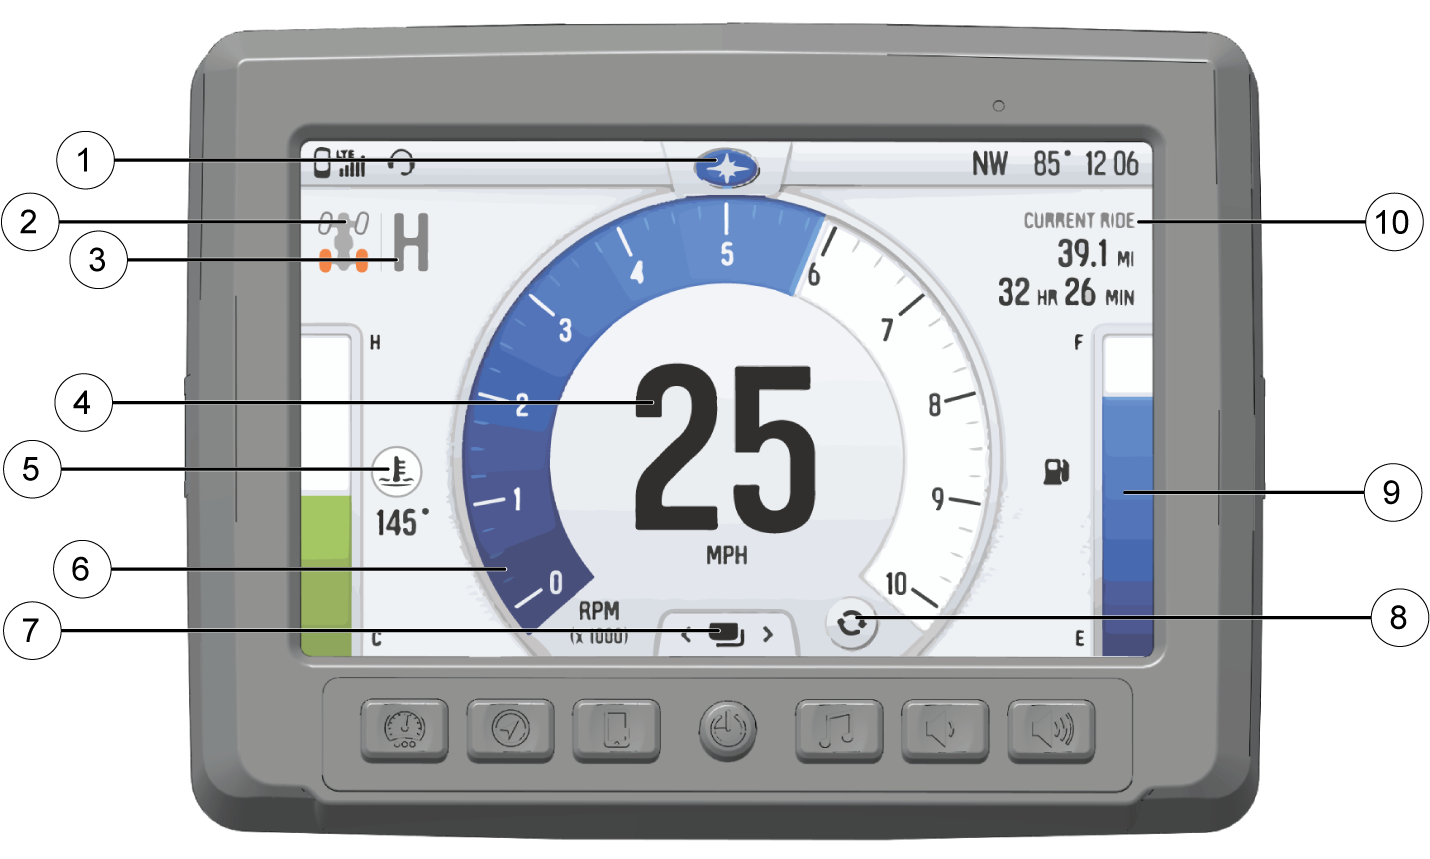
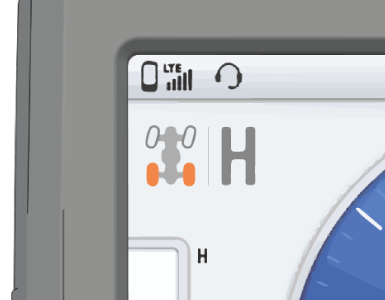
The vehicle’s current gear is displayed in the upper left-hand corner.

  • H: High Gear
  • L: Low Gear
  • N: Neutral Gear
  • R: Reverse
  • P: Park

Image

Fuel Gauge

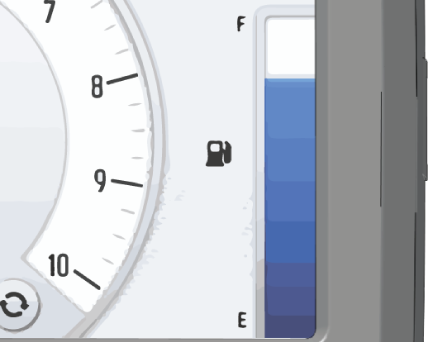
The fuel gauge displays the vehicle current fuel level. Fuel level will turn red when low fuel condition occurs.

Image

Drive Mode

The vehicle’s current drive mode is displayed in the upper-left hand corner.
Drive Mode Description Indicator
Two Wheel Drive When the switch is on 2X4, the ATV is in two-wheel drive at all times.
Image
All-Wheel Drive When in All-Wheel Drive, the demand drive unit will automatically engage any time the rear wheels lose traction. When the rear wheels regain traction, the demand drive unit will automatically disengage. There is no limit to the length of time the vehicle may remain in 4X4. The vehicle automatically engages 4X4 when operating in reverse if the switch is set to 4X4 position.
Image
Turf Mode (if equipped) When operating in TURF mode, the inside rear wheel will rotate independently from the outside wheel during turns. Operate in TURF mode only as needed to protect smooth, level surfaces from tire damage. DO NOT operate in TURF mode when climbing or descending hills, when sidehilling, or when operating on uneven, loose, or slippery terrain such as sand, gravel, ice, snow, obstacles, and water crossings. Always operate in AWD on these types of terrain.
Image

Speedometer

The speedometer display vehicle’s speed in either miles per hour (MPH) or kilometers per hour (km/h).

Tachometer

The tachometer displays engine speed in revolutions per minute (RPM).

Battery / Temperature

Press the Battery / Temperature icon on the touchscreen display to switch between the battery voltage meter and the engine temperature meter.
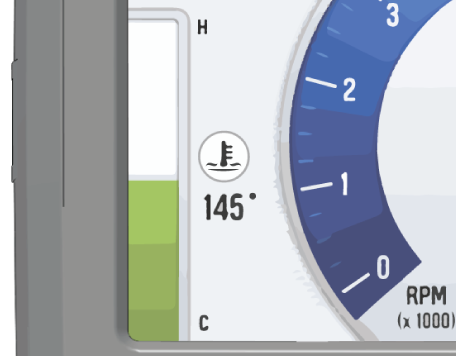
Image

Meter Indicator
Battery Voltage Image
Engine Temperature Image

Turbo (if equipped)

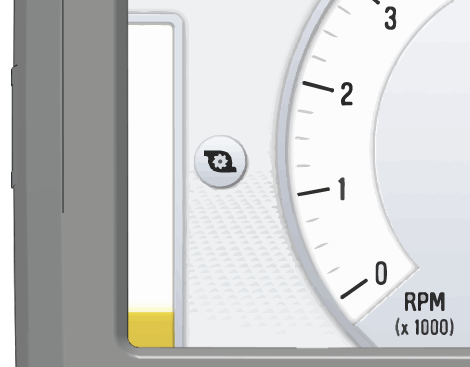
If your vehicle is equipped with Turbo, the Turbo icon will appear on the left side of the display screen. The meter will display the proportional amount of boost pressure (intake manifold pressure) relative to the maximum pressure possible.

Image

Screen Select

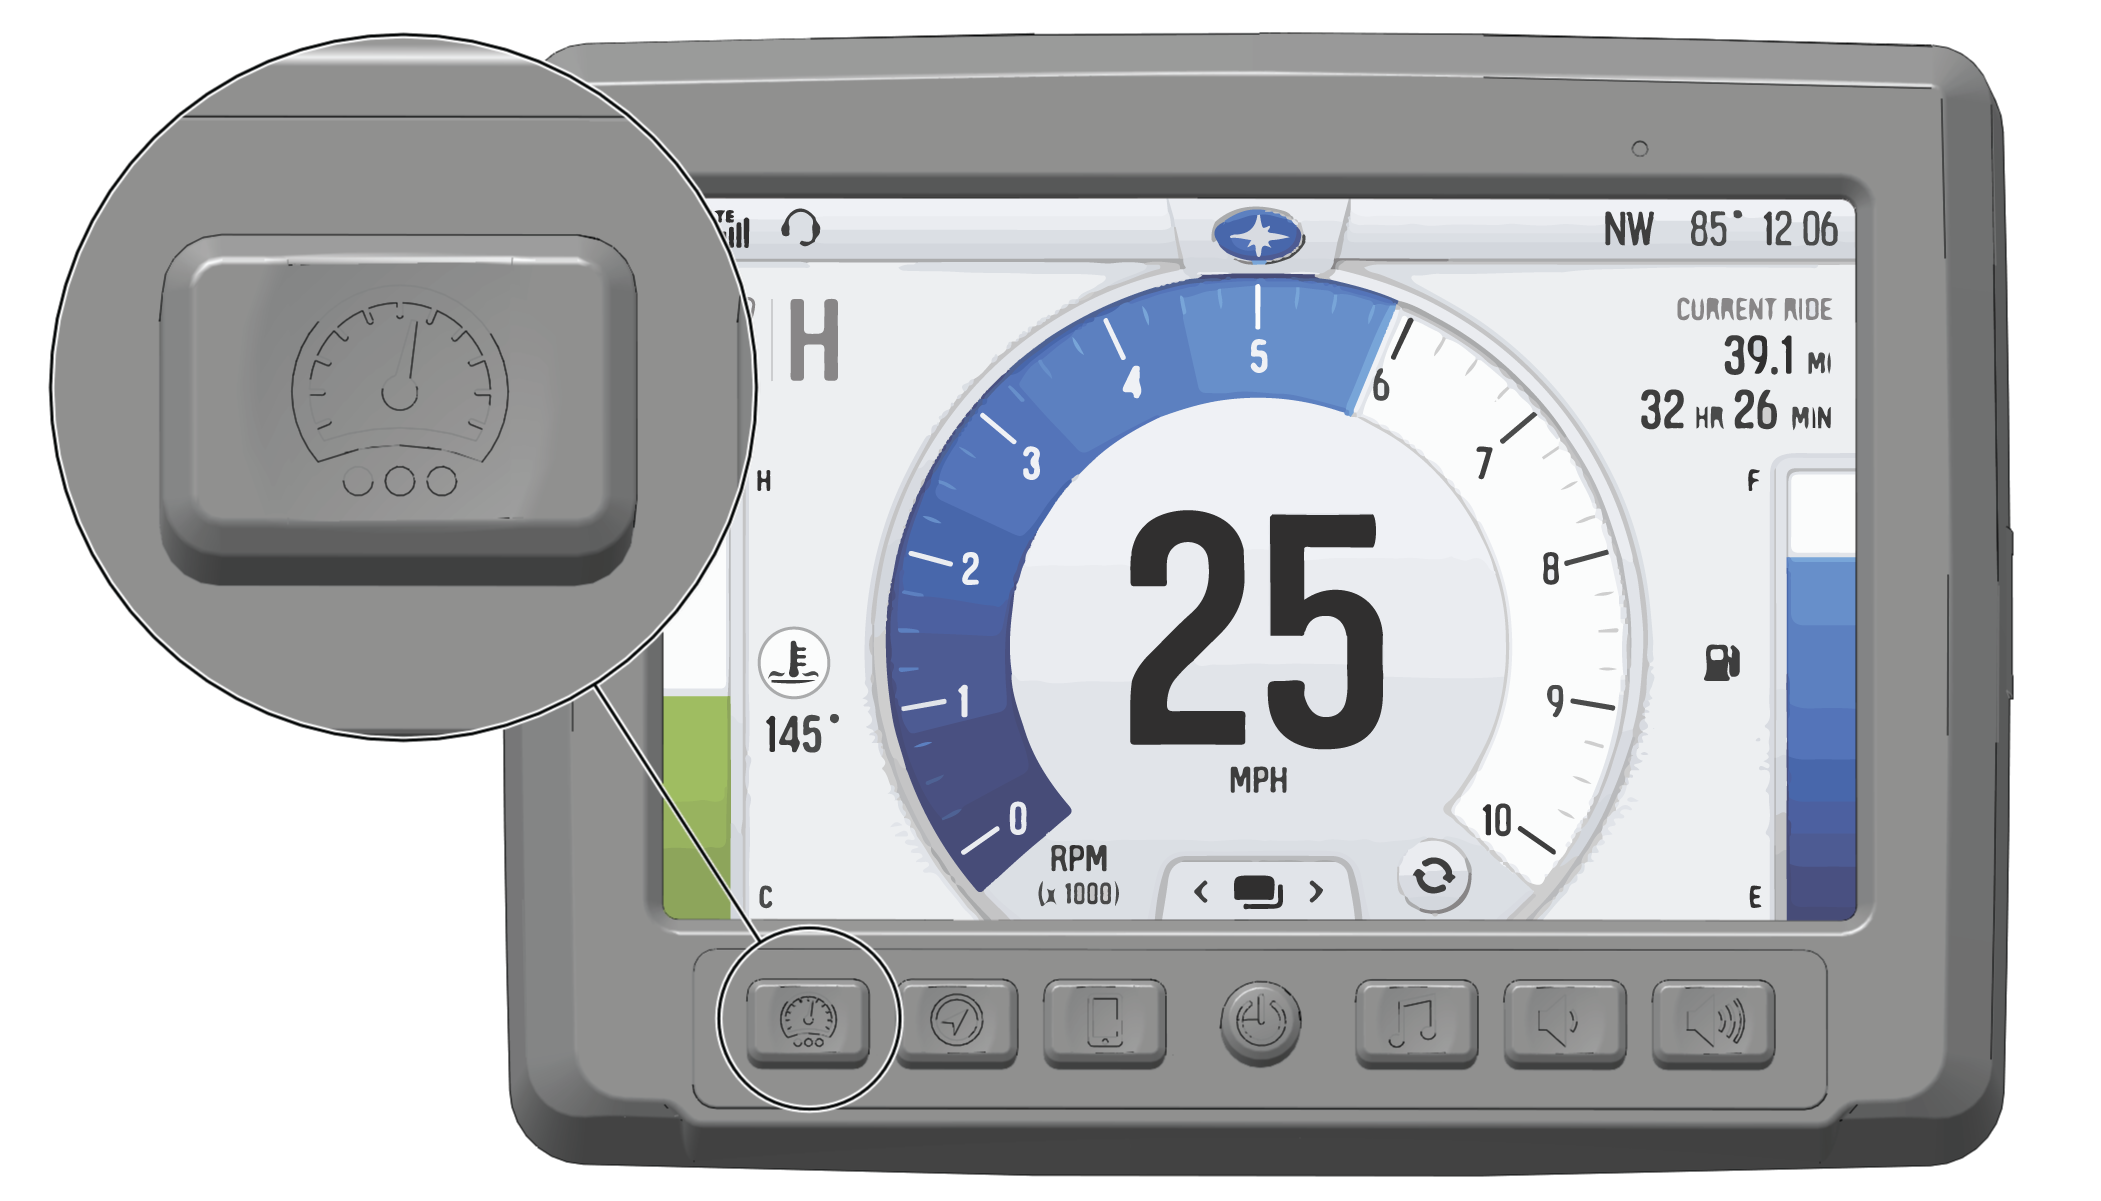
Press on the Screen Select Icon to see a list of available gauge screens.

Available Screens include:

  • Camera Views
  • Gauge Screens
  • Dynamix (if equipped)

Image

Analog / Digital

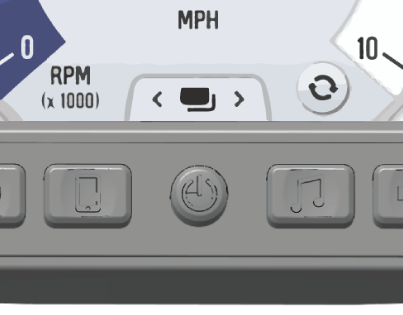
Press the icon to toggle between the analog and digital display screens.

Image
Image
Image
Analog Display Digital Display

Map Screen

Image
Press the MAP SCREEN button shown above to display the map screen. The map will center you based on the location of the GPS.
NOTE
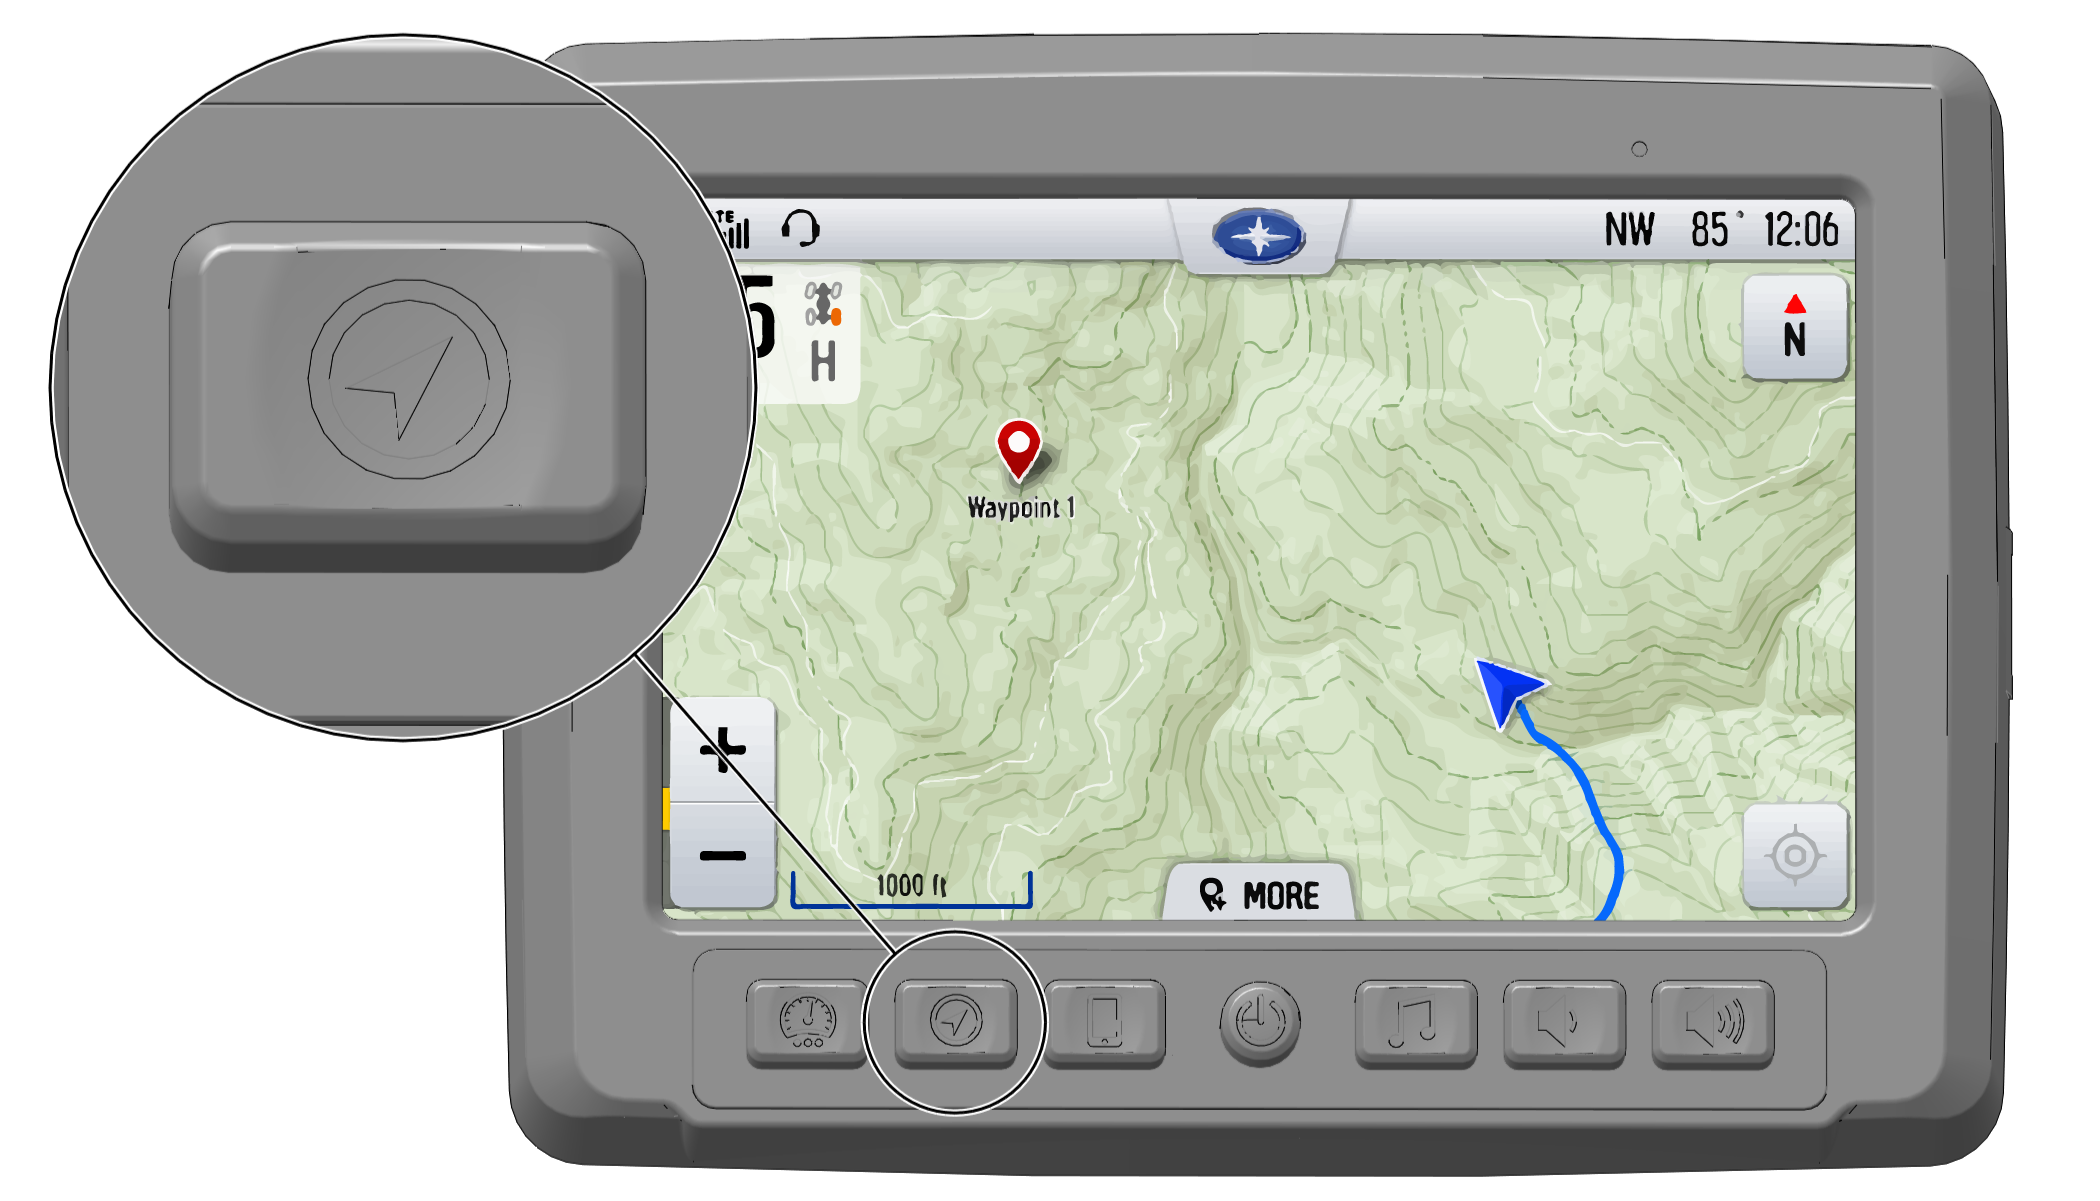
Controls on the map surface disappear after 10 seconds of inactivity, return with a tap anywhere on the map.

Zoom

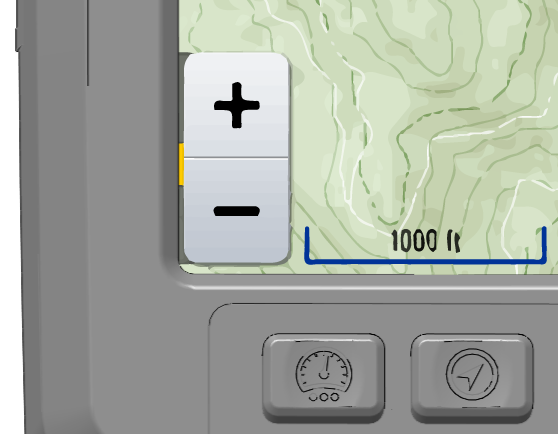
Use the plus and minus signs on the left side of the screen, or pinch the screen with your fingers to zoom in and out on the map.

  • Pinch zoom
  • Plus / Minus button
  • Auto-zoom to way-point while navigating
  • Current zoom level relative to max and min zoom

Image

Map Orientation

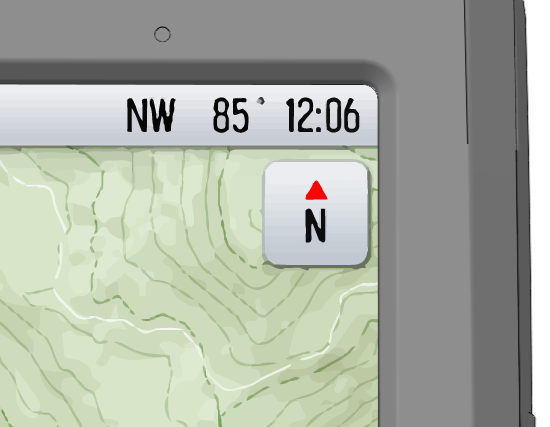
The COMPASS icon on the right side of the screen toggles north up and trail up. It will also re-center your vehicle if not already centered.

Image

Map Orientation Map Icon

North Up view locks the maps orientation so that North is always at the top of the screen, regardless of your vehicles position or direction.

Image

Trail Up view rotates the map to match the direction of your vehicle.

Image

Device Manager Screen

Image
Connect a smart phone and headset to listen to audio, make and receive calls and text messages, access a phone’s contact list, favorites, and call history.

Connect your Phone to the Display

The RIDE COMMAND™ Display is compatible with Android and iOS. Go to polaris.com/ridecommand for latest operating system compatibility.
Connect your Bluetooth device to do the following:
  • Pair and connect phones, media bluetooth devices, and bluetooth headset.
  • List of paired devices with connection status.
  • For phones, show reception and network type.
  • Listen to music over a headset.

iPhone

To connect your iPhone to the display, do the following:
  1. In your iPhone settings turn on Bluetooth. If available, make your phone discoverable to other devices in your iPhone’s Bluetooth settings. When your phone appears on the display press the “+” button next to it.
  2. A prompt will appear on your iPhone requesting “Polaris Display” to pair with your phone.
  3. Ensure the conformation code on the screen and your phone are the same then press “Pair” on your phone.
  4. For optimal experience turn on show notifications and sync contacts from “Polaris Display” within your smart phone’s Bluetooth settings.

Android

To connect you Android device to the display, do the following:
  1. From your smartphone settings, open the Bluetooth options on your device and ensure that Bluetooth is turned on.
    NOTE
    On some phones you have to make the phone visible to other devices. If your phone has this feature, it should show up on the Bluetooth connection screen of your phone. If no option exists to make your phone visible to the display, it is already visible to the display.
  2. Press the add device button, then press “OK” on the display.
  3. When your phone appears on the display press the “+” button next to it to pair with your phone.
  4. Ensure the conformation code on the screen and your phone are the same then press “OK” on your phone.
  5. For optimal experience press “Accept” on your phone when requested to access contacts and messages.
  6. The display will now show a list of previously connected phones on the display. If it is unpaired, click on your phone from the list.
  7. Once the display says connected/paired, your phone is now connected to the display via Bluetooth. After a phone is connected, the Device Manager Screen will appear.
  8. When a Smartphone is connected to the display via Bluetooth, users are able to make phone calls from the display through the keypad, recent calls, or their contacts by pressing the phone icon in the device manager screen or through the pull down menu.
    NOTE
    There is no built in microphone in the display. Phone call audio will play through the phone speakers or Polaris approved headset if connected. Some dial options may be unavailable at speeds greater than 3 MPH.

Connecting your Bluetooth Headset with the Display

The Display can connect with Polaris approved Bluetooth headsets to listen to music, take phone calls, and talk with other riders.
To connect your Bluetooth Heaset to your display, do the following:
  1. From the Device Manager menu press “Add Device.”
  2. Turn your Bluetooth headset on and put it in phone pairing mode.
  3. When your Bluetooth headset appears on the display press the “+” icon on the display. Once your headphones are connected you will see the headset icon in the upper left-hand corner of the display screen.
  4. Users can then return to the Device Management menu and toggle whether music plays through the headset or speakers with the icon below the headset name.

Audio Screen

Image
  1. Press the audio screen button shown above to display the audio screen.
  2. Use the source button in the top left corner to change between FM, AM, Weather, Bluetooth, and USB Audio.
  3. Press the tune up or down icons to change the radio station by small increments or press the scan up or down icon to search for the next quality signal station.
  4. To set favorites, scroll to a radio station and hold an “Empty” favorite icon. Press the arrows on either side of the favorites to view all 18 favorite slots.

Radio

  • Radio sources: AM, FM, MW (Medium Wave - Europe), LW (Long Wave - Europe), WX (Weather)
  • Show currently playing station, song and artist, if available
  • Tune up/down
  • Scan
  • Save and choose stations presets

Image

USB / iPod Audio

  • Show currently playing song and album art, if available
  • Show song duration and current progress
  • Browse available music by artist, album, song title and playlist, if available
  • Show play queue of upcoming songs, add and remove music from queue
  • Play/pause, go to next/ previous song, repeat, shuffle

Image

Bluetooth

  • Show currently playing song
  • Show song duration and current progress
  • Play/pause, go to next/ previous song

Image

Streaming Services

  • Show song duration and current progress
  • Play/pause, skip

Audio Controls

  • Output to speakers or bluetooth
  • Volume Up / Down
  • Mute / Pause

© Copyright Polaris Industries Inc. All rights reserved.