
Content Source: 2019 GEM em1400 LSV Owner’s Manual (9929177 R02) > Maintenance Chapter
| IMPORTANT |
|
The Owner's Manual for this vehicle contains warnings, instructions and other information you must read and fully understand before safely riding or performing maintenance on this vehicle.Always follow the warnings and instructions in Owner's Manual. Click the CONTENTS link above for the Table Of Contents, or download a full PDF of the Owner Manual in the Owner Support area of Polaris.com |
| Operating your vehicle with worn tires, improperly inflated tires, non-standard tires or improperly installed tires will affect vehicle handling and could cause an accident resulting in serious injury or death. Always follow all tire maintenance procedures as outlined in this manual and on the labels on the vehicle. Always use original equipment size and type when replacing tires. |
Any accelerated wear
of tires may be an indicator of improper alignment or poor driving
habits. Your authorized GEM dealer
can assist.
Rotate
wheels every 5,000 miles, or more frequently if needed.
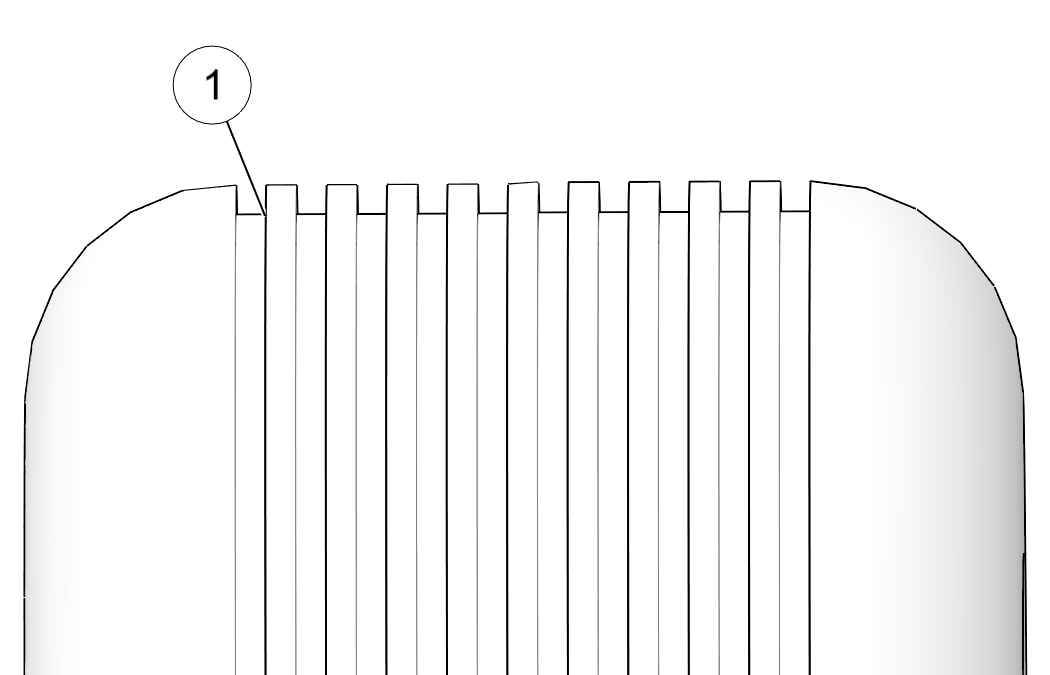
Always replace tires when tread depth is worn to
1/8” (3 mm) or less. ![]()
|
Nut Type |
Location |
Nut Torque |
|---|---|---|
|
Wheel Nut |
Front and Rear |
60 ft. lbs. (81.3 Nm) |
|
Spindle Nut |
Front |
75 ft. lbs. (102 Nm) |
|
Hub Retaining Nuts |
Rear |
110 ft. lbs. (150 Nm) |
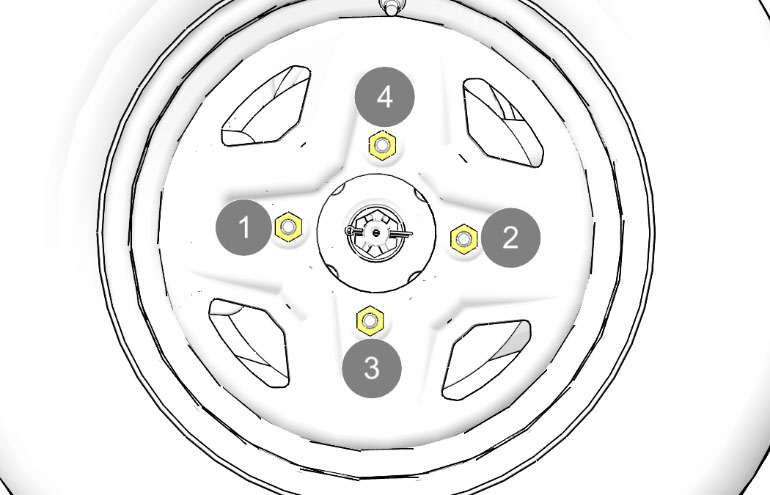
| Improperly installed wheels can adversely affect tire wear and vehicle handling, which can result in serious injury or death. Always ensure that all nuts are torqued to specification. Do not service axle nuts that have a cotter pin installed. Your authorized GEM dealer can provide service. |
| NOTICE |
| To ensure that the washers fully seat in the wheel taper, use other hand to position and center wheel, if necessary. |
© Copyright Polaris Industries Inc. All rights reserved.